The Grenadier Forum

Register a free account today to become a member! Once signed in, you'll be able to contribute to the community by adding your own topics, posts, and connect with other members through your own private inbox! INEOS Agents, Dealers or Commercial vendors please contact admin@theineosforum.com for a commercial account.

Fuel tank auxiliary

While plans to install the BD tank have been temporarily derailed ... however, I've taken the opportunity to at least complete the wiring as far as I could. I tapped the RH footwell outlets (switch Int 2) and in doing so, added a "pigtail" so that I still have a spare connection cable behind the footwell trim. I routed the cable internally to the rear where it currently sits beside the wheelarch cover.

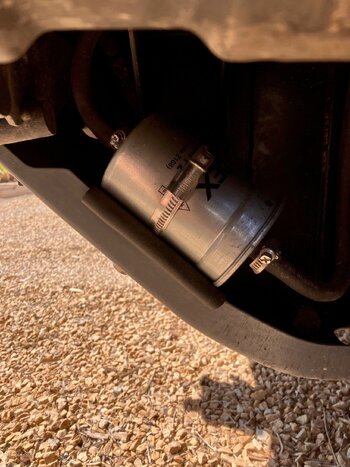
My question for those who have gone this way: there are two large grommets in the driver's side wheel arch, each accommodating a sizeable cable - one fore and one aft.
I presume they penetrate the wheel arch behind the wheel arch cover? (Due to space restrictions where I park at home, I am unable to remove the wheel and wheel well cover to see where to route the cable. )

So....Which of the two grommets should I use to connect the transfer pump and fuel level sender?
Thanks in anticipation...
Denis,If you check out my previous post you will see where my wiring enters the grommet, [near the junction of the filler hoses] above the chassis before running under the footwell trim to the front of the vehicle.
The LED gauge has it's own switch so used a pigtail [ign live],for power from the fuse box below the ign key/switch.Accessible when you remove the cover to drill the hole for the gauge.Take your time and it will all work out well.
 
1736513153903.png
 
I just finished installing the Brown Davis tank to my diesel Grenadier a couple of days ago up my driveway, so outside in the middle of winter it took me more than the 6 hours that Brown Davis quote, in fact more like 12 hours.
I don't think I work as fast as I used to, but if I did another one I think it would be 2 to 3 hours quicker, so probably 9 or 10 hours.
There are a couple of things left off the instructions that may help others, one is you have to cut the captive nuts off the rear bash plate support legs and repaint them so that you can attach the support brackets for the new tank.
The instructions don't give you the length to cut off the factory tank entry 38mm filler hose to install the new truck stop friendly filler neck and T junction, the answer is 40 - 45mm so to get to that length I did a 15mm cut, then an attempted fit, then another 15mm and a attempted fit, then 10 mm, and it then fitted, that will save you a bit of time.
The supplied loom wasn't long enough, but I used A firewall grommet as the entry point, ( the instructions want you to go through the floor ) but adding some extra wire is an easy fix.
For the power supply for the fuel pump and fuel gauge I used the front right footwell auxiliary power outlet ( very easy ) as there was no way I was going to use the supplied interruption clamp in to an ignition wire as suggested in the instructions.
I like the idea of being able to transfer fuel in to the main tank while at camp, and without the ignition on.
But overall the tank is very well made, and fits perfectly, and no special tools are required.
If you have access to a hoist the fitting time may be closer to the quoted 6 hours.
The 2 supplied "hose fuel emission 38mm X 60mm length" would be far easier to fit if they were 100 to 120mm in length.
Overall I am happy with the quality of the Brown Davis tank.
I used a V6 ( Buick motor for Americans ) VN Commodore steel fuel filter as they are the biggest inline fuel filters you can get, instead of the small in comparison Brown Davis supplied plastic fuel filter.
Just to refresh the thread, this is my experience, and for the 10,000km since the install, approximately 3,000km of that 10,000km off road, so far so good.
 
Last edited:
Brown Davis in Australia has released the auxiliary fuel tank that will go across the rear of the vehicle.
its around AUD$1,900 plus around 6 hours to fit. It is well built and if you follow the thread you can see about 15 photos of the fitting (bash plate goes back on)
I just ordered mine and its already a three month wait!!
View attachment 7849222
Hello
Brown Davi
Brown Davis in Australia has released the auxiliary fuel tank that will go across the rear of the vehicle.
its around AUD$1,900 plus around 6 hours to fit. It is well built and if you follow the thread you can see about 15 photos of the fitting (bash plate goes back on)
I just ordered mine and its already a three month wait!!
View attachment 7849222

s in Australia has released the auxiliary fuel tank that will go across the rear of the vehicle.
its around AUD$1,900 plus around 6 hours to fit. It is well built and if you follow the thread you can see about 15 photos of the fitting (bash plate goes back on)
I just ordered mine and its already a three month wait!!
View attachment 7849222
Hey, so I wanna ask about adding an aux fuel tank and removing the muffler – will that void the warranty?
 
Hello

Hey, so I wanna ask about adding an aux fuel tank and removing the muffler – will that void the warranty?
I'm not sure of the legalities in Kuwait; here in the US any parts that are modified, or anything caused by the modified parts will not be covered under warranty
 
I'm not sure of the legalities in Kuwait; here in the US any parts that are modified, or anything caused by the modified parts will not be covered under warranty
That is right. It literally nothing is going to happen because you remove the muffler. I installed a Milltek exhaust and the dealer couldn’t care less. No big deal. Should be the same with an auxiliary tank.
 
Hello

Hey, so I wanna ask about adding an aux fuel tank and removing the muffler – will that void the warranty?
Hi
It doesnt here if I can show it was installed correctly by a qualified person
I also added a GM (Commodore in Australia) large filter as shown
 

Attachments

  • fuel.jpg
    fuel.jpg
    1.4 MB · Views: 33
I'm not sure of the legalities in Kuwait; here in the US any parts that are modified, or anything caused by the modified parts will not be covered under warranty
Good to know thanks for the reply 👍
 
Just to refresh the thread, this is my experience, and for the 10,000km since the install, approximately 3,000km of that 10,000km off road, so far so good.
I am in the middle of the install. Every step is difficult, taking a long time to work out. Eg, the cable route suggested does not work. That grommet goes into an enclosed chassis cavity. So decided to run along inside sill, but everything is difficult with clicky things and many bolts and nuts.
FWIW I did not remove those captive nuts, and it fit. I did however pointlessly drill 2 holes…
Anyway.
The filler tube seems too short. Hoses are too short. Instructions are…confusing really. I’m concerned about the proximity of the filler to the spring and brake line.
So far, I am not a fan.
It's not as straightforward as one might be led to believe from the instructions.... However in desperation, I did contact Marc at Brown Davis head office on a couple of occasions and he was very helpful. If you can send him some photos with questions, he will normally get back to you soonish. He did advise me a few weeks ago that they were revising the instructions to give more details for DIY customers. There is not a lot of clearance between the aux. tank pipe and rear spring and the brake line. However, said pipe is "fixed" and the clearance is maintained... same for brake hoses. Use plenty of lube on the hoses to enable you adjust them after you've connected the whole lot together. The 40mm hose connecter from the large T piece connecting to the main filler tube would be easier to install if it were 20mm longer. I seem to recall a couple of forum members have bought longer hose pieces from local boat suppliers for this reason.
 
I am in the middle of the install. Every step is difficult, taking a long time to work out. Eg, the cable route suggested does not work. That grommet goes into an enclosed chassis cavity. So decided to run along inside sill, but everything is difficult with clicky things and many bolts and nuts.
FWIW I did not remove those captive nuts, and it fit. I did however pointlessly drill 2 holes…
Anyway.
The filler tube seems too short. Hoses are too short. Instructions are…confusing really. I’m concerned about the proximity of the filler to the spring and brake line.
So far, I am not a fan.
Hi Russell,

As Denis said the hose connector for the large T piece needed to be longer so I went to my local Repco and bought the standard length they sell approximately 800mm long of the correct fuel filler hose.
I had an early version of the Brown Davis tank, so mine was evidently slightly different than the later versions, so I had to cut about 50mm of the steel filler pipe between the factory tank and the auxiliary tank, and having the long Repco filler hose made it easy to cut more appropriate lengths of flexible hose, this also made it easy to manoeuvre the pipe between the two fuel tanks to where I wanted it.
For the filler pipe between the two tanks I used a small bit of rubber and insulation tape to stop vibration between the rear factory fuel tank bash plate support leg and the pipe, and firmly cable tied them together, this gave me plenty of clearance between the pipe and the R/R coil spring.

Cheers,

Steve.
 
It's not as straightforward as one might be led to believe from the instructions.... However in desperation, I did contact Marc at Brown Davis head office on a couple of occasions and he was very helpful. If you can send him some photos with questions, he will normally get back to you soonish. He did advise me a few weeks ago that they were revising the instructions to give more details for DIY customers. There is not a lot of clearance between the aux. tank pipe and rear spring and the brake line. However, said pipe is "fixed" and the clearance is maintained... same for brake hoses. Use plenty of lube on the hoses to enable you adjust them after you've connected the whole lot together. The 40mm hose connecter from the large T piece connecting to the main filler tube would be easier to install if it were 20mm longer. I seem to recall a couple of forum members have bought longer hose pieces from local boat suppliers for this reason.
I bought a 3ft length of 38mm today from NAPA (rebranded coventries/Repco). Struggling away in the night. Got the wiring done. The exhaust is not tight and WILL flop. Too loose and the clamp isn’t tightening it. Used most of a tube of exhaust cement so far.
 
I bought a 3ft length of 38mm today from NAPA (rebranded coventries/Repco). Struggling away in the night. Got the wiring done. The exhaust is not tight and WILL flop. Too loose and the clamp isn’t tightening it. Used most of a tube of exhaust cement so far.
Why is it that once the evening shadows fall, time seems to rocket by when you're flat on your back wrestling with 13mm nuts which are out of sight and almost out of reach.... Russell....I feel your pain and frustration!!🤬
Regarding the exhaust clamp: the cement doesn't act as an adhesive as such, rather, it seals gas leaks.
Make sure that the clamp edge is almost flush with the end of the exhaust to ensure that there is maximum compression on the slots to squeeze them together so that it's mechanically sound. A few mm of the slots may be visible inboard of the clamp, however the slot should be filled with cement which will harden. I checked the tightness of the clamp at ambient temp once it had been heat "cycled" a couple of times and the clamp nuts needed just a slight nudge to retorque them. They haven't needed further adjustment.
I’ll see how the exhaust clamp goes today. Maybe get a second one. Quite irritating that one nut was 14mm and the other 15mm, or maybe 9/16.
But my bigger problem appears to be that the inner guard no longer fits. The new pipe seems in the way, bizarrely.
 
Back
Top Bottom