The Grenadier Forum

Register a free account today to become a member! Once signed in, you'll be able to contribute to the community by adding your own topics, posts, and connect with other members through your own private inbox! INEOS Agents, Dealers or Commercial vendors please contact admin@theineosforum.com for a commercial account.

Fuel tank auxiliary

While plans to install the BD tank have been temporarily derailed ... however, I've taken the opportunity to at least complete the wiring as far as I could. I tapped the RH footwell outlets (switch Int 2) and in doing so, added a "pigtail" so that I still have a spare connection cable behind the footwell trim. I routed the cable internally to the rear where it currently sits beside the wheelarch cover.

My question for those who have gone this way: there are two large grommets in the driver's side wheel arch, each accommodating a sizeable cable - one fore and one aft.
I presume they penetrate the wheel arch behind the wheel arch cover? (Due to space restrictions where I park at home, I am unable to remove the wheel and wheel well cover to see where to route the cable. )

So....Which of the two grommets should I use to connect the transfer pump and fuel level sender?
Thanks in anticipation...
Denis,If you check out my previous post you will see where my wiring enters the grommet, [near the junction of the filler hoses] above the chassis before running under the footwell trim to the front of the vehicle.
The LED gauge has it's own switch so used a pigtail [ign live],for power from the fuse box below the ign key/switch.Accessible when you remove the cover to drill the hole for the gauge.Take your time and it will all work out well.
 
1736513153903.png
 
I just finished installing the Brown Davis tank to my diesel Grenadier a couple of days ago up my driveway, so outside in the middle of winter it took me more than the 6 hours that Brown Davis quote, in fact more like 12 hours.
I don't think I work as fast as I used to, but if I did another one I think it would be 2 to 3 hours quicker, so probably 9 or 10 hours.
There are a couple of things left off the instructions that may help others, one is you have to cut the captive nuts off the rear bash plate support legs and repaint them so that you can attach the support brackets for the new tank.
The instructions don't give you the length to cut off the factory tank entry 38mm filler hose to install the new truck stop friendly filler neck and T junction, the answer is 40 - 45mm so to get to that length I did a 15mm cut, then an attempted fit, then another 15mm and a attempted fit, then 10 mm, and it then fitted, that will save you a bit of time.
The supplied loom wasn't long enough, but I used A firewall grommet as the entry point, ( the instructions want you to go through the floor ) but adding some extra wire is an easy fix.
For the power supply for the fuel pump and fuel gauge I used the front right footwell auxiliary power outlet ( very easy ) as there was no way I was going to use the supplied interruption clamp in to an ignition wire as suggested in the instructions.
I like the idea of being able to transfer fuel in to the main tank while at camp, and without the ignition on.
But overall the tank is very well made, and fits perfectly, and no special tools are required.
If you have access to a hoist the fitting time may be closer to the quoted 6 hours.
The 2 supplied "hose fuel emission 38mm X 60mm length" would be far easier to fit if they were 100 to 120mm in length.
Overall I am happy with the quality of the Brown Davis tank.
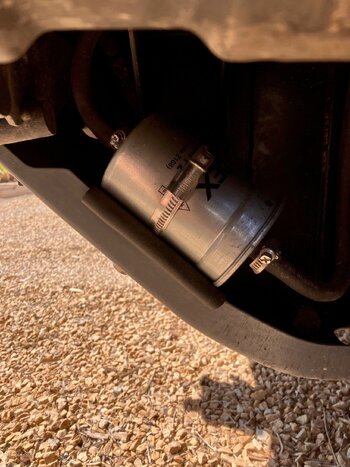
I used a V6 ( Buick motor for Americans ) VN Commodore steel fuel filter as they are the biggest inline fuel filters you can get, instead of the small in comparison Brown Davis supplied plastic fuel filter.
Just to refresh the thread, this is my experience, and the 10,000km since the install, approximately 3,000km of that 10,000km off road, so far so good.
 
Back
Top Bottom