The Grenadier Forum
Register Now for enhanced site access.
INEOS Agents, Dealers or Commercial vendors please contact admin@theineosforum.com for a commercial account.

Auxiliary Lights in the Grill - High Power LED light upgrade without any cutting (now available on the Forum Store)

Phred

Grenadier Owner
Lifetime Supporter
Local time
11:41 PM
Joined
Jul 2, 2024
Messages
89
Reaction score
92
Location
Doylestown, PA, USA
I would just be careful leaving them on EXT1.

Remember the fuse is 10amps. It doesn’t mean you can “use” up to 10amps. You must consider the wiring and associated insulation. There should be a safety factor as well.

Now, the good thing may be the lights are not used that often…but I’d still be cautious.

But that’s just me…🙂
 

Ovrland Bill

Grenadier Owner
Lifetime Supporter
Founding Guard
Local time
8:41 PM
Joined
Sep 25, 2021
Messages
302
Reaction score
324
Did the lights in question come with a fuse or specifications for a (required) fuse?
 
Local time
8:41 PM
Joined
Sep 28, 2023
Messages
2
Reaction score
8
Location
Canada
Did the lights in question come with a fuse or specifications for a (required) fuse?

Lights are in. The ext1 is fused in the truck.

Happy with the result if the fuse pops I’ll add in a relay.

I have the factory winch so there were a bunch more screws and pieces to remove to get the grill loosened. I think removing the fender lining on the drivers side would have helped as well. I didn’t do that but in hindsight it would have made the electric connections to the ext 1 easier.

I had the fender lining out while I changed the windshield washer pump. I just didn’t think ahead.

The good news is I didn’t have any extra screws left over.
 

Attachments

  • IMG_3962.jpeg
    4.3 MB · Views: 47

Karearea

Grenadier Owner
Local time
4:41 PM
Joined
Aug 2, 2023
Messages
210
Reaction score
261
Location
New Zealand
“You complete me!” 🤣
Although to be fair I’m sure there will be more additions 🤣
Huge thanks to @BenTN and @Stu_Barnes for all their efforts on this project.
Easy install and found Ext5 wires in engine bay easy enough too.
And I did have a screw left over but that’s because of these guys awesomeness in supplying a spare! 😁👍🏼 
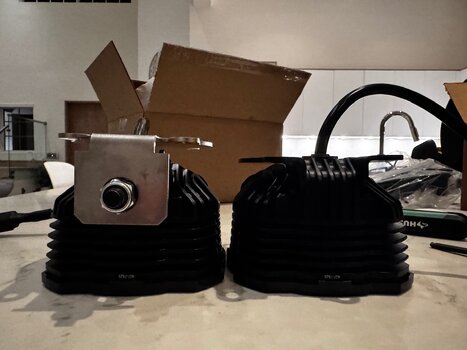
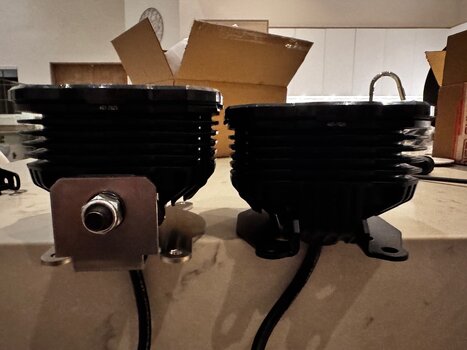
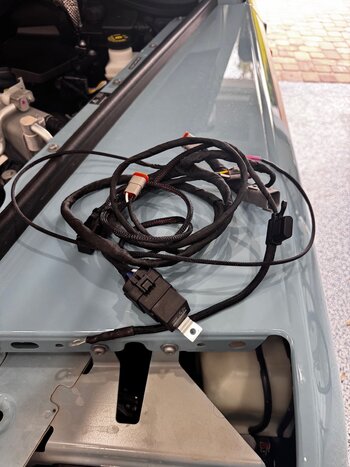
(maybe I just got by lucky) and I was able to use the nut to attach my earth connection from the relay. 👍🏼
No need for me to add any video or pics as I followed the amazing instructions in this thread by others.
The only thing I did struggle with was “remove the rubber grommets”. Not so straightforward for me and a little damage to the Ineos lights on removal but I don’t see me using these ever again!
Thanks very much for everyone involved in making this a simple and seamless undertaking.
🤩🙌👍🏼
 

Attachments

  • IMG_7781.jpeg
    IMG_7781.jpeg
    2.9 MB · Views: 57
  • IMG_7782.jpeg
    IMG_7782.jpeg
    1.6 MB · Views: 50

Asnes

Grenadier Owner
Lifetime Supporter
Local time
11:41 PM
Joined
Dec 10, 2022
Messages
339
Reaction score
603
Location
Windermere, FL, USA
After a lot of internal debate I ended up ordering the shawdowmarq KC ERA4 kit. It replaces the round bezels with square”ish” ones. i do really like the round design, but i also really liked the KC lights and didn’t want to put square peg in a round hole so to speak. We’ll see if this is the right choice. It will be wired whereby if the parking lights are on, the amber backlight on the KC lights will be activated, and when 25A master switch is engaged, the main white lights will be activated when high beams are engaged. Shawdowmarq just finished their custom wiring harness which is supposed to be completely plug and play with the exception of butt connectors to the 25A circuit with the high load aux panel.

The shawdowmarq bracket for the ERA4 requires you to cut into the grill a little. It removes one of the 4 mounting points of the bezel / plastic assembly. It’s not that big of a concern but I’d prefer to keep the grill 100% stock if I can with no cuts. Therefore, to see if it will work, I also ordered the ERA 4 bracket from the ineos forum store, which does not require cutting. If the ineos store bracket centers the light up/down/left/right in the receptacle area then the new bezel should hopefully line up correctly, and all should be well. We’ll see if that works.

Thanks to forum member @Walter for his documentation and guidance on his install.

I’ll post up with some notes and pictures of my install including wiring once complete.

Here are some stock photos.
 

Attachments

  • IMG_0128.jpeg
    IMG_0128.jpeg
    15.7 KB · Views: 32
  • IMG_0129.png
    IMG_0129.png
    1.9 MB · Views: 23
  • IMG_0130.jpeg
    IMG_0130.jpeg
    17 KB · Views: 24
  • IMG_0131.jpeg
    IMG_0131.jpeg
    15.1 KB · Views: 21
Last edited:

Asnes

Grenadier Owner
Lifetime Supporter
Local time
11:41 PM
Joined
Dec 10, 2022
Messages
339
Reaction score
603
Location
Windermere, FL, USA
Installed the shadowmarq kit with KC ELA4 lights and custom bezels that replace the factory round ones.

Their melal brackets required cutting, so instead of cutting, I ordered a set of ela4 brackets from the forum shop. I wasn’t sure if they’d center correctly in the shadowmarq bezels but they did fit perfect. So plug and play. A little more $$ but at this point of stopped counting dollars :/

Shawdowmarq also supplied a complete plug and play wiring harness which was totally awesome and completely simplified the install. You basically tap the driver headlight and the lights have an orange glow when parking lights/driving lights are on. 10a overhead triggers the relay to fire on the high beams when needed. One connection to batt+ under the hood and another to the purple 10a wire and done. Super easy.

I’m very happy with the install. I’ll put some black bezels on this weekend, blue is not really doing it for me as it’s more of and “electric” blue…… vs softer eldoret blue…

Anywho fun project. I removed the entire grill to make it easier… only took a few extra minutes to zip off the bumper cover. The grenadier is very easy to work on.
 

Attachments

  • IMG_2808.jpeg
    IMG_2808.jpeg
    501.3 KB · Views: 6
  • IMG_2760.jpeg
    IMG_2760.jpeg
    311.4 KB · Views: 6
  • IMG_2761.jpeg
    IMG_2761.jpeg
    272.5 KB · Views: 6
  • IMG_2762.jpeg
    IMG_2762.jpeg
    281.9 KB · Views: 5
  • IMG_2788.jpeg
    IMG_2788.jpeg
    296.4 KB · Views: 6
  • IMG_2789.jpeg
    IMG_2789.jpeg
    308.8 KB · Views: 6
  • IMG_2815.jpeg
    IMG_2815.jpeg
    383.9 KB · Views: 7
  • IMG_2816.jpeg
    IMG_2816.jpeg
    340.2 KB · Views: 8
  • IMG_2818.jpeg
    IMG_2818.jpeg
    504.7 KB · Views: 8
  • IMG_2817.jpeg
    IMG_2817.jpeg
    288 KB · Views: 8
  • IMG_2821.jpeg
    IMG_2821.jpeg
    370.1 KB · Views: 7
  • IMG_2820.jpeg
    IMG_2820.jpeg
    388.2 KB · Views: 7
  • IMG_2822.jpeg
    IMG_2822.jpeg
    515.9 KB · Views: 7
  • IMG_2823.jpeg
    IMG_2823.jpeg
    314.1 KB · Views: 7
  • IMG_2814.jpeg
    IMG_2814.jpeg
    735.3 KB · Views: 6
Back
Top Bottom