The Grenadier Forum
Register Now for enhanced site access.
INEOS Agents, Dealers or Commercial vendors please contact admin@theineosforum.com for a commercial account.

Show us your mods.

Asnes

Grenadier Owner
Lifetime Supporter
Local time
6:07 PM
Joined
Dec 10, 2022
Messages
386
Reaction score
724
Location
Windermere, FL, USA
I already purchased a G900 and was playing around with how to remove the existing mirror - and this is what you get:
View attachment 7837517
To remove the existing mirror you have to take a flat head screwdriver and pop off a metal C clamp from around the socket for where the ball (pictured above) is affixed to. Then, give a good tug on the mirror to remove from the ball. From what I can tell - the ball about 5/8” in diameter ball, and I’m having a difficult time figuring out how I can attach to that (ram mounts are all much larger). And, I’m having a hard time figuring out how to remove the plastic. My initial thought is to purchase the following ram mounts and attach them to the wolfbox oem backplate: View attachment 7837518
Thanks for blazing the trail. I plan to get the same 900. Keep us all posted on the solution to fit to the ball mount :)

I would prefer to fix the camera inside the door looking through the glass so I don’t need to drill.
 

grnamin

Grenadier Owner
Lifetime Supporter
Local time
5:07 PM
Joined
Oct 16, 2023
Messages
890
Reaction score
1,340
Location
Texas, USA
Might need to opt for your rear view camera installation. I fitted mine without any drilling and was thinking how to stick down the wire.
Maybe with this?
 

Voader - Oudersopzwier

Grenadier Owner
Local time
12:07 AM
Joined
Jun 28, 2023
Messages
325
Reaction score
610
Location
Belgium - Kortrijk
Wonder how well that will work with factory dark tinted glass?

Hmmmmmm. Good point. I will try it first perhaps before running wires and mounting
The reason that I chose a high position outside the car is that this gives me the best view. The closest view to the rear end of the car (Even with the big spare wheel blocking a part of that view) and a fair amount of distances view to other car’s or obstacles behind me.
Putting it inside is blocking the view of the rear end of the car. So it isn’t really useful.
(I don’t have the standard camera from INEOS installed) For me it’s more the camera function I need than the dashcam function.
 

Cheshire cat

Grenadier Owner
Lifetime Supporter
Local time
11:07 PM
Joined
May 30, 2022
Messages
2,014
Reaction score
4,720
Location
Cheshire, UK
Thanks for blazing the trail. I plan to get the same 900. Keep us all posted on the solution to fit to the ball mount :)

I would prefer to fix the camera inside the door looking through the glass so I don’t need to drill.
I fitted my 9000 rear camera on the outside, without any drilling required.
I may alter the fit and drill through the plastic trim panel as per Voadars method.
 

Attachments

  • IMG_0018.jpeg
    IMG_0018.jpeg
    2.1 MB · Views: 356

Pat

Grenadier Owner
Local time
12:07 AM
Joined
Dec 9, 2022
Messages
180
Reaction score
369
Location
Italy

Asnes

Grenadier Owner
Lifetime Supporter
Local time
6:07 PM
Joined
Dec 10, 2022
Messages
386
Reaction score
724
Location
Windermere, FL, USA
I fitted my 9000 rear camera on the outside, without any drilling required.
I may alter the fit and drill through the plastic trim panel as per Voadars method.
Cool can you show the wire run on the roof? Thanks! Only 2-3 more months of planning for me :)
 

khmarks

Grenadier Owner
Lifetime Supporter
Local time
6:07 PM
Joined
Dec 10, 2023
Messages
43
Reaction score
51
Location
Raleigh, NC, USA
I had one of these printed for me. It fits nicely in my Grenadier.
 

Voader - Oudersopzwier

Grenadier Owner
Local time
12:07 AM
Joined
Jun 28, 2023
Messages
325
Reaction score
610
Location
Belgium - Kortrijk
Might need to opt for your rear view camera installation. I fitted mine without any drilling and was thinking how to stick down the wire.
Awesome work! Looking great.

@Voader - Oudersopzwier Any chance you could take a quick picture of the back of the camera? I’m interested to see where/how you ran the cable in the hole you drilled. Thanks in advance!
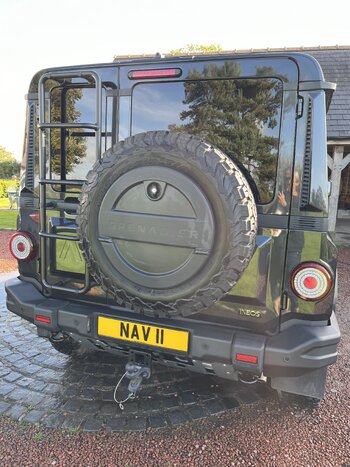
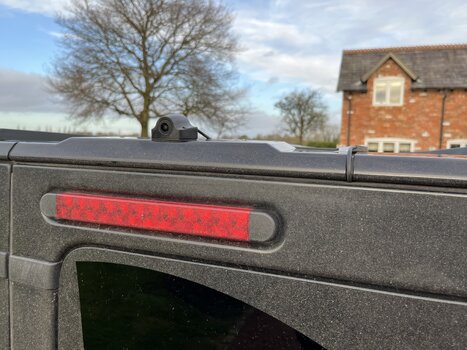
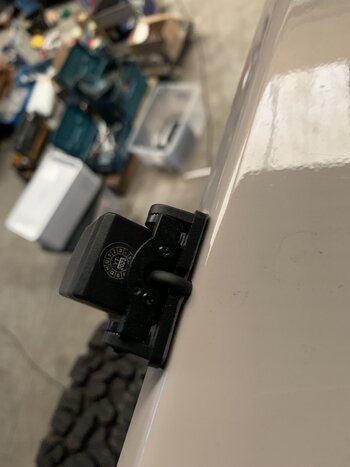
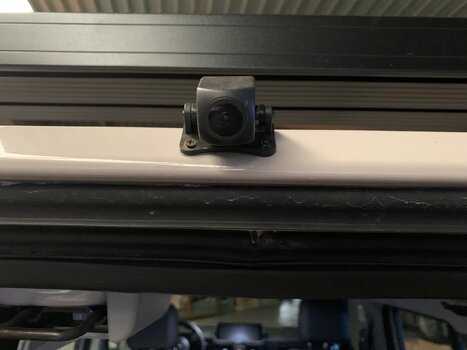
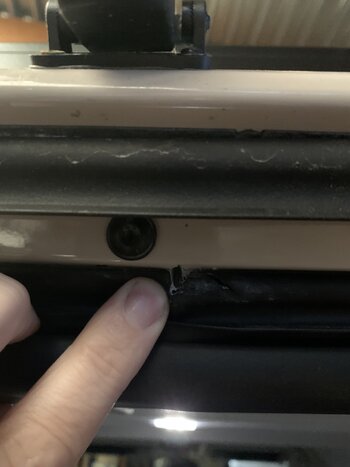
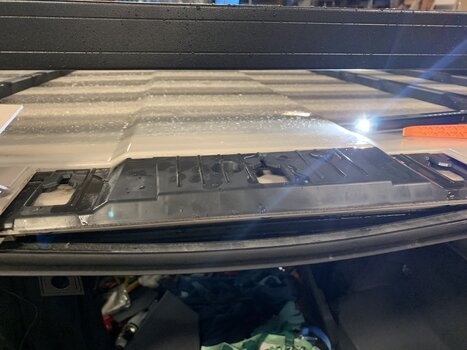
Some details about the camera fixation, The plastic cover sits on a plastic trim, connected to the chassis. So you can get the cable under this trim. You need also to loos a bit of the door seal, to get the cable in to the interieur of the car. Than you can guide the cable between the rubber sealing and roof finish towards the corner left or right.
 

Attachments

  • IMG_3801.jpeg
    IMG_3801.jpeg
    1.1 MB · Views: 222
  • IMG_3802.jpeg
    IMG_3802.jpeg
    2.6 MB · Views: 218
  • IMG_3803.jpeg
    IMG_3803.jpeg
    1.5 MB · Views: 217
  • IMG_3712.jpeg
    IMG_3712.jpeg
    2.2 MB · Views: 248

Krabby

Global Grenadier 76
Forum Moderator
Grenadier Owner
Lifetime Supporter
Local time
6:07 PM
Joined
Nov 5, 2022
Messages
5,231
Reaction score
9,922
Location
New Jersey, USA
Are those screws already rusted?
 

YIPPE

GG #00286
Grenadier Owner
Lifetime Supporter
Local time
10:07 AM
Joined
Mar 28, 2022
Messages
265
Reaction score
680
Location
Hawkesbury, NSW, Australia
Some details about the camera fixation, The plastic cover sits on a plastic trim, connected to the chassis. So you can get the cable under this trim. You need also to loos a bit of the door seal, to get the cable in to the interieur of the car. Than you can guide the cable between the rubber sealing and roof finish towards the corner left or right.
Now that these piecess are being removed, can someone please have them scanned for a specialised team to design a new piece with a gutter, not a rolling edge for rain to get us.
A rear awning is useless at the moment unless car is parked downhill.
 

GrenADV

Grenadier Owner
Lifetime Supporter
Local time
6:07 PM
Joined
Dec 24, 2021
Messages
200
Reaction score
421
Location
West Virginia
Some details about the camera fixation, The plastic cover sits on a plastic trim, connected to the chassis. So you can get the cable under this trim. You need also to loos a bit of the door seal, to get the cable in to the interieur of the car. Than you can guide the cable between the rubber sealing and roof finish towards the corner left or right.
Perfect! Thank you for the great pictures and good information - I’m feeling much more confident in this installation route.
 
Back
Top Bottom