The Grenadier Forum

Register a free account today to become a member! Once signed in, you'll be able to contribute to the community by adding your own topics, posts, and connect with other members through your own private inbox! INEOS Agents, Dealers or Commercial vendors please contact admin@theineosforum.com for a commercial account.

What did you do with your Grenadier today?

What is the (rough) cost of ceramic coating?

I have factory-applied PPF on my Defender, which is said to be 'better' (warrantied) and less expensive, but even that was over $5,000.00.


P.S. Jason's Defender parts are primo! I'd also love to know if anything Grenadier-related is in the hopper.
 
@Dual Grenny Guy ...thankfully, the product I bought is fabricated from 4mm stainless steel which provides a degree of flex to absorb big hits ( hopefully very rare) without necessarily cracking, and reduces the weight. No way could I manage a 6mm mild steel plate .!!!
The SPP ones are alloy, which is why they need to be 6mm.
 
Finally got around to mounting a driver's side grab handle. What a difference. I can get in and behind the wheel with out hands but getting out was more of an undignified ejection than a suave departure. Kinda like livestock being born. Much better now.

@nathanwind & @owl (Owl Outdoor)...
A P1800 was the first car I ever owned. Nice to know they still get some love. ❤️
 
What is the (rough) cost of ceramic coating?

I have factory-applied PPF on my Defender, which is said to be 'better' (warrantied) and less expensive, but even that was over $5,000.00.


P.S. Jason's Defender parts are primo! I'd also love to know if anything Grenadier-related is in the hopper.
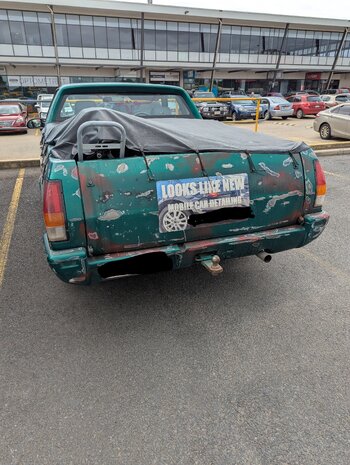
I do not think I ever paid more than $2k for ceramic coating in any vehicle.
 
I do not think I ever paid more than $2k for ceramic coating in any vehicle.
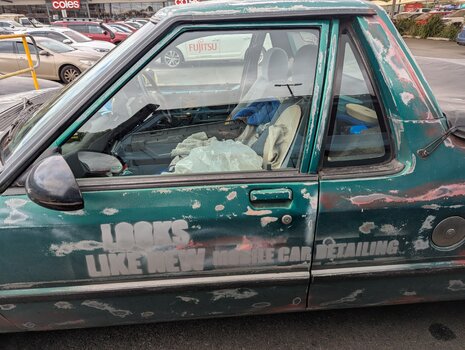
This guy will cut you a good deal on all your detailing needs 😁
He was parked next to me yesterday.
 

Attachments

  • markup_1000021003.jpg
    markup_1000021003.jpg
    4.1 MB · Views: 98
  • PXL_20241121_032658283.MP.jpg
    PXL_20241121_032658283.MP.jpg
    6.1 MB · Views: 90
I was getting the random clicks as well even with the speed warning disabled. Turns out the lane keep needs to be turned off too so that is also part of my start up check list. I now have zero clicks or sounds under any circumstance. The sequence is start engine, set HVAC to auto, choose desired temp, turn off auto start/stop, turn off speed warning, turn off lane keep warning. It doesn't take that much time, but I would prefer to not have a pre flight checklist.
I have found the random click sound I after turning off the speed warning is not the lane keep as this is not a click sound but it’s actually the speed limit changing which can also be turned off.
 
I have found the random click sound I after turning off the speed warning is not the lane keep as this is not a click sound but it’s actually the speed limit changing which can also be turned off.
Ok I’ve just come to the conclusion the engineers of our beloved (for most of us) Grenadiers have either a great sense of humor or are demented as they just wanted owners to hear clicks & clonks & dinglydonks without the radio even being on!!! 🙃🤦‍♂️

1732284800214.gif
 
Did an 18kmi oil change a little early (17800). People, please don't wait for the next 12kmi interval to do it - the oil after ~6300 miles since last change was pitch black.
Also, finally added a thing I have been missing - fog lights:
20241122_143108.jpg

It also made me realize that jamming a winch into the factory bumper is not an easy affair.
 
1000039444.jpg
1000039446.jpg
1000039445.jpg
Kaon shelf and molle panels are in. Some protection for the windows to really utilise the pockets. Great product. Total weight of 15.5kg. molle panels seem to have enough strength for me to possibly install a second shelf when fridge is back in the car.
The first lot of bushes kaon made for factory cargo barrier have been a problem for some but found you just disassemble the mount on the cage and install them from the back. Very easy.
Great product overall and am quite happy with it.
 
Did an 18kmi oil change a little early (17800). People, please don't wait for the next 12kmi interval to do it - the oil after ~6300 miles since last change was pitch black.
Also, finally added a thing I have been missing - fog lights:
View attachment 7878587
It also made me realize that jamming a winch into the factory bumper is not an easy affair.
So what brand are your fog lights? And how are they switched? And the most important question is are you happy with them? They look very sharp!
 
Here is really good video. Great info. The Wagon is sporting the same fog lights as sold by Owl (Triple R) Very nice look, the Wagon Cover is really a great item to have. This fellow puts out really informative videos. 🏆

View: https://www.youtube.com/watch?v=nfQBMIsaQgs
Thanks for sharing. I order the canvas cover for my QM and this is the first time I have seen it up close. I think it looks great.
 
The Quartermaster hood stick set is all there! It's quite robust and probably should be, considering the size of the canvas.

I've had all manner of Land Rover canvases (Series and Defender 3/4 canvas; Tickford and belt rail NAS) and the common thread between them all is shrinkage. It took me a few times to learn that a brand new canvas needs a solid 30-days to stay snapped-in/tied-down in place or I risked losing a lot of distance between the tailgate/side tabs and canvas. Long-term exposure to rain and sun gives a new canvas time to "cure." It's certainly tempting to skip this step, but I highly recommend sticking out the wait to be sure it can secured without tearing out your thumbs.

Here in the US, the 1994 Defender 90 was introduced with a true canvas top with snaps, but no one told owners to leave it in place... the rear panel was typically left rolled up, so by the Fall of that year, there was as much as a 2" gap that couldn't be fixed. There were warranty repairs to replace that panel, but eventually LRNA (Land Rover North America) went with Besttop for a vinyl-style with belt rails. It just wasn't the same aesthetic as canvas, but the convenience couldn't be argued with.

I will be curious how the sides mount - if they are also snapped into place like the rear or if they have a belt rail design. My guess is that the sides can't be rolled up, as the one in the video only shows plastic clips on the rear - ostensibly to roll up the back panel. Regardless, I am somewhat surprised that even the rear panel lacks a clear window. If that's the only version from the factory, I predict we'll see most in the rolled-up position. Visibility will be quite limited, but damn doesn't it look cool!
 
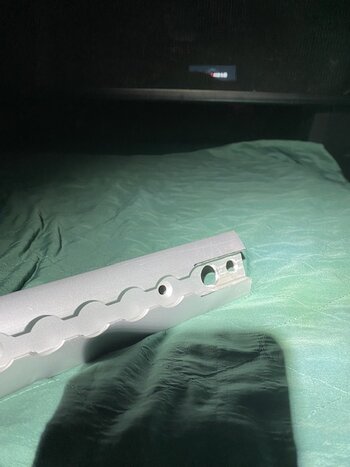
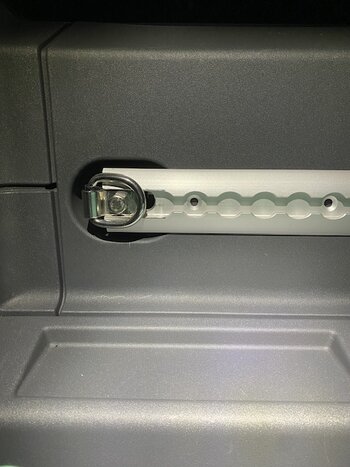
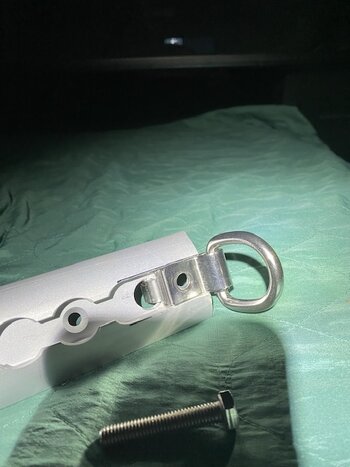
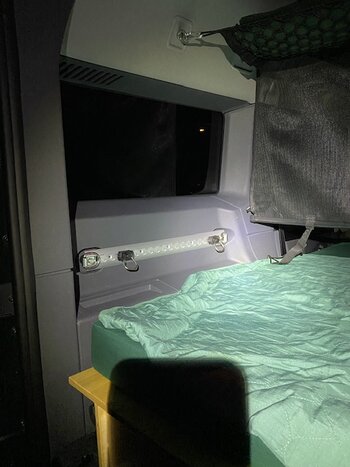
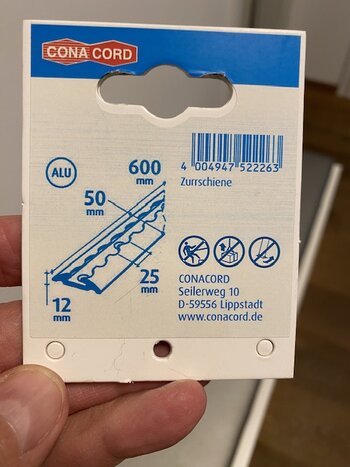
Today I attached an airline track (L track) to the trunk. I saw it by chance on Y Tube. I only wanted it on the left side. My canister hangs on the right side. It cost me 20 euros. I still had the screws, as well as a couple of rubber spacers (2.5 cm). The Dremel and Makita did the rest. Thanks for the cool idea, in case the guy is also here in the forum and reads this. Here are a few pictures.
 

Attachments

  • IMG_1527.jpeg
    IMG_1527.jpeg
    63.8 KB · Views: 163
  • IMG_1529.jpeg
    IMG_1529.jpeg
    96.3 KB · Views: 114
  • IMG_1528.jpeg
    IMG_1528.jpeg
    72.7 KB · Views: 114
  • IMG_1531.jpeg
    IMG_1531.jpeg
    80.5 KB · Views: 114
  • IMG_1533.mov
    5.3 MB
  • IMG_1536.jpeg
    IMG_1536.jpeg
    85.8 KB · Views: 137
Back
Top Bottom