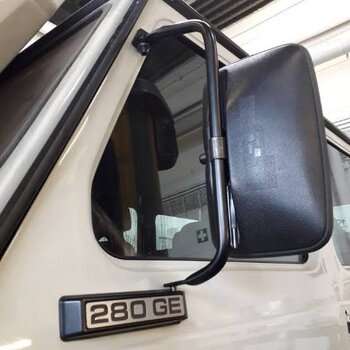
SUMA PERFORMANCE CONVEX SIDE MIRROR INSTALLATON AND REVIEW FOR THE GRENADIER
First, I would like to thank
@BillLumberg for getting Eddy at Suma Performance to make convex mirrors for the Grenadier.
Thank You.
I pre-ordered the Suma convex side mirrors back on 4-5-2024 prior to production and just received them a few days ago. They have some Grey and Blue ones in stock now. Here’s a link to them. Cost is $189.95. When I ordered them there was a 10% discount code, however not sure if it is still active.
The code was LXZ-P5ZQ6PO
Here’s a link to order them if you are interested
https://www.sumaperformance.com/collections/ineos/products/23-ineos-grenadier-quartermaster
I ordered the Grey + Defroster. They also have them in Blue + Defroster.
Note: The Grey color does have a light grey tint to them vs the stock side mirrors.
It cuts the glare a bit and I like it. It is also branded with SUMA written in small letters towards the bottom center of the mirror, which looks great.
My overall thoughts on these convex mirrors are that they almost completely eliminate the blind spot behind the B pillar. I say almost, as it’s important to always look back before making any turn or lane change. In the past I had always used the small round stick on mirrors and found them invaluable in helping to eliminate the blind spot and keep me out of trouble. They served their purpose, however after installing these full convex mirrors and using them, I am impressed with their distortion free wide image and coverage. The side mirrors on the Grenadier are a bit smaller then many other vehicle side mirrors and have a bit less adjustment. These Suma Mirrors help to overcome these shortcomings with a wider view and deliver a very nice experience. You can see the difference in how much wider of a view area they cover vs the stock ones in the first 2 photos below. The first photo is the stock mirror and the next photo is the Suma Mirror. Note: Objects do appear to be farther away in the Suma Mirrors vs the stock mirrors, so be careful to judge when to make a turn or lane change as the vehicle behind you or to the side of you may be closer then you think they are until you get used to using them. It has only taken me a day to adjust to this and I find it a minor difference when compared with the advantage of having a much wider view and a much less blind spot for safety purposes.
The mirrors arrived in a nicely branded box and were packaged in bubble wrap that had a R or L sticker on it and the mirrors also had either a R or L sticker on the back side of them so you could determine which side to put the mirror on, R for Right Hand Side and L for Left Hand Side. Other then that, there were zero instructions on how to install them. I went on YouTube and Suma’s web site to see if there were any instructions and although I found some videos, none were specific for the Grenadier so I pushed ahead anyway and was successful in removing and installing them.
I did reach out to Suma via email to get some information for installation, however they never responded to my various emails, which was disappointing as I did have some specific questions. There is no, nada, zero phone number for the company no matter how hard I searched for one, which was both frustrating and disappointing.
Call me old school, however I do like to actually speak to someone occasionally, although I can understand why some companies don’t list phone numbers, as I like to ask a lot of questions and they might not be able to produce any products if everyone was like me. Even still, it would have been nice for them to get back to me by email, especially since they asked me to try them out first and report back on fitment, which by the way is great. Perhaps Eddy is on vacation or busy making more mirrors.
One of the important questions I was trying to get answered was which of the two wires for the heater function on the back of the stock mirror posts were to go onto which of the two posts on the back of the Suma Mirror. There are no positive and or negative/ground markings on the back of the stock mirrors or Suma mirrors or on the wires or wire connectors. If you look closely at the photos, you will see one wire connector on the stock mirror has black heat shrink tubing over the tip of one wire connector and the other does not. My recommendation is to put that black heat shrink wrapped wire connector on the same left post on the Suma Mirror. I would recommend first using some blue masking tape to mark the terminal on the stock mirror first that the black heat shrink connector wire is on and also that wire, so you won’t get confused when transferring over to the new mirror as you can always look back at the old mirror to see which post it came off of since you marked it with blue tape.
There is no guarantee that the posts on the Suma mirror are in the same position, (ie Positive or Negative) and for that reason I finally went to a stereo installation shop with the stock mirror and Suma mirror and spoke with two of their installation electricians. After looking at the mirrors, they said it does not matter which wire goes to which post. I did try the wires on one way and then the other way and then turned on the Grenadier key and pushed the Window Demist Rear Button on the main center console, which turns on the heating function on the side mirrors as well as the rear boot door windows. Either way the mirror heated up after a couple of minutes and nothing seemed to short or blow a fuse and the Grenadier did not throw any fault codes. I am not guarantying this is correct, however so far it does appear to be working fine. IMPORTANT: Make sure the Grenadier is off when you are either removing the wires from the posts on the back of the mirror or when placing them on the new Suma Mirror. Only after they are secured, should you turn the Grenadier on and test the heating function on the mirrors before reinstalling them. It would be great if Eddy confirmed this. Hi Eddy, please reach out to confirm which wire goes where or if it simply does not matter at all.
Update 8-2-2024 / Eddy reached back out to me. His exact quote is: "The defroster wires can be connected with either pin, there is no + or -."
TOOLS AND ITEMS RECOMMENDED FOR MIRROR REMOVAL AND INSTALLATION
- You will need a wide flat trim tool that is between 2 ½” to 3 ½” wide. Wider is a bit better as it spreads the forces over more area. You could also purchase a stiff plastic putty knife if you don’t have a trim tool or even use a metal putty knife if you put a few layers of masking tape on the end of the blade to prevent any scratching.
- Some blue tape to mark which wire comes off which post.
- A towel to set on the flat window/arm rest area once the door window is opened so you have a place to set the mirrors where they won’t get scratched.
- A small pair of needle nose pliers to hold the wiring posts steady on the back of the mirror when you remove the wire connectors from the posts.
- Optional – I purchased a small tube of Dieletric Silicone Grease to put on the connections prior to installing the new mirrors.
REMOVAL OF THE STOCK MIRRORS
You can start on either side mirror first. I choose to start on the Left Hand Mirror first, which in the US market is the Drivers side.
1 - Open the side front window all the way down.
2 - Place a towel over the window/door arm rest, as you will want a towel there to set the mirror on once you take it off and also when installing the new mirror. You don’t want to scratch the mirrors.
3 - Position the stock mirror by using the electric mirror adjustment buttons in the Grenadier to put the mirror in a neutral position both vertically and side to side.
4 - Turn off the key in the Grenadier and remove it. You will want the vehicle off when you are removing the mirror and switching the wiring from one mirror to the next.
5 - Take your wide trim tool or plastic putty knife and place it ¼ to ½” or so under the bottom of the mirror and then carefully lever it off by putting pressure on the backside bottom of the mirror by using the leverage of the mirror housing to gain leverage to ratchet the bottom of the mirror towards you. You will hear it start to click off and it may take 3-4 clicks before it is completely free. Make sure to grab the mirror, however don’t pull it too far away from the mirror housing as the back of the mirror has 2 wires attached to the back of it by wire connectors on connection posts.
6 – With blue tape, mark which post has the black heat shrink wrap connector on it and also put a small piece of blue tape on that wire.
7 – Carefully remove the connectors from the 2 posts on the back of the mirror. You may need a small pair of needle nose pliers to hold each post steady as you slowly work the connector off.
8 – Once the connectors are off, set the stock mirror aside.
INSTALLING THE NEW SUMA PERFORMANCE CONVEX MIRRORS
9 - Grab the Suma L labeled mirror, which is the Left Hand Side mirror if working on the Drivers side mirror first. You will notice that the Suma mirror already has 2 extension wires on it that are already connected to the 2 posts on the back of the mirror. Don’t remove the wires from the posts. You will want to simply insert/connect the wire male plug ends at the end of each wire into the connector/wires that were removed from the original stock mirror posts and that are sitting loose in the mirror housing. Note: If you concerned which wire should go to which wire, connect up the blue taped up wire in the mirror housing to the same wire that matches the same post position on the Suma Mirror and stock mirror. If working on the Drivers Side Door, this would be the left post and it should be the same for the Passenger side, left post. Note: Left is when looking at the back of the mirror.
10 – Set the mirror carefully down on the window sill and turn the key on in the Grenadier. Then engage the Demist Window Rear Button on the center console and see if the mirror heats up after a minute or two. If so, turn off the key and remove it from the Grenadier and then proceed to the next step. If it does not heat up, first make sure the connections are not loose. If they are, you may need to use the needle nose pliers to lightly tighten up the connectors and or try reversing which wire is connected to which post and check the heater function again.
11 – OPTIONAL - I purchased a small tube of Dieletric Silicone Grease to put on the connections prior to finishing the final installation of the new mirrors since the wiring and connectors behind the mirrors are open to the elements. I simply brushed on a light coating of Dieletric Silicone Grease onto the connections after they had already been connected to help prevent oxidation. I did try to use some heat shrink wrap first, however found it not a great fit as trying to bridge the larger size of the connectors and the very small wires was not a great fit since the heat shrink tubing would not reduce far enough to seal the small wire. The Dielectric Silicone Grease was much easier to work with and sufficient for my purposes. Note: The Dielectric Silicone Grease is non-conductive.
12- To install the mirror, you will need to tuck the excess wiring back into the void/opening at the back of the mirror housing and make sure the wires are clear of the large hockey puck mechanism that moves the mirror. The mirror back will fit over the hockey puck mechanism and not in it or through it. First lightly position the bottom of the mirror so you can see that you are lining it up to go over the hockey puck shaped mechanism keeping in mind where the bottom tabs will go over the hockey puck and then slowly move the mirror up to a vertical position so that it feels like it is positioned evenly over the whole hockey puck and then slowly and evenly push the mirror over the hockey puck until you hear multiple clicks as it is getting seated. Continue to press on it to make sure it is completely seated with even pressure, however not so much that you break the mirror.
13 – Turn the key on the Grenadier on use the mirror adjustment toggle to see if the mirror moves up and down and back and forth. Note: If the mirror is not moving, make sure you have set the adjustment switch to the left hand mirror.
14) Rinse and Repeat for the other side.
15) Clean the mirrors with some Windex.
16) Adjust the mirrors when seated in the Grenadier so you just catch a small slice of the side of the Grenadier. By doing so you will catch a good view of both the side of your Grenadier and most importantly a lot of if not most of the blind spot. Always make sure to also turn your neck to double check no one is along the side of you before making a turn or lane change.
I highly recommend these Suma Convex Mirrors for the Grenadier.
Thanks again to
@BillLumberg for getting Eddy from Suma Performance to support the Grenadier.
Also, many thanks to all the Forum Members who stepped up and ordered them in advance of production.
Thanks Eddy for making these available for the Grenadier.
They have increased my enjoyment of my Grenadier and are keeping me safer too!
If you have any questions, please reach out to Eddy at Suma Performance at:
support@sumaperformance.com
or simply give me a call if I can be of any assistance.
Note: No compensation or incentive has been paid for this review.
DaBull 805-236-6417
Last but not least….. I am either going to have to take a course on how to write a very short story or perhaps how to write a novel.
View attachment 7865623