A few things have happened...
Drawers arrived! I ordered the drawers preassembled and coated from CabinetDoorStore.com; couple weeks for them to be built and shipped and they are
far better than anything I could have done out of wood. Also the convenience of just screwing the slides in caused pre-built wood to win out against DIY plastic/aluminum extrusion. They are installed on "500lb" Vevor locking full extension slides; do I think these slides will hold 500lbs? Probably not, but we also use them in our Sprinter for the toilet and fridge, and both of those hold my weight with no issues, so the real value is at least half of the rated value. The internal dimensions of each drawer are 34.75" long, 5.5" deep, and 16.25" wide. Also, yes I know they are slightly crooked in the slides, I hate it as well, and have black drawer faces that still need to be installed which will hide my errors. Also please excuse the complete lack of organization in the drawers, I just threw a bunch of stuff in.
View attachment 7862381
View attachment 7862382
I've also been adding on to the driver's side of the drawer system. The Grenadier has a ton of vertical space in the cargo area, and I didn't want that to go to waste; additionally, the space between the window and the fridge was being wasted, so I decided to rectify both of those issues. Tied into the factory tie downs on the driver's side wall as well as the drawer system skeleton, this extension gives mounting room for my "control panel" (for lack of a better descriptor), power distribution (12 outlet Blue Sea fuse block), Victron MPPT solar controller, Victron inverter, weBoost, MIMO 5G antenna for the hotspot/hotspot itself, the Icom IC-2730A VHF/UHF radio, and the ARB Single air compressor. The Icom and ARB compressor aren't in the photos, as I'm waiting on a few extra pieces of extrusion (I moved the compressor from the original mounting spot slightly).
The control panel holds my Victron BMV-712 battery monitor, Feniex Mini 4200 switch controller, 120v outlets, ARB air connection, 12v plug, and a multitude of USBs
View attachment 7862383
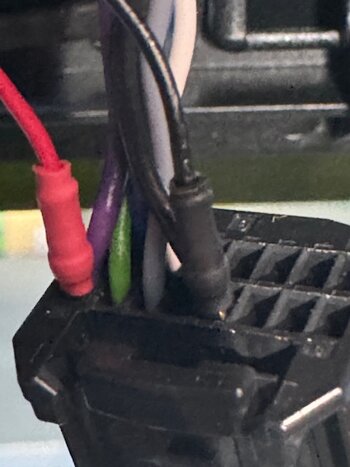
And a sneak peak of behind that panel (sorry, again this was an in progress picture, the wiring organization wasn't tidied up at all at that point)
View attachment 7862384
The structure also allows for a shelf above the fridge (25"x20" if I recall correctly), I'm still waiting on a couple pieces of 1x3 extrusion to create a "fence" on the front and rear and I'll probably use a bungee cord or similar on the open side to hold things in place. The "shelf" is 6mm ABS plastic slid into the extrusion groove (kept from rattling with a few strips of TESA cloth tape)
View attachment 7862385
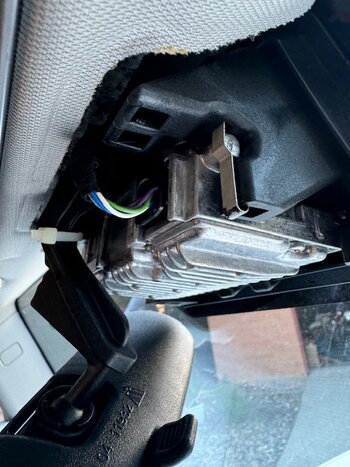
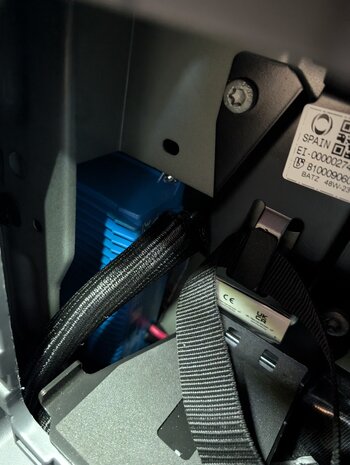
Also accomplished over the past few days was my Victron IP67 AC-DC charger install; it is located forward the driver's side taillight in the bottomless pit beyond the OEM jack and held in place with a set of 4 40lb pull force magnets. It get's AC power from a NOCO connector I installed where Ineos would put the NATO plug on vehicles with the high-amp switch panel option
View attachment 7862386
View attachment 7862388
I also ordered a few pieces of extrusion to tie the drawer system into the passenger side wall tie downs, and perhaps will build a MOLLE panel of sorts covering the passenger side cargo window. All that will arrive this weekend, so maybe another update next week. Hopefully I'll also have tracking information for my battery by then.
I didn't take any photos at all, but my negative distribution, Victron shunt, Blue Sea SafetyHub150 (main 12v distribution from the aux battery), and Switch Pros SP-9100 were all installed under the passenger side rear seat over the past few days. The only things left are to run the Victron VE.Direct communication cables from the cargo area to the back seat and make a panel to mount the Victron Orion XS DC-DC charger and the aux battery system will be complete (shy of, of course, receiving, creating a mount for, and mounting the aux battery).
Also on the docket and waiting in the garage to install are the weBoost interior and exterior antennas, a matte infotainment screen protector, some more custom cut Scotchlite lambda logos, and a Powerwerx dual USB charger for the dash, but that'll happen in due time. Also should have a few more storage bags for the drawers and a rear headrest from Blue Ridge Overland gear in a few weeks when they get made

")


 ??
??


