The Grenadier Forum
Register Now for enhanced site access.
INEOS Agents, Dealers or Commercial vendors please contact admin@theineosforum.com for a commercial account.

Show us your mods.

Voader - Oudersopzwier

Grenadier Owner
Local time
11:04 PM
Joined
Jun 28, 2023
Messages
301
Reaction score
590
Location
Belgium - Kortrijk
I currently have a Wolfbox G900 dashcam attached to the mirror. I also have a kit for attaching it directly to the window, but I don't know how to remove the original mirror. How did you do that ?
Sweet. How did you run the wire to the exterior camera? I have seen some people mount it inside the door behind the glass to keep it all inside the vehicle. Did you drill through the roof to pass the wire? I am going to install a wolf box as well when I get mine. Any other pics you can share would be awesome :)
Did you completely replace the mirror or did you strap the screen over the top?

I purchased also the OEM mirror bracket, but it doesn’t fit.
You need a square connection foot (who is glued on the windshield) The one from the Grenadier is round. Also, this connection should be glued lower on the window, because now the wiring is bouncing to the upper switch panel and you can’t adjust the mirror in height. So indeed I finally strapped the mirror on the existing mirror. Which works just fine. It’s fixed and it has no vibrations.

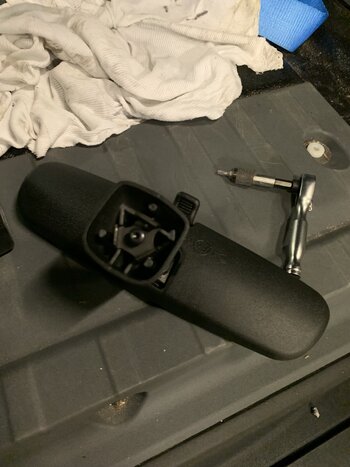
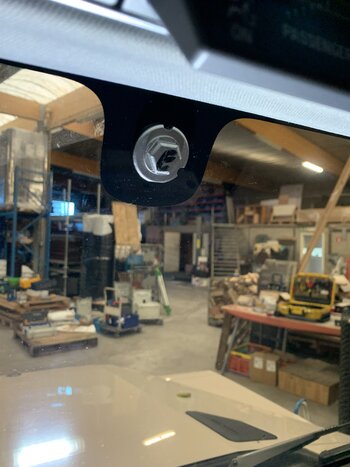
To remove the mirror you need to turn it counter clockwise. It will pop off, but you need to put some force on it. To reattach, same procedure but clockwise.

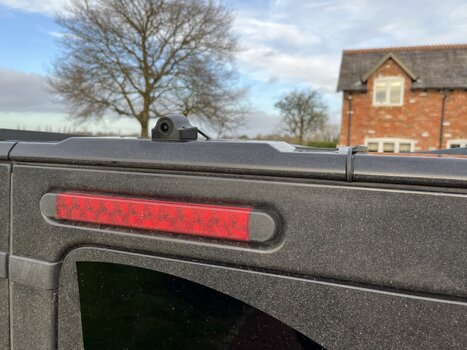
I had to drill a hole in the plastic cover where the camera is installed, but all the rest went smoothly without cutting or drilling.
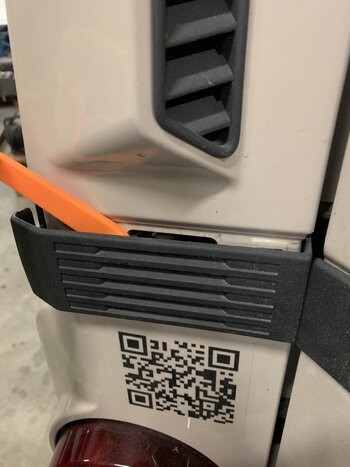
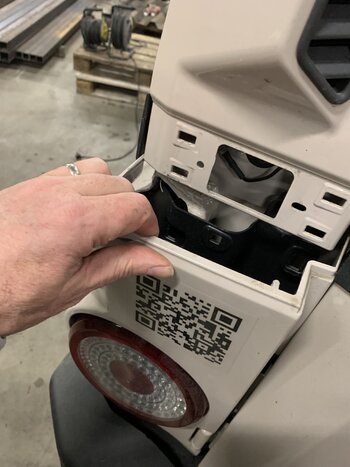
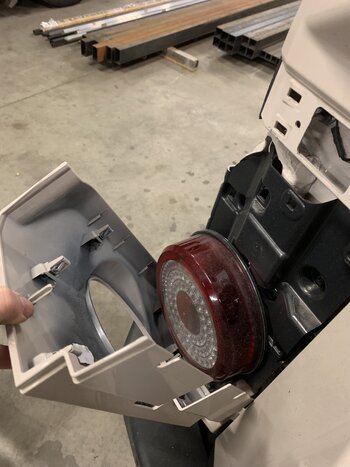
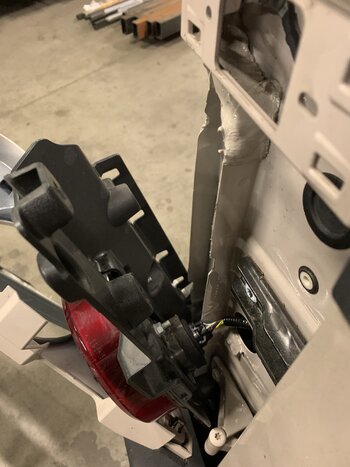
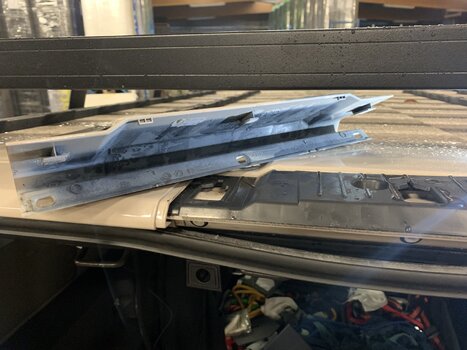
You can all simply de assembled and re assemble with some simple tools. I did run the wiring using the left post at the end to reach the cable from the rear light. Made the connection with the rear light wire (It’s the Purple/orange one) than needed to disassemble the side skirts to reach the B pillar. Then up to the roof to the A pillar. But in between I could just put the wiring behind the rubber seals. Then disassemble the cover at the A pillar (It’s just one screw) to route the power cables down to the fuse box under the steering wheel.
I ordered also the hardwire kit to make the connection in the fuse box.
The connection from the camera to the rear light is just soldered together and then finished with some isolation tape.
 

Attachments

  • IMG_3713.jpeg
    IMG_3713.jpeg
    2.3 MB · Views: 350
  • IMG_3714.jpeg
    IMG_3714.jpeg
    2 MB · Views: 314
  • IMG_3715.jpeg
    IMG_3715.jpeg
    1.4 MB · Views: 317
  • IMG_3716.jpeg
    IMG_3716.jpeg
    1.2 MB · Views: 326
  • IMG_3770.jpeg
    IMG_3770.jpeg
    1.3 MB · Views: 318
  • IMG_3771.jpeg
    IMG_3771.jpeg
    927.7 KB · Views: 313
  • IMG_3773.jpeg
    IMG_3773.jpeg
    1.3 MB · Views: 311
  • IMG_3776.jpeg
    IMG_3776.jpeg
    1.6 MB · Views: 316

Voader - Oudersopzwier

Grenadier Owner
Local time
11:04 PM
Joined
Jun 28, 2023
Messages
301
Reaction score
590
Location
Belgium - Kortrijk
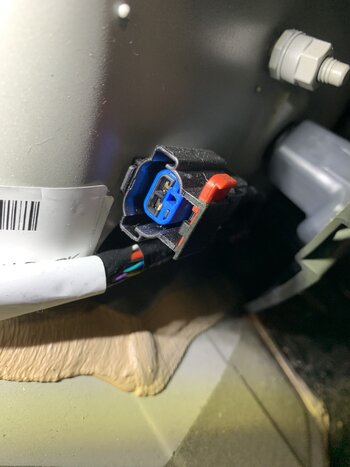
I also spotted this connector. No idea where this is for.
Maybe for the optional AC/DC inverter, or is it the wiring for the power switches (which I don't have) on the roof?
 

Attachments

  • IMG_3768.jpeg
    IMG_3768.jpeg
    1.2 MB · Views: 307
  • IMG_3766.jpeg
    IMG_3766.jpeg
    2.2 MB · Views: 345
Last edited:

Jean Mercier

GG#920
Grenadier Owner
Lifetime Supporter
Local time
11:04 PM
Joined
Sep 10, 2022
Messages
2,630
Reaction score
9,393
Location
Sint-Martens-Latem, Belgium
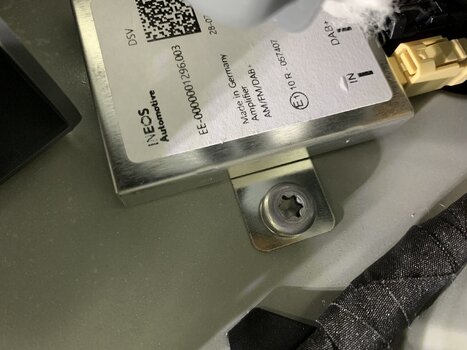
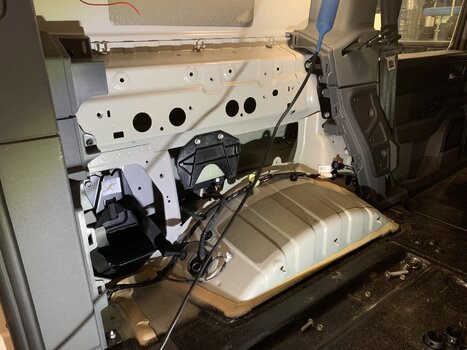
@Jean Mercier I also spotted a DAB receiver in the left corner. I thought, Jean, that you spotted one in the right back corner of the car? Meaning there ar two receiver?
I spotted the one at the left. But not the one at the right "yet", but saw something on other pictures on the forum. Therefore I don't know if there are two.
 

Jean Mercier

GG#920
Grenadier Owner
Lifetime Supporter
Local time
11:04 PM
Joined
Sep 10, 2022
Messages
2,630
Reaction score
9,393
Location
Sint-Martens-Latem, Belgium
I also spotted this connector. No idea where this is for.
Maybe for the optional AC/DC inverter, or is it the wiring for the power switches (which I don't have) on the roof?
It is not for the power switches on the roof, because I have them and I have also this hanging connector. I made some measurements on the connector here:

Therefore probably BCM (Body Control Module) signals for the optional smart invertor, but this is a guess.
 

Voader - Oudersopzwier

Grenadier Owner
Local time
11:04 PM
Joined
Jun 28, 2023
Messages
301
Reaction score
590
Location
Belgium - Kortrijk
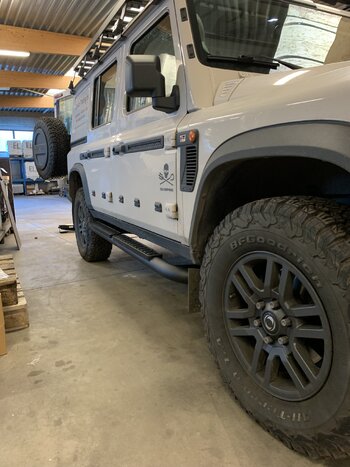
Optional sidesteps are loaded. Grenadier a bit more in beast modus now.
Just a tip for people who are mounting the Urban steps. Start with the front, then the back. Otherwise it will be difficult to get the bolts in the front position at there place. There is very limited play. Just saying.
 

Attachments

  • IMG_3799.jpeg
    IMG_3799.jpeg
    1.4 MB · Views: 361

ADVAW8S

Global Grenadier 0044
Lifetime Supporter
Founding Guard
Local time
2:04 PM
Joined
Oct 11, 2021
Messages
1,971
Reaction score
2,872
Location
Kirkland, WA, USA
I purchased also the OEM mirror bracket, but it doesn’t fit.
You need a square connection foot (who is glued on the windshield) The one from the Grenadier is round. Also, this connection should be glued lower on the window, because now the wiring is bouncing to the upper switch panel and you can’t adjust the mirror in height. So indeed I finally strapped the mirror on the existing mirror. Which works just fine. It’s fixed and it has no vibrations.

To remove the mirror you need to turn it counter clockwise. It will pop off, but you need to put some force on it. To reattach, same procedure but clockwise.

I had to drill a hole in the plastic cover where the camera is installed, but all the rest went smoothly without cutting or drilling.
You can all simply de assembled and re assemble with some simple tools. I did run the wiring using the left post at the end to reach the cable from the rear light. Made the connection with the rear light wire (It’s the Purple/orange one) than needed to disassemble the side skirts to reach the B pillar. Then up to the roof to the A pillar. But in between I could just put the wiring behind the rubber seals. Then disassemble the cover at the A pillar (It’s just one screw) to route the power cables down to the fuse box under the steering wheel.
I ordered also the hardwire kit to make the connection in the fuse box.
The connection from the camera to the rear light is just soldered together and then finished with some isolation tape.
@Stu_Barnes maybe talk with wolfbox to see if a adapter for grenadier is in works for permanent mount to the front windshield.
 

Stu_Barnes

Grenadier Owner
Fixer & General Dogsbody
Local time
2:04 PM
Joined
Aug 15, 2021
Messages
2,636
Reaction score
8,785
Location
Los Angeles
@Stu_Barnes maybe talk with wolfbox to see if a adapter for grenadier is in works for permanent mount to the front windshield.
I reached out to them and we have a discount for forum members. I was waiting to get my hands on a grenadier to give them the spec to develop a mount :).
 

Voader - Oudersopzwier

Grenadier Owner
Local time
11:04 PM
Joined
Jun 28, 2023
Messages
301
Reaction score
590
Location
Belgium - Kortrijk
@Stu_Barnes maybe talk with wolfbox to see if a adapter for grenadier is in works for permanent mount to the front windshield.
Well, if I ever have to replace my windshield (It already has a dent from a stone chipping on the German Autobahn). I ask to change this fixation, so I still can use the OEM bracket.
 

Cheshire cat

Grenadier Owner
Lifetime Supporter
Local time
10:04 PM
Joined
May 30, 2022
Messages
1,909
Reaction score
4,556
Location
Cheshire, UK
I reached out to them and we have a discount for forum members. I was waiting to get my hands on a grenadier to give them the spec to develop a mount :).
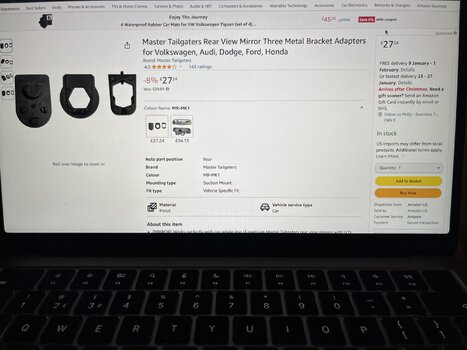
How about this?
I purchased also the OEM mirror bracket, but it doesn’t fit.
You need a square connection foot (who is glued on the windshield) The one from the Grenadier is round. Also, this connection should be glued lower on the window, because now the wiring is bouncing to the upper switch panel and you can’t adjust the mirror in height. So indeed I finally strapped the mirror on the existing mirror. Which works just fine. It’s fixed and it has no vibrations.

To remove the mirror you need to turn it counter clockwise. It will pop off, but you need to put some force on it. To reattach, same procedure but clockwise.

I had to drill a hole in the plastic cover where the camera is installed, but all the rest went smoothly without cutting or drilling.
You can all simply de assembled and re assemble with some simple tools. I did run the wiring using the left post at the end to reach the cable from the rear light. Made the connection with the rear light wire (It’s the Purple/orange one) than needed to disassemble the side skirts to reach the B pillar. Then up to the roof to the A pillar. But in between I could just put the wiring behind the rubber seals. Then disassemble the cover at the A pillar (It’s just one screw) to route the power cables down to the fuse box under the steering wheel.
I ordered also the hardwire kit to make the connection in the fuse box.
The connection from the camera to the rear light is just soldered together and then finished with some isolation tape.
 

Attachments

  • image.jpg
    image.jpg
    3 MB · Views: 305
Last edited:

Cheshire cat

Grenadier Owner
Lifetime Supporter
Local time
10:04 PM
Joined
May 30, 2022
Messages
1,909
Reaction score
4,556
Location
Cheshire, UK
I purchased also the OEM mirror bracket, but it doesn’t fit.
You need a square connection foot (who is glued on the windshield) The one from the Grenadier is round. Also, this connection should be glued lower on the window, because now the wiring is bouncing to the upper switch panel and you can’t adjust the mirror in height. So indeed I finally strapped the mirror on the existing mirror. Which works just fine. It’s fixed and it has no vibrations.

To remove the mirror you need to turn it counter clockwise. It will pop off, but you need to put some force on it. To reattach, same procedure but clockwise.

I had to drill a hole in the plastic cover where the camera is installed, but all the rest went smoothly without cutting or drilling.
You can all simply de assembled and re assemble with some simple tools. I did run the wiring using the left post at the end to reach the cable from the rear light. Made the connection with the rear light wire (It’s the Purple/orange one) than needed to disassemble the side skirts to reach the B pillar. Then up to the roof to the A pillar. But in between I could just put the wiring behind the rubber seals. Then disassemble the cover at the A pillar (It’s just one screw) to route the power cables down to the fuse box under the steering wheel.
I ordered also the hardwire kit to make the connection in the fuse box.
The connection from the camera to the rear light is just soldered together and then finished with some isolation tape.
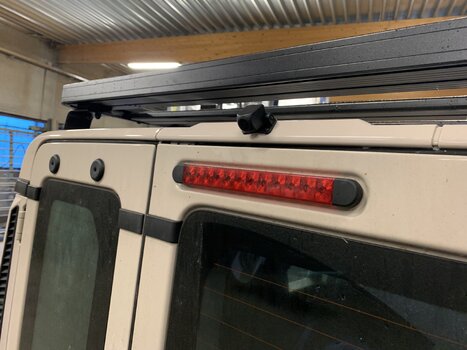
Might need to opt for your rear view camera installation. I fitted mine without any drilling and was thinking how to stick down the wire.
 

Attachments

  • IMG_0204.jpeg
    IMG_0204.jpeg
    3.5 MB · Views: 303

Voader - Oudersopzwier

Grenadier Owner
Local time
11:04 PM
Joined
Jun 28, 2023
Messages
301
Reaction score
590
Location
Belgium - Kortrijk
How about this?

I didn’t drill any holes for wiring in my camera but seeing your work, maybe I should.
The middle one could fit, but still the position is to heigh on the windscreen, so the mirror is tilted down because off the wires on top. But maybe you can mount the mirror upside down, and flip the images on the screen. So the connections are on the underside. Than the mirror can maybe be adjusted in the correct viewing position, need to have a look if that could work.
 

GrenADV

Grenadier Owner
Lifetime Supporter
Local time
5:04 PM
Joined
Dec 24, 2021
Messages
195
Reaction score
410
Location
West Virginia
I purchased also the OEM mirror bracket, but it doesn’t fit.
You need a square connection foot (who is glued on the windshield) The one from the Grenadier is round. Also, this connection should be glued lower on the window, because now the wiring is bouncing to the upper switch panel and you can’t adjust the mirror in height. So indeed I finally strapped the mirror on the existing mirror. Which works just fine. It’s fixed and it has no vibrations.

To remove the mirror you need to turn it counter clockwise. It will pop off, but you need to put some force on it. To reattach, same procedure but clockwise.

I had to drill a hole in the plastic cover where the camera is installed, but all the rest went smoothly without cutting or drilling.
You can all simply de assembled and re assemble with some simple tools. I did run the wiring using the left post at the end to reach the cable from the rear light. Made the connection with the rear light wire (It’s the Purple/orange one) than needed to disassemble the side skirts to reach the B pillar. Then up to the roof to the A pillar. But in between I could just put the wiring behind the rubber seals. Then disassemble the cover at the A pillar (It’s just one screw) to route the power cables down to the fuse box under the steering wheel.
I ordered also the hardwire kit to make the connection in the fuse box.
The connection from the camera to the rear light is just soldered together and then finished with some isolation tape.
Awesome work! Looking great.

@Voader - Oudersopzwier Any chance you could take a quick picture of the back of the camera? I’m interested to see where/how you ran the cable in the hole you drilled. Thanks in advance!
 

GrenADV

Grenadier Owner
Lifetime Supporter
Local time
5:04 PM
Joined
Dec 24, 2021
Messages
195
Reaction score
410
Location
West Virginia
I reached out to them and we have a discount for forum members. I was waiting to get my hands on a grenadier to give them the spec to develop a mount :).
I already purchased a G900 and was playing around with how to remove the existing mirror - and this is what you get:
IMG_3627.jpeg

To remove the existing mirror you have to take a flat head screwdriver and pop off a metal C clamp from around the socket for where the ball (pictured above) is affixed to. Then, give a good tug on the mirror to remove from the ball. From what I can tell - the ball about 5/8” in diameter ball, and I’m having a difficult time figuring out how I can attach to that (ram mounts are all much larger). And, I’m having a hard time figuring out how to remove the plastic. My initial thought is to purchase the following ram mounts and attach them to the wolfbox oem backplate:
IMG_3628.jpeg
 

Cheshire cat

Grenadier Owner
Lifetime Supporter
Local time
10:04 PM
Joined
May 30, 2022
Messages
1,909
Reaction score
4,556
Location
Cheshire, UK
I already purchased a G900 and was playing around with how to remove the existing mirror - and this is what you get:
View attachment 7837517
To remove the existing mirror you have to take a flat head screwdriver and pop off a metal C clamp from around the socket for where the ball (pictured above) is affixed to. Then, give a good tug on the mirror to remove from the ball. From what I can tell - the ball about 5/8” in diameter ball, and I’m having a difficult time figuring out how I can attach to that (ram mounts are all much larger). And, I’m having a hard time figuring out how to remove the plastic. My initial thought is to purchase the following ram mounts and attach them to the wolfbox oem backplate: View attachment 7837518
In UK, we don't have that white box as seen in your pic. I guess that is to do with ADAS?
 

Cheshire cat

Grenadier Owner
Lifetime Supporter
Local time
10:04 PM
Joined
May 30, 2022
Messages
1,909
Reaction score
4,556
Location
Cheshire, UK
The middle one could fit, but still the position is to heigh on the windscreen, so the mirror is tilted down because off the wires on top. But maybe you can mount the mirror upside down, and flip the images on the screen. So the connections are on the underside. Than the mirror can maybe be adjusted in the correct viewing position, need to have a look if that could work.
I was hoping that the adaptor plate and conversion might be shorter than the original mirror and allow the wire to be hidden behind the airbag warning unit. I did try the upside down set up as you have suggested. I didn't like the aesthetics and it also placed the camera in a less advantageous position. I see that most adaptors seem to be around 10 cm's in length. I will need to check how many cm's the original mirror stands off the windscreen.
 

Cheshire cat

Grenadier Owner
Lifetime Supporter
Local time
10:04 PM
Joined
May 30, 2022
Messages
1,909
Reaction score
4,556
Location
Cheshire, UK
Yeah that’s correct - plastic shroud contains the ADAS camera. I can’t figure out how to remove the plastic to see what’s inside.
My dealership have the 3d drawings on CAD. I expect your guys do too. Likely that will show how this piece of trim has been attached. So far, I have not damaged any clips when removing trim. A good sign for you, moving forward.
 
Back
Top Bottom