The Grenadier Forum
Register Now for enhanced site access.
INEOS Agents, Dealers or Commercial vendors please contact admin@theineosforum.com for a commercial account.

Wolf Box

wolfbox_logo_e68cf9b7-062c-40e0-a6b8-6f94291edbd3.png.jpeg

As the leading brand in the automotive electronics market, WOLFBOX has earned its reputation with an unwavering commitment to quality and durability. We strive to deliver cutting-edge electronics with the latest trends and technology to enhance the driving experience and cater to the evolving needs of modern drivers.

At WOLFBOX, we understand that driving is more than just a means of transportation – it's an exploration, an adventure waiting to unfold. WOLFBOX is your trusted companion, encouraging you to venture beyond your comfort zone and discover the extraordinary.


Wolfbox have agreed to give forum members a discount on their products, the discount varies depending on region unfortunatelyf.

They didn't say if this was in addition to any other promotions but its worth a go.


For USA Customers ONLY 18% discount with the coupon code below.

Code

GRENADIERS-USA

WOLFBOX USA Site


For UK Customers and EU 20% discount with the coupon code below.

Code

GRENADIERS-UK

WOLFBOX UK Site


For AU and NZ Customers 20% discount with the coupon code below

Code

GRENADIERS-AU​


WOLFBOX AU Site


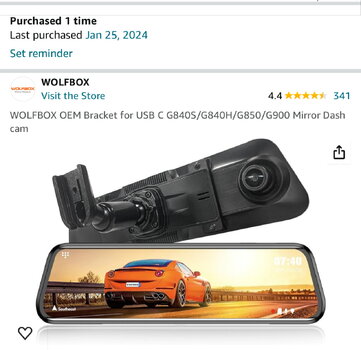
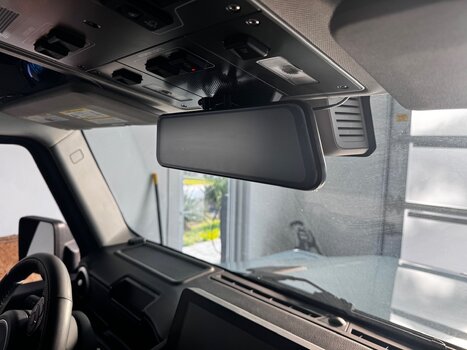
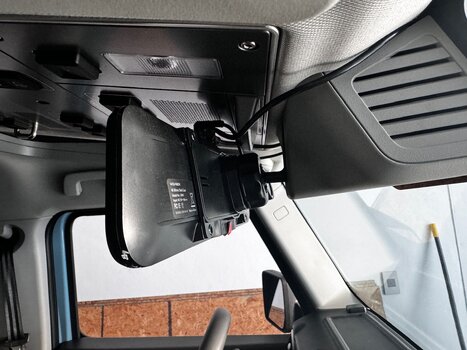
WOLFBOX G850 Rearview Mirror Backup Camera Dash Cam Smart Mirror​

wolfbox-g850-rearview-mirror-backup-camera-dash-cam-877069.jpg
The smart way to record your driving experience with a choice of G850 4K mirror rearview mirror backup camera.


Please note, the forum discount only applies to orders placed directly with WOLFBOX and not via 3rd parties.
The forum may earn a small commission from any sales generated by the links above or by using the coupon code.
 
Last edited:

Korg

Grenadier Owner
Lifetime Supporter
Local time
9:45 AM
Joined
Dec 25, 2022
Messages
111
Reaction score
122
Location
Warrawee NSW, Australia
Installation guide for Wolfbox (or any reversing camera or dashcam) attached.
Note that the red lead to reversing camera needs to be extended and that you will most likely replace the power lead with a 2m right angled USB lead.
1716270757572.jpg
 

Attachments

  • Wolfbox Install - Grenadier V1.pdf
    2.1 MB · Views: 204
Last edited:

offender110

Grenadier Owner
Local time
6:45 PM
Joined
Jun 13, 2023
Messages
56
Reaction score
106
Location
Seattle
For those with the 67 Design mount, how did you remove the stock mirror from the ball joint? Is it simply just pull it hard as the solution? Asking before I break something.

On a separate note, I was able to successfully snake the camera wire through accordion loom at the base of the rear door. I can provide some tips there. Really great tips from @Korg above!
 
Last edited:
Local time
6:45 PM
Joined
Jan 16, 2024
Messages
70
Reaction score
211
Location
Carlsbad, CA, USA
For those with the 67 Design mount, how did you remove the stock mirror from the ball joint? Is it simply just pull it hard as the solution? Asking before I break something.

On a separate note, I was able to successfully snake the camera wire through accordion loom at the base of the rear door. I can provide some tips there. Really great tips from @Korg above!
Tips on snaking the camera wire through the loom at bottom of the door would be appreciated. I’d like to clean up the wiring on mine, and I didn’t want to mess with that loom. Thank you in advance.
 

Jean Mercier

GG#920
Grenadier Owner
Lifetime Supporter
Local time
3:45 AM
Joined
Sep 10, 2022
Messages
2,578
Reaction score
9,205
Location
Sint-Martens-Latem, Belgium
Tips on snaking the camera wire through the loom at bottom of the door would be appreciated. I’d like to clean up the wiring on mine, and I didn’t want to mess with that loom. Thank you in advance.
My explanation here:

But I stole some ideas from other people.
 

FlyersFan76

Grenadier Owner
Lifetime Supporter
Local time
9:45 PM
Joined
Jan 7, 2023
Messages
375
Reaction score
445
Location
West Chester, Pennsylvania, USA
For those with the 67 Design mount, how did you remove the stock mirror from the ball joint? Is it simply just pull it hard as the solution? Asking before I break something.

On a separate note, I was able to successfully snake the camera wire through accordion loom at the base of the rear door. I can provide some tips there. Really great tips from @Korg above!

There is a metal retainer ring on the mirror. Marked in Orange. Pry it out towards the ball and you should then be able to remove the mirror. There is some space to put a plastic pry tool or slotted screw driver.


20240322_132705349_iOS-edit.jpg
 

Clark Kent

Grenadier Owner
Lifetime Supporter
Local time
11:45 AM
Joined
Jul 26, 2022
Messages
609
Reaction score
1,540
Location
Toowoomba QLD, Australia
I may have justed wasted 30 bucks, but I have ordered this arm from Aliexpress to see how close it is to a solution. It's the price Wolfbox will charge anyway.
The mount plate hole spacing is different at 30 x 46mm but I'm working on a hunch that the head can be swapped out for the Wolfbox head (30 x 30mm spacing).

Will advise...

View attachment 7855380
I've cracked the code on a mirror mount arm for MY23 RHD vehicles (not NA, not ADAS). It cost me four different arms as a trial but I finally found the solution. The recommended arm places the mirror at a good height for use and leaves plenty of room for the cables.

Dashcam/mirror arm No 11, available on Aliexpress here, is a drop in replacement for the D-tab arm supplied by Wolfbox in their OEM mount kit. You will still need the Wolfbox arm kit so you have the backing plate that screws onto the mirror. Once you have fitted the backing plate to the mirror, swap out the Wolfbox D-tab arm for arm #11. The ball head is the same size.

As noted earlier in this thread the screws that come in the Wolfbox arm kit are too long so the ball head is loose on the backing plate (disassembled pic for reference). It's the same problem with arm #11. Your choice is to either shorten the screws about 1.5mm (1/16"), or do as I did and make a packer to sit between the head and the backing plate. I used a piece of heavy card that will compress slightly as a vibration damper. Rubber sheet (e.g. inner tube) or silicone sheet would also work well. Again, this is a fault in the kit supplied by Wolfbox and nothing to do with the swapped arm.

Arm #11 is two-piece. Remove the #2 Phillips joining screw and attach the arm section to the windscreen screen. Attach the ball head and arm section to the mirror. Reassemble the two sections on the windscreen then install the screw from behind. This step is necessary because the arm has to rotate to engage the stud on the windscreen and the mirror is too long to do this as a complete assembly.
To tighten the screw use a stubby offset #2 Phillips, or a #2 bit and 1/4” ratchet wrench as I did (pic).

To remove the factory mirror wrap a leather riggers glove or similar heavy material around the arm to prevent damage, then grip it firmly with a set of multi-grips (slip-jaws, cobra pliers, etc.) and twist counter clockwise. The factory mirror arm is tight but take your time and grip firmly and it will come off. I put a few dabs of grease on the windscreen stud before fitting the new arm to make the job easier next time (hopefully not necessary..).

@Stu_Barnes If you communicate this arm info to Wolfbox they could package it in place of the D-tab arm as a MY23 Grenadier kit. They also need to supply a packer/gasket or shorter screws as noted.

@nishan
@Cheshire cat
 

Attachments

  • PXL_20240602_032614116.jpg
    PXL_20240602_032614116.jpg
    2.6 MB · Views: 131
  • PXL_20240602_032539837.jpg
    PXL_20240602_032539837.jpg
    2.3 MB · Views: 123
  • PXL_20240602_032414277.jpg
    PXL_20240602_032414277.jpg
    1.9 MB · Views: 120
  • PXL_20240602_031713397.MP.jpg
    PXL_20240602_031713397.MP.jpg
    5.3 MB · Views: 119
  • PXL_20240602_031313004.jpg
    PXL_20240602_031313004.jpg
    2.5 MB · Views: 116
  • PXL_20240602_031258741.jpg
    PXL_20240602_031258741.jpg
    2.4 MB · Views: 113
  • PXL_20240602_030504311.jpg
    PXL_20240602_030504311.jpg
    3 MB · Views: 164
Last edited:

Korg

Grenadier Owner
Lifetime Supporter
Local time
9:45 AM
Joined
Dec 25, 2022
Messages
111
Reaction score
122
Location
Warrawee NSW, Australia
I've cracked the code on a mirror mount arm for MY23 RHD vehicles (not NA, not ADAS). It cost me four different arms as a trial but I finally found the solution. The recommended arm places the mirror at a good height for use and leaves plenty of room for the cables.

Dashcam/mirror arm No 11, available on Aliexpress here, is a drop in replacement for the D-tab arm supplied by Wolfbox in their OEM mount kit. You will still need the Wolfbox arm kit so you have the backing plate that screws onto the mirror. Once you have fitted the backing plate to the mirror, swap out the Wolfbox D-tab arm for arm #11. The ball head is the same size.

As noted earlier in this thread the screws that come in the Wolfbox arm kit are too long so the ball head is loose on the backing plate (disassembled pic for reference). It's the same problem with arm #11. Your choice is to either shorten the screws about 1.5mm (1/16"), or do as I did and make a packer to sit between the head and the backing plate. I used a piece of heavy card that will compress slightly as a vibration damper. Rubber sheet (e.g. inner tube) or silicone sheet would also work well. Again, this is a fault in the kit supplied by Wolfbox and nothing to do with the swapped arm.

Arm #11 is two-piece. Remove the #2 Phillips joining screw and attach the arm section to the windscreen screen. Attach the ball head and arm section to the mirror. Reassemble the two sections on the windscreen then install the screw from behind. This step is necessary because the arm has to rotate to engage the stud on the windscreen and the mirror is too long to do this as a complete assembly.
To tighten the screw use a stubby offset #2 Phillips, or a #2 bit and 1/4” ratchet wrench as I did (pic).

To remove the factory mirror wrap a leather riggers glove or similar heavy material around the arm to prevent damage, then grip it firmly with a set of multi-grips (slip-jaws, cobra pliers, etc.) and twist counter clockwise. The factory mirror arm is tight but take your time and grip firmly and it will come off. I put a few dabs of grease on the windscreen stud before fitting the new arm to make the job easier next time (hopefully not necessary..).

@Stu_Barnes If you communicate this arm info to Wolfbox they could package it in place of the D-tab arm as a MY23 Grenadier kit. They also need to supply a packer/gasket or shorter screws as
Well done!
 

DaBull

Grenadier Owner
Lifetime Supporter
Local time
6:45 PM
Joined
Dec 28, 2022
Messages
1,410
Reaction score
2,672
Location
California
I've cracked the code on a mirror mount arm for MY23 RHD vehicles (not NA, not ADAS). It cost me four different arms as a trial but I finally found the solution. The recommended arm places the mirror at a good height for use and leaves plenty of room for the cables.

Dashcam/mirror arm No 11, available on Aliexpress here, is a drop in replacement for the D-tab arm supplied by Wolfbox in their OEM mount kit. You will still need the Wolfbox arm kit so you have the backing plate that screws onto the mirror. Once you have fitted the backing plate to the mirror, swap out the Wolfbox D-tab arm for arm #11. The ball head is the same size.

As noted earlier in this thread the screws that come in the Wolfbox arm kit are too long so the ball head is loose on the backing plate (disassembled pic for reference). It's the same problem with arm #11. Your choice is to either shorten the screws about 1.5mm (1/16"), or do as I did and make a packer to sit between the head and the backing plate. I used a piece of heavy card that will compress slightly as a vibration damper. Rubber sheet (e.g. inner tube) or silicone sheet would also work well. Again, this is a fault in the kit supplied by Wolfbox and nothing to do with the swapped arm.

Arm #11 is two-piece. Remove the #2 Phillips joining screw and attach the arm section to the windscreen screen. Attach the ball head and arm section to the mirror. Reassemble the two sections on the windscreen then install the screw from behind. This step is necessary because the arm has to rotate to engage the stud on the windscreen and the mirror is too long to do this as a complete assembly.
To tighten the screw use a stubby offset #2 Phillips, or a #2 bit and 1/4” ratchet wrench as I did (pic).

To remove the factory mirror wrap a leather riggers glove or similar heavy material around the arm to prevent damage, then grip it firmly with a set of multi-grips (slip-jaws, cobra pliers, etc.) and twist counter clockwise. The factory mirror arm is tight but take your time and grip firmly and it will come off. I put a few dabs of grease on the windscreen stud before fitting the new arm to make the job easier next time (hopefully not necessary..).

@Stu_Barnes If you communicate this arm info to Wolfbox they could package it in place of the D-tab arm as a MY23 Grenadier kit. They also need to supply a packer/gasket or shorter screws as noted.

@nishan
@Cheshire cat
Hi Clark Kent, Thanks for posting this. Nice work!
Couple questions.
1 - Are you seeing any vibrations in the mirror?
2 - Do you see any reason this would not work on NA vehicles?
DaBull
 

AngusMacG

Grenadier Owner
Lifetime Supporter
Local time
9:45 PM
Joined
Nov 6, 2023
Messages
654
Reaction score
949
Location
Massachusetts, USA
Hi Clark Kent, Thanks for posting this. Nice work!
Couple questions.
1 - Are you seeing any vibrations in the mirror?
2 - Do you see any reason this would not work on NA vehicles?
DaBull
Pretty sure it wont work for US as we have the forward facing camera right there
 

Clark Kent

Grenadier Owner
Lifetime Supporter
Local time
11:45 AM
Joined
Jul 26, 2022
Messages
609
Reaction score
1,540
Location
Toowoomba QLD, Australia
Hi Clark Kent, Thanks for posting this. Nice work!
Couple questions.
1 - Are you seeing any vibrations in the mirror?
2 - Do you see any reason this would not work on NA vehicles?
DaBull
Hi @DaBull. Thank you.

First drive with the new arm today. There is some induced vibration in the mirror. I think it's due to the plastic backing plate supplied by Wolfbox being too thin for this application, and the G900 mirror is quite heavy. I would like to see Wolfbox offer a stiffer plate with rubber isolation for heavy duty 4WD applications. I have a spare Wolfbox OEM kit as part of my fitment trials so I can hack that to see how it might be improved.
I haven't tried the G900 over the factory mirror using the rubber bands. I suspect it might have slightly less vibration because the factory mirror would act as a stiffer arm.

As @AngusMacG noted the MY23 ROW uses a different mirror and arm because we don't currently have ADAS like all NA vehicles have. If the 67 Designs mount is not satisfactory then @Stu_Barnes noted earlier in this thread that Wolfbox were happy to produce a different mount.
 
Last edited:

Tom109

Grenadier Owner
Local time
9:45 PM
Joined
Jun 3, 2023
Messages
1,445
Reaction score
1,983
Location
New Jersey, USA
As @AngusMacG noted the MY23 ROW uses a different mirror and arm because we don't currently have ADAS like all NA vehicles have. If the 67 Designs mount is not satisfactory then @Stu_Barnes noted earlier in this thread that Wolfbox were happy to produce a different mount.
I have not yet installed my Wolfbox, partially due to time constraints but also due to minor vibration I can see in the stock MY24 mirror arm. If I'm going to install it I want to make sure it is vibration-free.
 

Asnes

Grenadier Owner
Lifetime Supporter
Local time
9:45 PM
Joined
Dec 10, 2022
Messages
305
Reaction score
554
Location
Windermere, FL, USA
I have a stock mirror arm with ADAS. I used the wolfbox backing plate plus a ball mount shim from eBay and works perfect. No vibration. Sits high and close to the airbag indicator for maximum visibility.

Prior to the fixed mount I used the rubber straps and secured to the OEM mirror. That worked well too / no vibration.
 

Attachments

  • IMG_1805.jpeg
    IMG_1805.jpeg
    270.5 KB · Views: 134
  • IMG_1804.jpeg
    IMG_1804.jpeg
    370.6 KB · Views: 141
Last edited:
Local time
9:45 PM
Joined
Aug 28, 2023
Messages
15
Reaction score
8
Location
Florida, USA
Ultimately, I ended up using the two screws that came with the kit and pre-drilled small holes into the plastic trim and secured the camera mechanically. If I ever need to remove the camera (unlikely) I can prboably patch the hole with some grey toothpaste! ;) BTW, I bought and installed the Wolfbox anti-glare film on my G900...only drove the truck once since then, but the reduction of reflections was very noticeable and a huge improvement. I didnt feel that the film degraded the clarity of the display much...or at least not nearly as bad as I feared. So far I give it a thumbs up.
Does the film go on the window or the camera lens.
 

DaBull

Grenadier Owner
Lifetime Supporter
Local time
6:45 PM
Joined
Dec 28, 2022
Messages
1,410
Reaction score
2,672
Location
California
I have a stock mirror arm with ADAS. I used the wolfbox backing plate plus a ball mount shim from eBay and works perfect. No vibration. Sits high and close to the airbag indicator for maximum visibility.

Prior to the fixed mount I used the rubber straps and secured to the OEM mirror. That worked well too / no vibration.
Hi Asnes,
Which ball mount shim did you use on ebay?
DaBull
 

nickelnoff

Grenadier Owner
Lifetime Supporter
Local time
3:45 AM
Joined
Jul 19, 2022
Messages
129
Reaction score
241
Location
Switzerland
First drive with the new arm today. There is some induced vibration in the mirror. I think it's due to the plastic backing plate supplied by Wolfbox being too thin for this application, and the G900 mirror is quite heavy.
Nice one @Clark Kent Exciting progress !

Thinking of getting one of these G900 unit’s and and had a few questions. When you say the plastic back plate is too thin do you mean the OEM Bracket is flimsy or the actual G900 build ? Also given you’ve a MY23 RHD do you think the same would be do-able on MY23 LHD ? Also is the 33 Feet Rear Camera Extension Cable needed to reach the rear view camera position? Oh and are the mentioned rubber bands coming in the main G900 kit ?
 

Asnes

Grenadier Owner
Lifetime Supporter
Local time
9:45 PM
Joined
Dec 10, 2022
Messages
305
Reaction score
554
Location
Windermere, FL, USA

Attachments

  • IMG_1807.jpeg
    IMG_1807.jpeg
    160.2 KB · Views: 108
  • IMG_1806.jpeg
    IMG_1806.jpeg
    223.4 KB · Views: 83

Clark Kent

Grenadier Owner
Lifetime Supporter
Local time
11:45 AM
Joined
Jul 26, 2022
Messages
609
Reaction score
1,540
Location
Toowoomba QLD, Australia
Nice one @Clark Kent Exciting progress !

Thinking of getting one of these G900 unit’s and and had a few questions. When you say the plastic back plate is too thin do you mean the OEM Bracket is flimsy or the actual G900 build ? Also given you’ve a MY23 RHD do you think the same would be do-able on MY23 LHD ? Also is the 33 Feet Rear Camera Extension Cable needed to reach the rear view camera position? Oh and are the mentioned rubber bands coming in the main G900 kit ?
Yep, the backing plate is part of the OEM kit. The only issue I have with the mirror construction is that the power button rattles due to vibration. That's fixable.
If you have the same bare factory arm as MY23 RHD and don't have ADAS then this alternative arm should work for you also.

The rubber bands are part of the OEM kit.

I haven't fitted the rear camera yet but plenty have done this. We'll both need to search around a bit for that info.
 

Asnes

Grenadier Owner
Lifetime Supporter
Local time
9:45 PM
Joined
Dec 10, 2022
Messages
305
Reaction score
554
Location
Windermere, FL, USA
Yep, the backing plate is part of the OEM kit. The only issue I have with the mirror construction is that the power button rattles due to vibration. That's fixable.
If you have the same bare factory arm as MY23 RHD and don't have ADAS then this alternative arm should work for you also.

The rubber bands are part of the OEM kit.

I haven't fitted the rear camera yet but plenty have done this. We'll both need to search around a bit for that info.
The button sure does rattle! Wolfbox actually sent me a replacement unit, it rattled too!

I put a small piece of thick 3M tape on it, and that has worked perfectly :)
 
Back
Top Bottom