Saw my first gren todey. Went to see my son play cricket in stamford driving my one and there, right in the middle of town, was my first sighting of another actual Gren. Was silver and had the ladder but I was following it.. After two months and 2000 miles..
The Grenadier Forum
Register a free account today to become a member! Once signed in, you'll be able to contribute to the community by adding your own topics, posts, and connect with other members through your own private inbox! INEOS Agents, Dealers or Commercial vendors please contact admin@theineosforum.com for a commercial account.
You are using an out of date browser. It may not display this or other websites correctly.
You should upgrade or use an alternative browser.
You should upgrade or use an alternative browser.
What did you do with your Grenadier today?
- Thread starter Stu_Barnes
- Start date
-
- Tags
- grenadier
- Local time
- 12:42 PM
- Joined
- Aug 24, 2022
- Messages
- 2,450
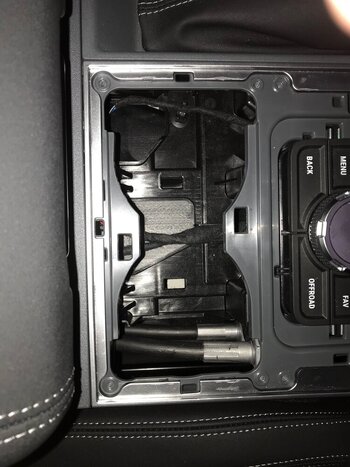
thanks for these @rovie you are doing sterling work. Looks like there may be some space under the cupholder area, did you get a hand in under? What was your impression?@AnD3rew
LHD, Trialmaster, Diesel
Today I continued the disassembly of various trim.
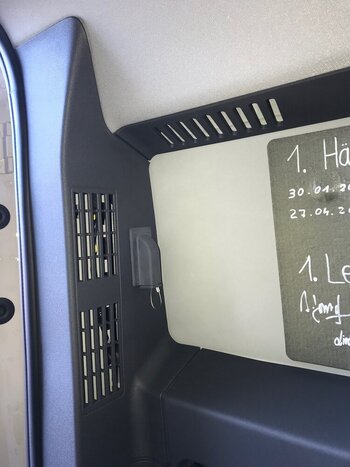
Among other things, the panels and box on the centre tunnel as well as the trim on both sides. Likewise near the glove box. Especially the box for the beverage cups and the two other parts cannot be removed by loosening the screws alone. Here, too, there are clamps that hold the box in place.
fantastic work thanks, can you easily get to the back of the usb charge ports in the cubby box (via the removed cup holders) and see what connectors they use?@AnD3rew
LHD, Trialmaster, Diesel
Today I continued the disassembly of various trim.
Among other things, the panels and box on the centre tunnel as well as the trim on both sides. Likewise near the glove box. Especially the box for the beverage cups and the two other parts cannot be removed by loosening the screws alone. Here, too, there are clamps that hold the box in place.
Yeah, it would be good to have the option to install a more full width/deeper tray instead of cupholders… is there room , or are the cables seen in your photo prominent?thanks for these @rovie you are doing sterling work. Looks like there may be some space under the cupholder area, did you get a hand in under? What was your impression?
- Local time
- 10:42 PM
- Joined
- May 19, 2022
- Messages
- 2,224
@Krabby@rovie
Well done - keep the pics coming!
Did you break anything in the process? That's my biggest fear when removing trip - breaking off a tab. Clips can be replaced but broken plastic is bad juju.
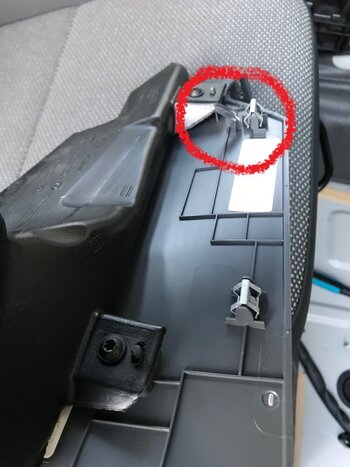
No, I didn't break anything off, even though it was sometimes very difficult to loosen the parts. Especially the black trim strips on the glove compartment.
However, once again I discovered assembly errors by Hambach, which INEOS will have on their desk by tomorrow morning at the latest.
On both sides of the transmission tunnel, the plastic insertion pins that are cast onto the trim were not positioned correctly in the holes. As a result, they were completely bent when they snapped into place.
Attachments
Great job. Thank you! As before I would suggest to post such content in separate threads in the build thread section. Who knows if we ever get the promised workshop manual and if not, that thread could serve as our own manual with things sorted by subject. Just a suggestion. I appreciate your work.@AnD3rew
LHD, Trialmaster, Diesel
Today I continued the disassembly of various trim.
Among other things, the panels and box on the centre tunnel as well as the trim on both sides. Likewise near the glove box. Especially the box for the beverage cups and the two other parts cannot be removed by loosening the screws alone. Here, too, there are clamps that hold the box in place.
- Local time
- 10:42 PM
- Joined
- May 19, 2022
- Messages
- 2,224
@AnD3rewthanks for these @rovie you are doing sterling work. Looks like there may be some space under the cupholder area, did you get a hand in under? What was your impression?
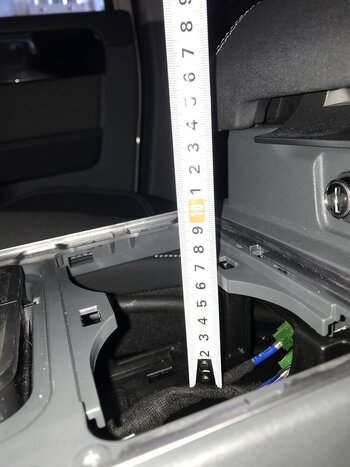
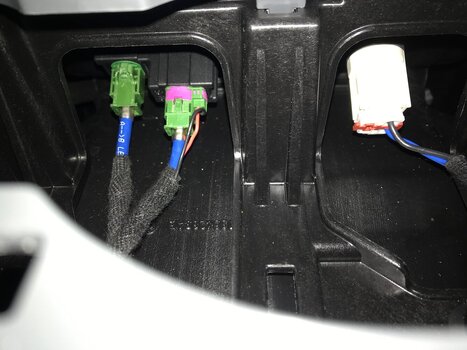
The length and width roughly correspond to the cover with the cup holders. The depth is determined by the cables for the sockets, it is approx. 6 cm. The cables are very short and do not allow any movement.
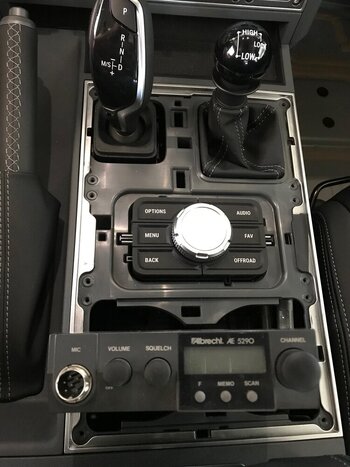
My radio fits in, but sticks out a long way because it is very deep. There are much smaller radios from Midland.
I don't know what I'm going to do yet.
Attachments
- Local time
- 10:42 PM
- Joined
- May 19, 2022
- Messages
- 2,224
@bakepl Here you go.fantastic work thanks, can you easily get to the back of the usb charge ports in the cubby box (via the removed cup holders) and see what connectors they use?
Attachments
- Local time
- 10:42 PM
- Joined
- May 19, 2022
- Messages
- 2,224
@Stu_Barnes Yes I take the hint from @muxmax. Where would you file such documents? When I read through your guide, it doesn't exactly fit. In which thread with which heading should I do this? I ask for your help. Thanks.Great job. Thank you! As before I would suggest to post such content in separate threads in the build thread section. Who knows if we ever get the promised workshop manual and if not, that thread could serve as our own manual with things sorted by subject. Just a suggestion. I appreciate your work.
- Local time
- 12:42 PM
- Joined
- Aug 24, 2022
- Messages
- 2,450
Thanks for that, looks like it’s a no go for my idea.@AnD3rew
The length and width roughly correspond to the cover with the cup holders. The depth is determined by the cables for the sockets, it is approx. 6 cm. The cables are very short and do not allow any movement.
My radio fits in, but sticks out a long way because it is very deep. There are much smaller radios from Midland.
I don't know what I'm going to do yet.
@Stu_Barnes Yes I take the hint from @muxmax. Where would you file such documents? When I read through your guide, it doesn't exactly fit. In which thread with which heading should I do this? I ask for your help. Thanks.
This would be the place for general upgrades and modifications.
If you find a way to re route a cable for the hand brake for instance, then that would go in the tech section concerning brakes. The main thing is that threads are clearly named with their intended content.
Today I decided to fit an ARB compressor (single) into the space by the auxiliary battery and connect it to the Ineos fitted wiring points in that same place.
If I was doing it again, I may take the rear seat out. I didn’t, and managed to work around the plastic panels under the seat, but it was fiddly and awkward. Probably took longer.
First I made up a bracket to hold the compressor. Two small pieces of 30mm box and a small piece of 3mm plate (I had these bits in the shed - they are certainly strong enough). I used the box to fit over the four existing 8mm studs in the floorpan and then fixed the plate to the box using rivnuts. I inserted some strips of soundproofing between the box and the floorpan, and then between the box and the plate. This has really damped out any vibration from the pump.


I connected the wiring loom using solder and heatshrink. I had intended to use Deutsch DTP connectors, but the cable was too thick. Do this before you put the pump in place as there is no room when it’s in position.
I decided to have the switch and the air outlet in the rear. There’s plenty of space behind the right hand rear panel to run the loom and the air hose.
The one compromise I made was to drill a hole in the plastic panel under the seat to get the air hose and loom out. If you took the seat out, you could avoid this. I decided to compromise, because once the rear seat squab is in place, you have to bend down and look really close to see the hose.


Overall I’m pleased with the outcome.
As I was in there with the rear panel off, I thought it would be rude not to fit a couple of extra 12v sockets. I managed to run a cable all the way to the front footwell without much problem. The sad thing is, I then couldn’t find the outlet wires on the right hand side. I’ve checked other helpful threads from @Jean Mercier and @rovie, but mine are not easy to spot.
That was a bit frustrating!
If I was doing it again, I may take the rear seat out. I didn’t, and managed to work around the plastic panels under the seat, but it was fiddly and awkward. Probably took longer.
First I made up a bracket to hold the compressor. Two small pieces of 30mm box and a small piece of 3mm plate (I had these bits in the shed - they are certainly strong enough). I used the box to fit over the four existing 8mm studs in the floorpan and then fixed the plate to the box using rivnuts. I inserted some strips of soundproofing between the box and the floorpan, and then between the box and the plate. This has really damped out any vibration from the pump.
I connected the wiring loom using solder and heatshrink. I had intended to use Deutsch DTP connectors, but the cable was too thick. Do this before you put the pump in place as there is no room when it’s in position.
I decided to have the switch and the air outlet in the rear. There’s plenty of space behind the right hand rear panel to run the loom and the air hose.
The one compromise I made was to drill a hole in the plastic panel under the seat to get the air hose and loom out. If you took the seat out, you could avoid this. I decided to compromise, because once the rear seat squab is in place, you have to bend down and look really close to see the hose.
Overall I’m pleased with the outcome.
As I was in there with the rear panel off, I thought it would be rude not to fit a couple of extra 12v sockets. I managed to run a cable all the way to the front footwell without much problem. The sad thing is, I then couldn’t find the outlet wires on the right hand side. I’ve checked other helpful threads from @Jean Mercier and @rovie, but mine are not easy to spot.
That was a bit frustrating!
Last edited:
- Local time
- 10:42 PM
- Joined
- May 19, 2022
- Messages
- 2,224
Good work, @Highwayman. We could put our grenadiers side by side and work in parallel. We'd help each other out. Did you find the wire ends in the footwell? They're partially taped behind the thick wiring harness.Today I decided to fit an ARB compressor (single) into the space by the auxiliary battery and connect it to the Ineos fitted wiring points in that same place.
If I was doing it again, I may take the rear seat out. I didn’t, and managed to work around the plastic panels under the seat, but it was fiddly and awkward. Probably took longer.
First I made up a bracket to hold the compressor. Two small pieces of 30mm box and a small piece of 3mm plate (I had these bits in the shed - they are certainly strong enough). I used the box to fit over the four existing 8mm studs in the floorpan and then fixed the plate to the box using rivnuts. I inserted some strips of soundproofing between the box and the floorpan, and then between the box and the plate. This has really damped out any vibration from the pump.
View attachment 7817903
View attachment 7817904
I connected the wiring loom using solder and heatshrink. I had intended to use Deutsch DTP connectors, but the cable was too thick. Do this before you put the pump in place as there is no room when it’s in position.
I decided to have the switch and the air outlet in the rear. There’s plenty of space behind the right hand rear panel to run the loom and the air hose.
The one compromise I made was to drill a hole in the plastic panel under the seat to get the air hose and loom out. If you took the seat out, you could avoid this. I decided to compromise, because once the rear seat is in place, you have to bend down and look really close to see the hose.
View attachment 7817907
View attachment 7817908
View attachment 7817906
View attachment 7817905
View attachment 7817909
Overall I’m pleased with the outcome.
As I was in there with the rear panel off, I thought it would be rude not to fit a couple of extra 12v sockets. I managed to run a cable all the way to the front footwell without much problem. The sad thing is, I then couldn’t find the outlet wires on the right hand side. I’ve checked other helpful threads from @Jean Mercier and @rovie, but mine are not easy to spot.
That was a bit frustrating!
Thanks @rovie. Sadly I’ve not found the footwell wires. I had a tracker and immobiliser fitted in the first week of ownership and I suspect the fitter has re-taped up all the wires together. I started to take the insulation off the thick wiring harness. I’ll have another go and see if I can find the elusive connection points.Good work, @Highwayman. We could put our grenadiers side by side and work in parallel. We'd help each other out. Did you find the wire ends in the footwell? They're partially taped behind the thick wiring harness.
Thanks for the help
Strange, but you should look for an electrical wire, attached with ordinary black isolation tape, the cable in a vertical position, with two semi transparent endings.Today I decided to fit an ARB compressor (single) into the space by the auxiliary battery and connect it to the Ineos fitted wiring points in that same place.
If I was doing it again, I may take the rear seat out. I didn’t, and managed to work around the plastic panels under the seat, but it was fiddly and awkward. Probably took longer.
First I made up a bracket to hold the compressor. Two small pieces of 30mm box and a small piece of 3mm plate (I had these bits in the shed - they are certainly strong enough). I used the box to fit over the four existing 8mm studs in the floorpan and then fixed the plate to the box using rivnuts. I inserted some strips of soundproofing between the box and the floorpan, and then between the box and the plate. This has really damped out any vibration from the pump.
View attachment 7817903
View attachment 7817904
I connected the wiring loom using solder and heatshrink. I had intended to use Deutsch DTP connectors, but the cable was too thick. Do this before you put the pump in place as there is no room when it’s in position.
I decided to have the switch and the air outlet in the rear. There’s plenty of space behind the right hand rear panel to run the loom and the air hose.
The one compromise I made was to drill a hole in the plastic panel under the seat to get the air hose and loom out. If you took the seat out, you could avoid this. I decided to compromise, because once the rear seat is in place, you have to bend The sad thing is, I then couldn’t find the outlet wires on the right hand side. I’ve checked other helpful threads from @Jean Mercier and @rovie
Of course you have to remove the footwell sidewall before being able to see the wiring.
- Local time
- 10:42 PM
- Joined
- May 19, 2022
- Messages
- 2,224
@Highwayman Send a photo of the entire open side of the footwell. Maybe @Jean Mercier or I can find something and mark it.Thanks @rovie. Sadly I’ve not found the footwell wires. I had a tracker and immobiliser fitted in the first week of ownership and I suspect the fitter has re-taped up all the wires together. I started to take the insulation off the thick wiring harness. I’ll have another go and see if I can find the elusive connection points.
Thanks for the help
Thank You for the help. I’ll take it apart again tomorrow and send it over.@Highwayman Send a photo of the entire open side of the footwell. Maybe @Jean Mercier or I can find something and mark it.
- Local time
- 10:42 PM
- Joined
- May 19, 2022
- Messages
- 2,224
Grenadier Model: Trialmaster, LHD, Diesel
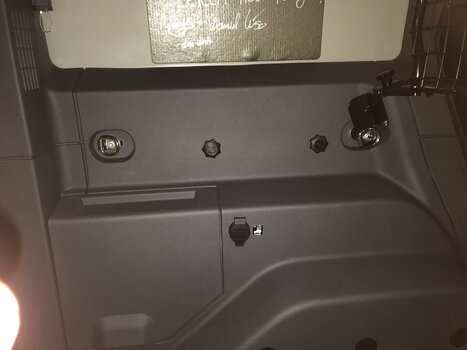
Today I installed a socket for a Deutsch plug on the left-hand trim panel in the boot. It is intended for use with Deutsch DT (not DTP!). I pulled the wires from the left front footwell under the panels to the rear. I am in the process of putting an identical socket in the right front footwell (as soon as I have this, I will send photos again). This way I can switch these sockets via the switches on the ceiling.
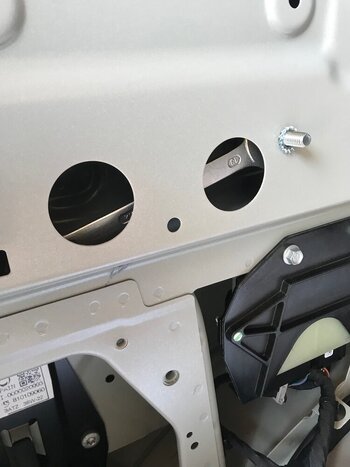
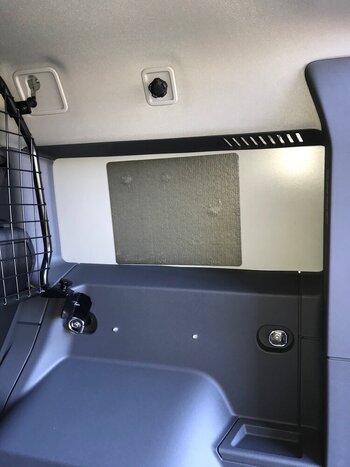
When I dismantled the side panels in the boot, I noticed that there are M8 nuts welded on there, which are hidden by the trim. I took the opportunity to fit M8 threaded sleeves. At this point I drilled a hole in the fairing. This way I can attach M8 screws or ring eyes at any time. You can see the sleeves once in the photos. On the other side I screwed in screws with plastic handles once.
Such welded-on nuts can also be found behind the covers on the top. I have also mounted M8 threaded bolts there, which I have covered with grip screws.
I plan to screw stowage boxes into the recesses on both sides. But first I have to think about what that should look like.
Until the next time.
Attachments
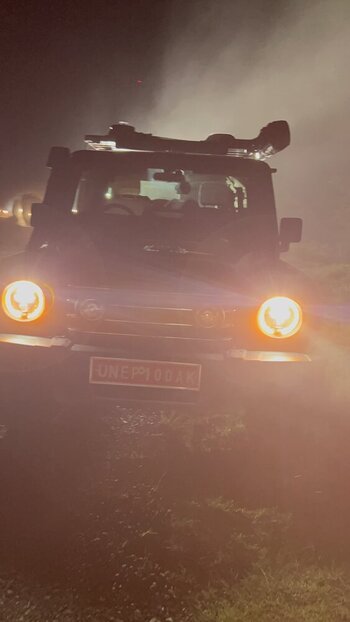
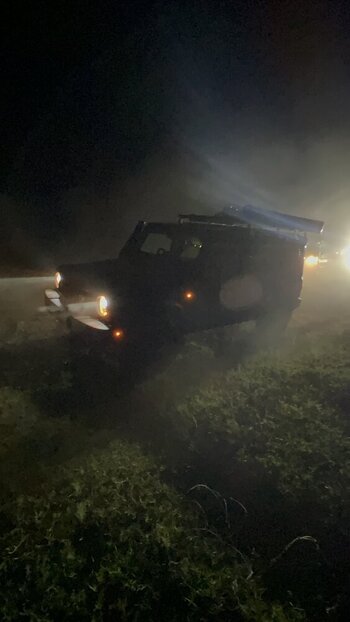
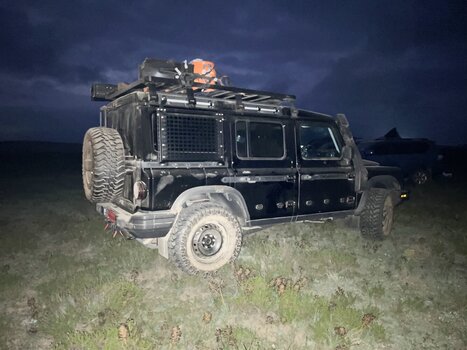
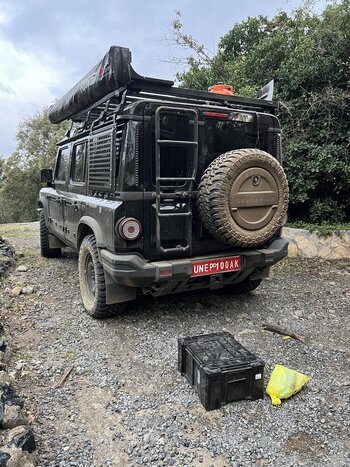
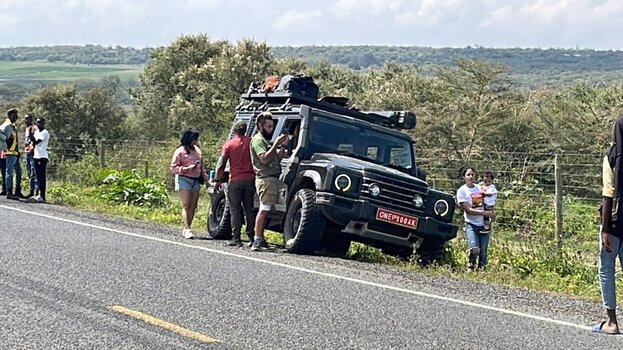
I just spent 4 days in the bush, driving 6 WRC rally routes in my Grenadier. Done it every year for the past three: the prior two years in my 200 series and this year in my Grenadier.
It involves single lane Kenyan tarmac (stressful) to get to the stages, corrugation (lava rock) in-between stages and then a mix of mud, rock, savannah and “fesh fesh” (deep dust) within the stages. It’s extremely rough.
I can honestly say I made the right choice with this vehicle. It felt invincible. Absolutely unbelievable in the bush- steady, confident- zero issues whatsoever. I was pleasantly surprised on tarmac too. Once you get used to the steering and how it handles, you’re far more confident in its ability.
I must admit, at first I was quite afraid of high speed tarmac driving on narrow winding roads… but after this trip I’ve learnt how to deal with the beast and trust it! You learn that when you point and shoot, it just goes. You learn not to overcorrect, which is one of the reasons I was timid. There’s a natural tendency to overcorrect when the steering is more loose than you’re used to. But the grenadier felt nimble and planted when I pushed it and trusted it more.
The acceleration is fantastic, especially for single lane tarmac highways with more trucks than you can count. And then there’s the brakes- before I left the city, I didn’t really know just how powerful the braking system is because city driving is mostly tempered and progressive braking. But on this trip, emergency braking was critical off-road and on. And the 3.5 ton machine literally comes to a halt when you need it to, and is ready to take off again, faster than you can push your foot down!
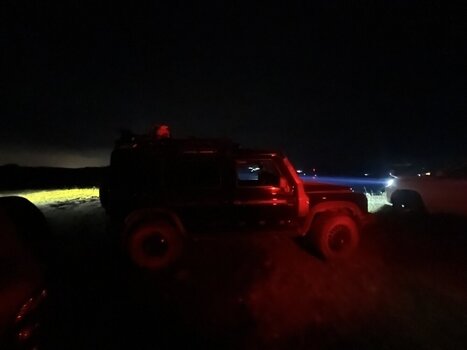
This post may sound crazy, but you need to do this trip to understand what I’m talking about. This isn’t overloading, nor is it rock crawling or off-roading on trails. This is driving out in the wild where you don’t have a map, or any idea what the next turn brings. Animals, trenches, massive rocks… trucks… and you have very little time to get from point to point, mostly between 1 and 4am in pitch darkness…
I’ve attached a snippet of some of the roads/paths driven…
If you’ve got a Grenadier on order, well done! If you’re on the fence, get off and get one!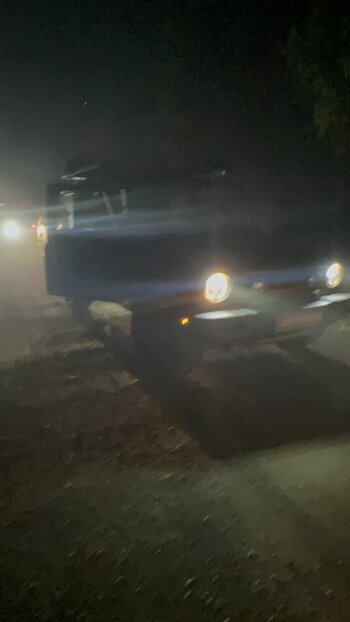


Similar threads
- Replies
- 155
- Views
- 8K
- Replies
- 5
- Views
- 388
- Replies
- 12
- Views
- 599

