The Grenadier Forum
Register Now for enhanced site access.
INEOS Agents, Dealers or Commercial vendors please contact admin@theineosforum.com for a commercial account.

What did you do with your Grenadier today?

Tazzieman

Grenadier Owner
Lifetime Supporter
Founding Guard
Local time
7:33 PM
Joined
Sep 30, 2021
Messages
6,415
Reaction score
12,797
Location
Tasmania
With the imminent arrival of our hybrid caravan (was supposed to be today but now Monday) I thought I'd better finish the NATO adapter. I bought some copper pipe off Ebay as a reducer for the 175A Anderson sockets; thanks to @Clark Kent for this tip. I had to drill it out a bit as I couldn't get the same OD/ID.
The 175>50A adapter I bought off ebay.

20240223_184006.jpg
 

YIPPE

GG #00286
Grenadier Owner
Lifetime Supporter
Local time
7:33 PM
Joined
Mar 28, 2022
Messages
246
Reaction score
634
Location
Hawkesbury, NSW, Australia
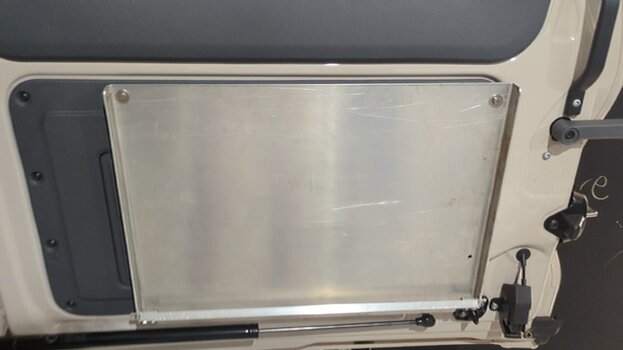
Custom door table backing plate.
540 wide. 400mm tall and 25mm deep.
Designed to allow my 700mm drawer to still open 450mmish. The some notching and angles the bottom for clearance of the plastic cowling where the doors close.
I had 35-40mm between my door and drawer system, the whole table will be 25-30mm thick due to spacing it off the door. I wanted to retain the plastic panelling. Perhaps a cut out in the future.
The actual table will be 12mm marine ply to match the rest of the car. It will be housed in some Aluminium C channel that has a pin either end. The pin fits a drilled holed in my bent backing plate. Some limiting straps and retaining clips to hold in place. Simples.
Will add some completed photos in the coming week.
 

Attachments

  • PXL_20240222_052434730.TS_exported_2357.jpg
    PXL_20240222_052434730.TS_exported_2357.jpg
    188.3 KB · Views: 108

Ever Pragmatic

Grenadier Owner
Local time
10:33 AM
Joined
Oct 3, 2022
Messages
654
Reaction score
2,975
Location
Thrapston
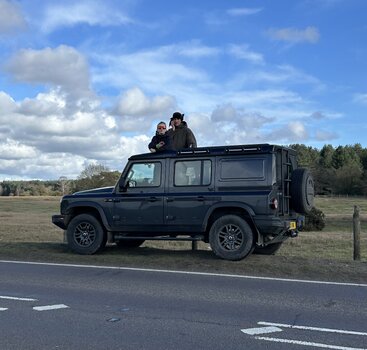
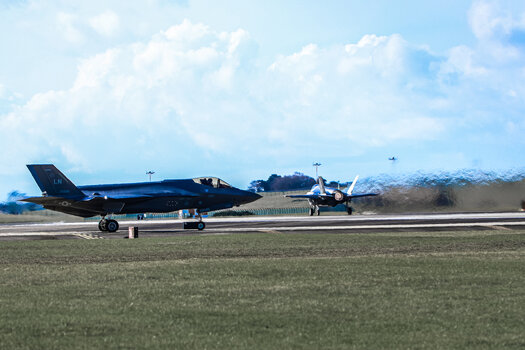
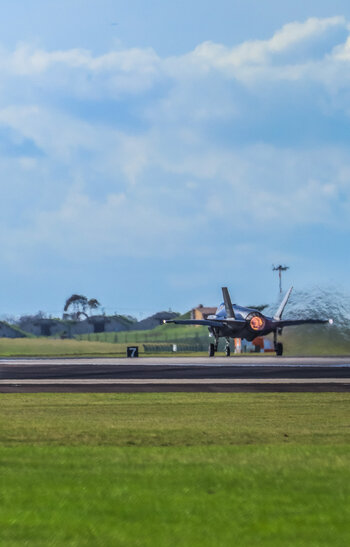
Used the safari window aperture in anger for the 1st time today…. Went plane spotting at RAF Lakenheath and watched 13 F-35s blast off. Bloody awesome sight and the safari windows gave us a great view…. Also got 24 mpg overall for the round trip..
 

Attachments

  • IMG_5904.jpeg
    IMG_5904.jpeg
    1.6 MB · Views: 101
  • 0881AAEA-A5B3-4CED-A345-5ECAD4CD9F9A.jpeg
    0881AAEA-A5B3-4CED-A345-5ECAD4CD9F9A.jpeg
    2.7 MB · Views: 88
  • F36634F2-33D3-48C2-A0C8-3640E5A18541.jpeg
    F36634F2-33D3-48C2-A0C8-3640E5A18541.jpeg
    1.9 MB · Views: 104

DaBull

Grenadier Owner
Lifetime Supporter
Local time
2:33 AM
Joined
Dec 28, 2022
Messages
1,410
Reaction score
2,684
Location
California
Used the safari window aperture in anger for the 1st time today…. Went plane spotting at RAF Lakenheath and watched 13 F-35s blast off. Bloody awesome sight and the safari windows gave us a great view…. Also got 24 mpg overall for the round trip..
I bet that sounded like a Grenadier DPF Diesel Burn.
DaBull
 

IG_in_AZ

Global Grenadiers #1372
Grenadier Owner
Lifetime Supporter
Local time
2:33 AM
Joined
Dec 30, 2022
Messages
767
Reaction score
1,689
Location
Tucson, AZ, USA
Got a single photo from the stereo shop who are installing my Focal door speakers & tweeters powered by a Mosconi Pico Amp / DSP, and a 12" Focal sub in a custom enclosure powered by a Gladen SPL 1800C1 1800W Mono Amp. Amp in the photo is the Orion I supplied, which went poof when they energized it.
1000008772.jpg

I'll get it Monday morning. More photos to come.

Also, shipment of Bison Gear arrived and will be installed : interior overhead rack, 2 molle panels and NATO can mounts.

Also finally got my registration finalized so the proper plate is on the proper vehicle.
1000008523.jpg
 

ECrider

Grenadier Owner
Lifetime Supporter
Local time
10:33 AM
Joined
May 4, 2022
Messages
3,273
Reaction score
5,442
Location
UK
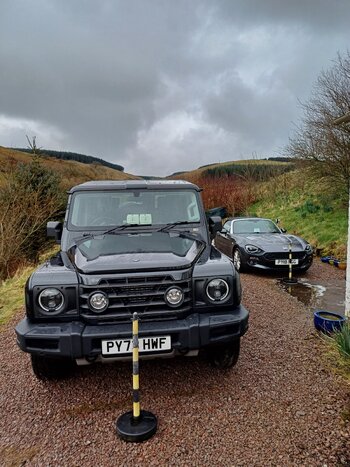
Washed them lovingly with a sponge ( after pressure washing)
a) what are the two things in centre of dash

b) what are the yellow and black poles for
 

ECrider

Grenadier Owner
Lifetime Supporter
Local time
10:33 AM
Joined
May 4, 2022
Messages
3,273
Reaction score
5,442
Location
UK
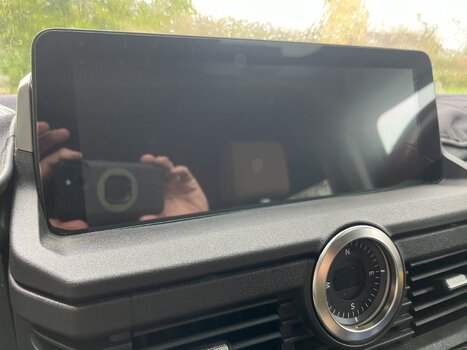
Fitted my Aliexpress special - Centre screen protector. Thanks to @bemax for the suggestion.
 

Attachments

  • IMG_0475.jpeg
    IMG_0475.jpeg
    3.1 MB · Views: 81

Eric

Grenadier Owner
Lifetime Supporter
Local time
10:33 AM
Joined
Oct 27, 2022
Messages
2,270
Reaction score
4,100
Location
Scotland
a) what are the two things in centre of dash

b) what are the yellow and black poles for
a) they are re- chargeable dehumidifiers, in both cars. We I come home and the car inside is nice and hot the outside temperature drops to minus temperatures the inside windows start to steam up. Those dehumidifiers prevent condensation forming inside the touch screens and in the Fiat there is one on the instrument binnacle as well. In the morning when I go out I put them in recharge.
Old habit from L/R ownership
Only use them with we have cold nights.

b) they are there as a left over from when I had a horse 🐎 box on the drive. Everything was driven up to those so I could get visitors cars on the drive as well.
 
Last edited:

Alprider

Grenadier Owner
Local time
11:33 AM
Joined
May 30, 2022
Messages
63
Reaction score
170
Location
Courchevel
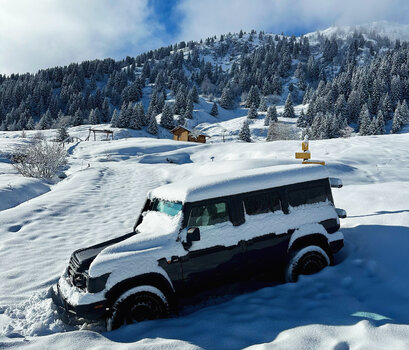
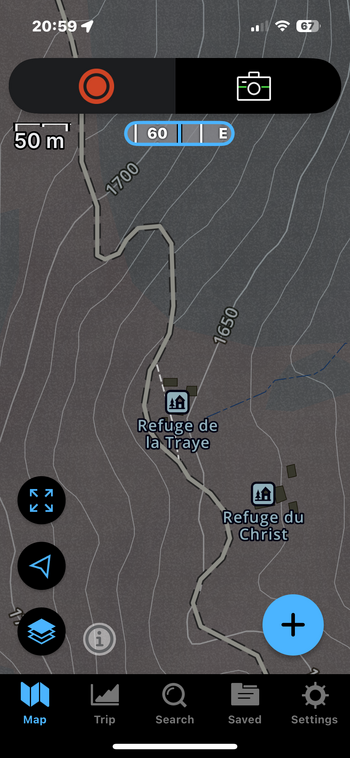
Nice trip up and back to the Refuge de la Traye the other day, didn’t put chains on but maybe should have 🤔
The Grenadier performing well in the ice and snow on the factory tyres.
Centre, front and rear diff lock tested, hill descent tested all worked as it should.
 

Attachments

  • 73368ABB-2E90-4167-A4F2-C4F3ED0274A8.jpeg
    73368ABB-2E90-4167-A4F2-C4F3ED0274A8.jpeg
    2.3 MB · Views: 71
  • e0da3842-4c23-4856-9bf1-296be1373cfb.mp4
    1.9 MB
  • IMG_0609.png
    IMG_0609.png
    1.9 MB · Views: 71

Tom109

Grenadier Owner
Local time
5:33 AM
Joined
Jun 3, 2023
Messages
1,486
Reaction score
2,048
Location
New Jersey, USA
I got sick of drips running down the inside of the rear doors, and falling inside when the rear doors were opened after rain.
I got a piece of ‘P’ section rubber and mounted it across the rear door opening (with Gorilla Glue), ‘P’ section facing up, and retaining the existing door seal.
After a test with the hose, it does appear to do the trick by not allowing the water to accumulate between the top edge of the door and the door seal. This means when the door is opened, there is no water to dribble down the inside of it.
I know it won’t solve extreme weather event intrusion, but should help a lot in the majority of situations. A simple fix that should have been done with a small gutter in that spot from the the start.
That looks like a great solution. Here is my ‘24 Gren and the factory seals.

IMG_6288.jpeg

IMG_6289.jpeg
 

Bobby Mac

Grenadier Owner
Lifetime Supporter
Local time
7:33 PM
Joined
May 7, 2022
Messages
299
Reaction score
710
Location
Narangba, Qld., Australia
That looks like a great solution. Here is my ‘24 Gren and the factory seals.

View attachment 7845474

View attachment 7845475
Yes, they are the same as on my ‘23 - there’s nothing to stop water running off the roof, down over the seal and sitting on top of the door. It really could have been designed a lot better with a different shaped seal that has a lip overhanging the top of the doors, or a small (Landrover like) gutter overhanging the doors. Just a small thing to make it more “fit for purpose”!
 

TheDocAUS

Grenadier Owner
Lifetime Supporter
Local time
7:33 PM
Joined
Mar 8, 2023
Messages
2,159
Reaction score
3,852
Location
Eromanga
I installed the Razed Products Roof Rack Grab Handle today. I bought it to make the roof rack more accessible, but I figured it could help me get in and out of the car easier, at least until I get my third party rocksliders.

I installed the Grab Handle above the driver’s door and it has made getting in and out of the car much easier.

RF-GH_03.jpg
 

ECrider

Grenadier Owner
Lifetime Supporter
Local time
10:33 AM
Joined
May 4, 2022
Messages
3,273
Reaction score
5,442
Location
UK
I installed the Razed Products Roof Rack Grab Handle today. I bought it to make the roof rack more accessible, but I figured it could help me get in and out of the car easier, at least until I get my third party rocksliders.

I installed the Grab Handle above the driver’s door and it has made getting in and out of the car much easier.

RF-GH_03.jpg
Looks good. I don't have a roof rack so use the gutter.
 

RunBikeDive

🔺 🌎 🔺
Grenadier Owner
Lifetime Supporter
Local time
2:33 AM
Joined
Jul 20, 2023
Messages
41
Reaction score
74
Location
USA
Got a single photo from the stereo shop who are installing my Focal door speakers & tweeters powered by a Mosconi Pico Amp / DSP, and a 12" Focal sub in a custom enclosure powered by a Gladen SPL 1800C1 1800W Mono Amp. Amp in the photo is the Orion I supplied, which went poof when they energized it.
View attachment 7845453

I'll get it Monday morning. More photos to come.

Also, shipment of Bison Gear arrived and will be installed : interior overhead rack, 2 molle panels and NATO can mounts.

Also finally got my registration finalized so the proper plate is on the proper vehicle.
View attachment 7845455
Love that plate bro!
 

minidok

#883
Grenadier Owner
Lifetime Supporter
Local time
11:33 AM
Joined
Aug 9, 2022
Messages
186
Reaction score
233
Location
Zürich, Schweiz
I installed the Razed Products Roof Rack Grab Handle today. I bought it to make the roof rack more accessible, but I figured it could help me get in and out of the car easier, at least until I get my third party rocksliders.

I installed the Grab Handle above the driver’s door and it has made getting in and out of the car much easier.

RF-GH_03.jpg
Nice one and also lots of other good ideas to find from Razed Products. Delivery is limited to Australia.
 

LeonD

Grenadier Owner
Local time
5:33 AM
Joined
Feb 7, 2024
Messages
42
Reaction score
102
Location
Virginia, USA
Good morning all. I have a small project and a larger project to highlight. But first, I would like to thank all the forum members who post their projects, provide pictures, share their processes, and perhaps even a mistake or two. I reached out to a few with questions about their builds and recommendations. Everyone was great, thank you!

Small project - Installation of a Streamlight cradle to store and recharge a Streamlight LED flashlight. A simple tap to a 5-amp fuse, ground it, and it's good to go.

Larger project - Installation of a BajaDesign OnX6+ 20-inch light bar and a pair of BajaDesign S2 Sport auxiliary lights. It was a slow and methodical installation; I did research on the INEOS forum, located the 25-amp and 10-amp wiring harnesses under the bonnet, stripped the wax/heat shrink on the 25 and 10-amp harnesses (which was a pain, patience is the key), extended both the 25 and 10-amp harnesses with female Delphi waterproof connectors, removed the skid plate, measured once, twice, three times, drilled the front bumper (more on this later), installed the light, removed the driver's side front light cover, ran the Baja Design wiring harnesses through the grill to the driver's side light to the engine bay, connected, tested, zip-tied wiring harnesses to existing ones in the engine bay area, and enjoyed.

A few lessons learned: 1) The BajaDesign OnX6+ LED light bar is an absolute beast - it emits a lot of light. I have a pair of BajaDesign LP6s on my Tacoma, and the OnX6+ is substantially more powerful. I debated between the 30-inch and the 20-inch, and I'm very pleased with my decision on the 20-inch and highly recommend it. I believe it is the right size, and it made the installation easier as well, 2) One item that I did not anticipate was the length of the hitch steel from the front-mounted tow hitch on my IG Trailmaster. The hitch steel runs the entire length of the front, middle part of the bumper. This was discovered after I removed the skid plate. Two issues: the mounting bracket of the OnX6+ was outward (mounting bolts on the outside of the LED light) and would be impossible to drill as the hitch steel came to an angle to mount to the IG. The solution was to place the mounting bracket inward, so the mounting bolt is under the LED light bar and not to the side, 3) Measure once, twice, three times, mark, drill. What I was unable to measure and see exactly is where the mark was on the hitch steel under the bumper plate. I measured and drilled too close to the front of the hitch steel (uhhhhh). The solution was to move the mounting holes back about an inch and place a plug in the 'whoops' holes (all bare steel was primed and painted). 4) There is a space between the bumper plate steel and the hitch steel. When you tighten the mounting bolts, the bumper steel bends down to close the gap between the two. The solution was to use stainless steel washers to fill the gap.

I tested the lights this morning on the way to work. The OnX6+ is very powerful. I am very impressed with this light. The S2 Sport auxiliary lights are a perfect complement to the IG front headlights; they provide additional light, but not too much where it blinds oncoming traffic for several moments.

A list of a few additional parts required: 1) Baja Design wiring harness part 640094 (to wire to the OEM 25-amp auxiliary switch) OnX6+, 2) Baja Design wiring harness part 613606 S2 Sport splitter (to bring two lights to one harness) and Baja Design 640093 (to wire to the OEM 10-amp auxiliary switch) S2 Sport, 3) male and female Delphi waterproof connectors, 4) 3/8-16 2.5-inch stainless steel hex cap screws (two), washers, nylon locking nuts, 3/8-inch x 1 zinc post (two), and 5) an extended L bracket to mount S2 Sport on the side of the LED light bar (Amazon).
 

Attachments

  • IMG_7849.jpg
    IMG_7849.jpg
    3.1 MB · Views: 157
  • IMG_7850.jpg
    IMG_7850.jpg
    4 MB · Views: 119
  • IMG_7851.jpg
    IMG_7851.jpg
    4 MB · Views: 127
Back
Top Bottom