Register a free account today to become a member! Once signed in, you'll be able to contribute to the community by adding your own topics, posts, and connect with other members through your own private inbox! INEOS Agents, Dealers or Commercial vendors please contact admin@theineosforum.com for a commercial account.
I haven't opened the pack, it looks like its easy to mold around the ladder supports?This is nothing revolutionary in regards to mods (been done by many on here) just figured Id share mine.
Sill Guard with Xpel
Using a heat gun and trim tool I was able to mold the Xpel material to the contour of the door sill and then trim it around the OME plastic guards. (Images taken a few days after install)
View attachment 7847934 View attachment 7847935View attachment 7847937
Ladder Rung Protection/Grip
I noticed some light surface scratches developing on the access door ladder rungs after a few trips up and down, so with the remaining Xpel material I gave them a bit of protection and added grip.
View attachment 7847939
View attachment 7847940
View attachment 7847941
It is a bit stiffer than I thought even with the backer removed (which is ultimately a good thing) and I was installing in temps around 55 degrees F. So I used a heat gun to mold the material around the rungs and door sill contours. There is a fine line between too hot and too cold using the heat gun with this material, it's best to start on the "to cold" end and work up. Incidentally I found that when I had air bubbles trapped under the material I could hit the air bubble with a tad "too much" heat and the bubble would expand and the material would get really soft and the bubble would "pop" and then when removing the heat I would push on the spot with my finger and it would heal up nicely.I haven't opened the pack, it looks like its easy to mold around the ladder supports?
Thank you for the informationIt is a bit stiffer than I thought even with the backer removed (which is ultimately a good thing) and I was installing in temps around 55 degrees F. So I used a heat gun to mold the material around the rungs and door sill contours. There is a fine line between too hot and too cold using the heat gun with this material, it's best to start on the "to cold" end and work up. Incidentally I found that when I had air bubbles trapped under the material I could hit the air bubble with a tad "too much" heat and the bubble would expand and the material would get really soft and the bubble would "pop" and then when removing the heat I would push on the spot with my finger and it would heal up nicely.
 I wouldn't have any issues with making it palyable as ambient temp for me is 30c I do like the round edges, looks neat
For that, after cutting the material to length, I just used a quarter-sized washer butted up to the corner and a pencil to create the contour and then trimmed with scissors prior to applicationThank you for the information
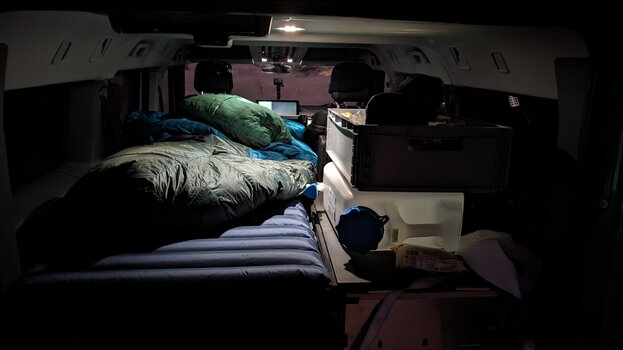
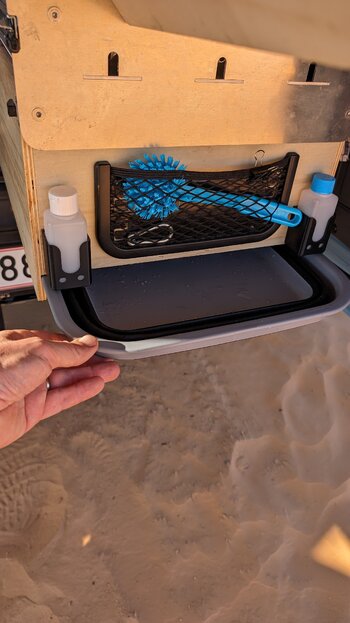
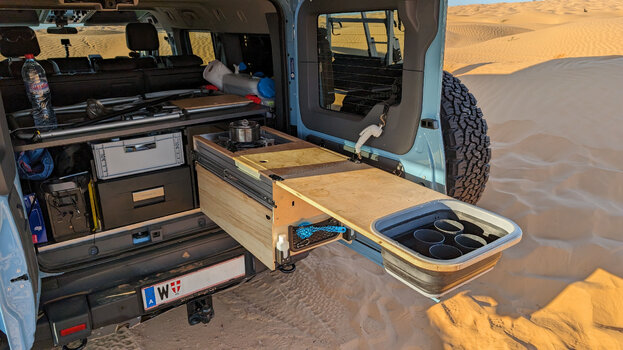
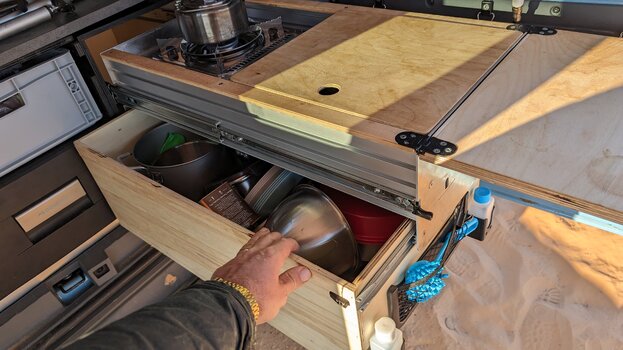
That's my camping setup now. A drawer kitchen and a drawer fridge. Chairs are the first thing accessible. My table is a real table, not one of these shaky, flimsy, small and low ones. Also easy acessible. It doubles as a sleeping platform. I can lower the left side of my box, put the table on top of the left folded rear seat and get a wonderful sleeping platform.I am planning to build a kitchen drawer system. I know it is quite a large kitchen but I am a foodie and love to cook outdoors. Here is my plan so far. It will be built from birch plywood in 21, 15, 12 and 8mm. The weight of the setup is my biggest concern. What would you change? I am thinking about adding a foldout bed on top. Hmmm...
View attachment 7833617

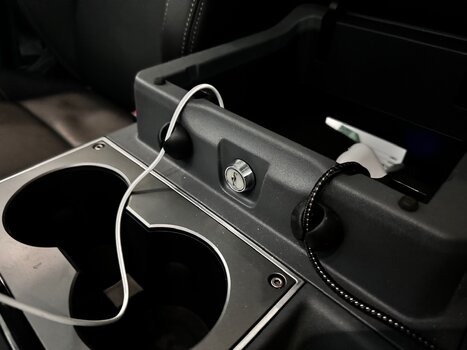
@Shopkeep, if you don't mind me asking, how is the hood secured to the console? Thank you!Printed a screen for the main display, fits like a glove but still tweaking it (almost there, and yes I need to get my Z-Offset in order....)
View attachment 7848586
View attachment 7848587
Dimensions are tight so it just presses snugly over the top of the display and holds on. Some thin double sided tape on the top edge of the display may help reduce or prevent any movement and creaks but so far no issues.@Shopkeep, if you don't mind me asking, how is the hood secured to the console? Thank you!
")
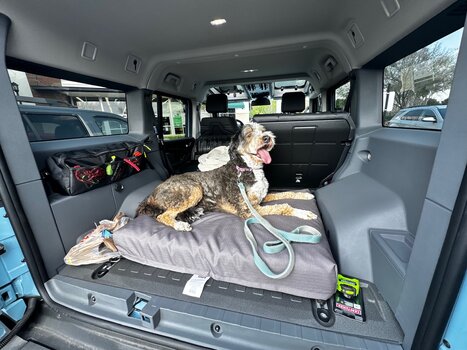
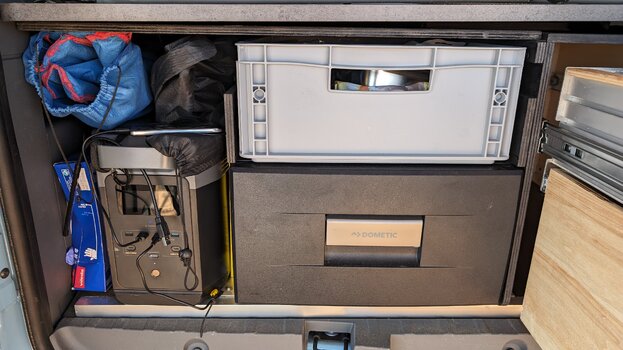
my draw fridge and slide draw, coated with raptor paint. Still got room for the dog on top. Will test out over Easter before making finer mods. Battery seems to last 2 days. Charges very fast.

More photos of your rear cargo set up please. Looks neat from what can be seen.Last weekend I installed sliding windows on both sides. These come from Explore Glazing in the Netherlands. Great quality, perfect fit and well made. If you follow the detailed instructions, assembly shouldn't be a problem for most people.
View attachment 7848608
The hardest part was cutting out the original window panes. There definitely have to be two of you and you need patience! ... not only the cutting wire burned out several times!
View attachment 7848609
I let it dry for 3 days without moving the Granadier. You shouldn't even close the doors.
View attachment 7848610
View attachment 7848611
ideal for my purposes. Great for the dogs, or for sleeping in the car!
View attachment 7848612
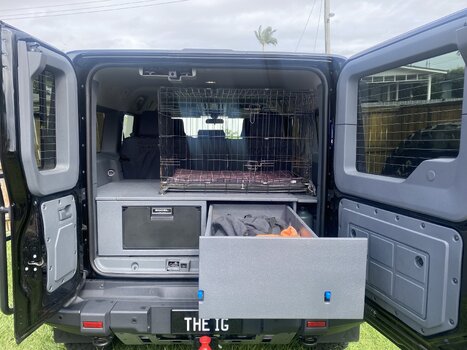
For the protective grille / Molle panel you have to drill the holes and cut the thread yourself. But shouldn't be a problem.
View attachment 7848613
View attachment 7848614
Your dog must be bloody athletic and have a good aim, to be able to jump into that crate
 being a kelpie she good but not that good.
 The box is self-made to maintain a flat surface with the rear seat folded down. On the right side there is space for 2 x 2 liter water bottles for the dogs, rain gear or similar fits under the lid.More photos of your rear cargo set up please. Looks neat from what can be seen.
That looks great! Is it really the same height with the folded seats? It looks much taller than I would have thought. That said, well done!The box is self-made to maintain a flat surface with the rear seat folded down. On the right side there is space for 2 x 2 liter water bottles for the dogs, rain gear or similar fits under the lid.
I built it myself because, in my opinion, the ones on the market are too expensive and I was happy to take on the challenge of finding a solution that exactly meets my requirements. The whole thing weighs a little under 32kg.
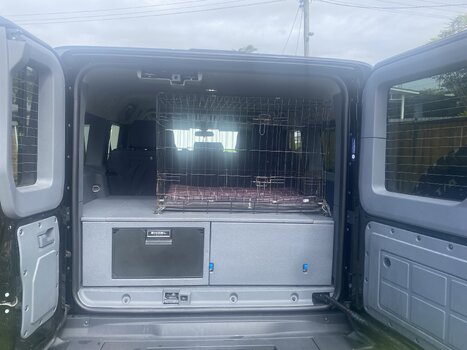
As you can see by the different colors, it was a step by step project. There will definitely be changes...
View attachment 7848768
6 inch height to be flush with folded seats?That looks great! Is it really the same height with the folded seats? It looks much taller than I would have thought. That said, well done!
That looks great! Is it really the same height with the folded seats? It looks much taller than I would have thought. That said, well done!