The Grenadier Forum
Register Now for enhanced site access.
INEOS Agents, Dealers or Commercial vendors please contact admin@theineosforum.com for a commercial account.

Build Thread Igor - Build starting

Mudnut

Quatermaster Owner
Local time
1:44 AM
Joined
Feb 22, 2024
Messages
93
Reaction score
165
Location
Clifton Beach QLD, Australia
Well I have had my Quartermaster for 1 week now, and finally had some time to have a look around, and see what I need to do to make it mine!
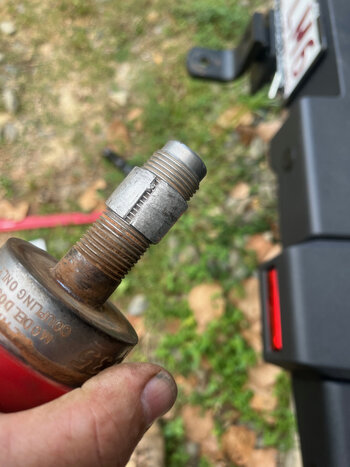
First thing I did was change out the tow ball with a DO35 pin to fit my offroad caravan. INIOS why so tight on the ball??? I needed a large pipe wrench and long pipe for extra force to break it loose. I ended up making a sleeve out of some old pipe, to act as a bush to keep the DO35 from rattling in the hole. So 1st mod was free!
 

Attachments

  • IMG_0798.jpeg
    IMG_0798.jpeg
    2.6 MB · Views: 204

Mudnut

Quatermaster Owner
Local time
1:44 AM
Joined
Feb 22, 2024
Messages
93
Reaction score
165
Location
Clifton Beach QLD, Australia
Well I have had my Quartermaster for 1 week now, and finally had some time to have a look around, and see what I need to do to make it mine!
First thing I did was change out the tow ball with a DO35 pin to fit my offroad caravan. INIOS why so tight on the ball??? I needed a large pipe wrench and long pipe for extra force to break it loose. I ended up making a sleeve out of some old pipe, to act as a bush to keep the DO35 from rattling in the hole. So 1st mod was free!
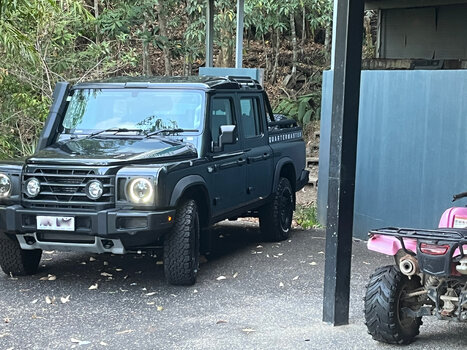
Probably should add a photo of the truck
 

Attachments

  • IMG_0767.jpeg
    IMG_0767.jpeg
    3 MB · Views: 161

Mudnut

Quatermaster Owner
Local time
1:44 AM
Joined
Feb 22, 2024
Messages
93
Reaction score
165
Location
Clifton Beach QLD, Australia
TowPro Elite3 added to Quartermaster. Wanting to understand the electrics of the vehicle, I spent many hours of research on this forum trying to get my head around the wiring for the TowPro brake controller. Finally had some time to have a crack today, and got it installed and working properly!
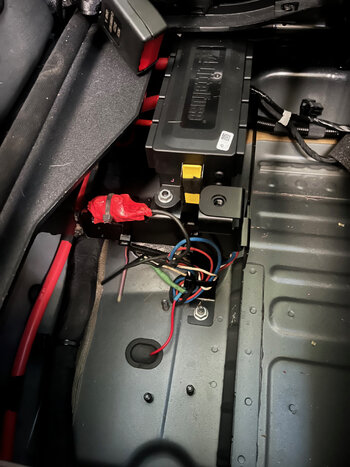
1. Install the TowPro module, and wire in under the rear seat. I installed on the back side of the bracket so I have room for my compressor. It is not really visible in the photo, but wires visible. Used 2 of the 4 wires available (power and control wires). I did not use the blue orange one, as there has been conflicting reports on weather it works, so ran my own brake wire (red). No need to connect ground, as there are plenty of ground points available in the space.
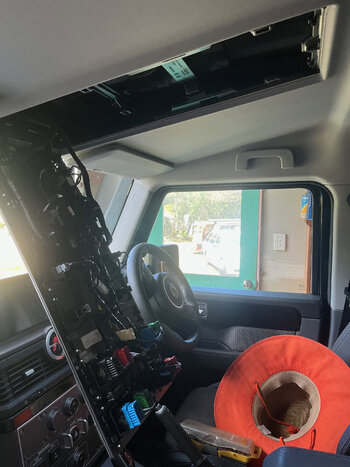
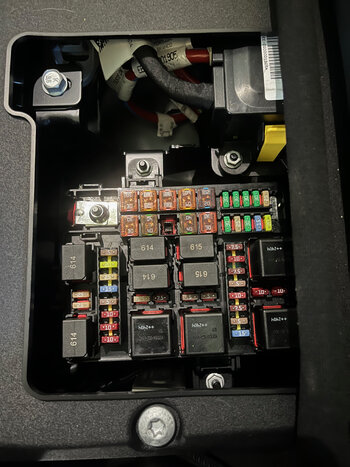
TowPro black wire - Power was taken off the Yellow / Red constant 12v, and fused to Fl13 fuse in the main fuse panel (Picture 1 and 2 ). Confirmed no power when fuse pulled. I did leave the existing circuit breaker in the line that I had already had installed in my old car. Seen wrapped in red tape picture 1.
TowPro white wire - ground. Good ground point to chases under where TowPro mounted.
TowPro Blue wire - Control wire to Grey wire. This was modified at the rear of vehicle (explain later).
TowPro Red wire ran my own to rear of vehicle from grommet in the floor, and sheathed in flex split conduit.
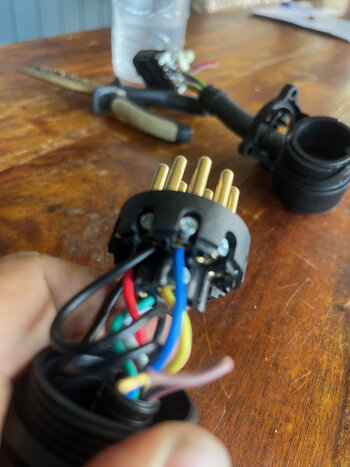
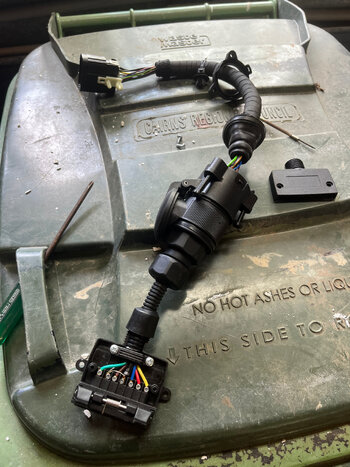
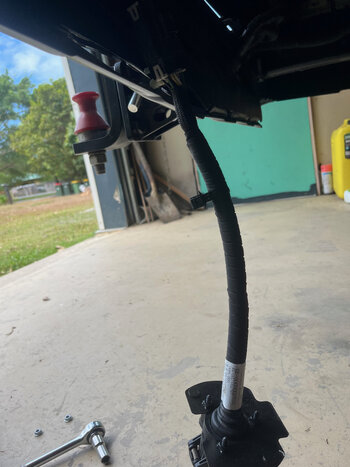
2. Rear of vehicle. There is a 400mm wiring loom extension on this Quartermaster, which makes access easy. (picture 3, and 4)
Looking at the wires coming to the connecter, the grey has no pin on the pigtail. I ended up using pin 8 reverse for the Control wire, as there is no pin 12 in the plug, and can't source in FNQ a pin puller to remove it from the 13 pin socket. I was able to use a small jewlers screwdriver to remove the purple wire in the connector of the short loom which is the Reverse light wire (pin 8 in the socket) I moved this pin to the one that correlated with the grey wire fed into, but had nothing coming off.
3. Connected the Redarc diode in line with the red wire and blue / orange of the wiring loom. Wire coming from car or signal - to orange of diode. Red wire to red feed from under the seat. Other red end to the blue orange going to socket.
4. At my 13 pin to 7 pin flat connector. Was able to take the blue wire from pin 12, and move it to pin 8. I taped and folded this brown reverse wire back up into the loom Will re instate if I ever need a reversing light on a trailer (picture 5) I do get a reverse lamp warning when going into reverse, but I know why. Goes away when I shift out of reverse.
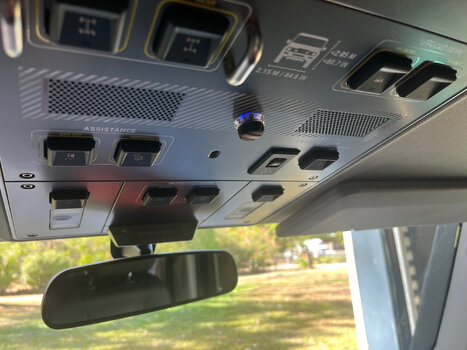
5. Running the control knob - I checked first if the system worked and calibrated before running this wire. It worked flawlessly! I then ran my extended wire from under the back seat to under the panel at the bottom of the door. I then ran it up under the rubber seal on the inside of the rear door, and up under the interior ceiling to the rear of the cab. Pulled the plastic trim piece from above the window, and exposed gap between the ceiling and roof. Undid the four screws on the upper control panel end, and was able to unsnap and swing the panel down. Found a clear spot and drilled a small hole, and used a step drill to enlarge it to fit the control knob. I fed a wire puller under the roof liner and roof to the back of the cab. fished it out, and taped the cable to it. was easy to pull through. Plugged into control knob, and closed everything up again. (Picture 6 and 7)
Happy with today's progress, and no sparks when I plugged the fuse back in.
 

Attachments

  • IMG_0821.jpeg
    IMG_0821.jpeg
    2.5 MB · Views: 94
  • IMG_0822.jpeg
    IMG_0822.jpeg
    2.5 MB · Views: 71
  • IMG_0812.jpeg
    IMG_0812.jpeg
    2.3 MB · Views: 78
  • IMG_0813.jpeg
    IMG_0813.jpeg
    3.7 MB · Views: 82
  • IMG_0817.jpeg
    IMG_0817.jpeg
    2.8 MB · Views: 86
  • IMG_0823.jpeg
    IMG_0823.jpeg
    3.8 MB · Views: 107
  • IMG_0824 (1).jpeg
    IMG_0824 (1).jpeg
    2.9 MB · Views: 124
Last edited:

Mudnut

Quatermaster Owner
Local time
1:44 AM
Joined
Feb 22, 2024
Messages
93
Reaction score
165
Location
Clifton Beach QLD, Australia
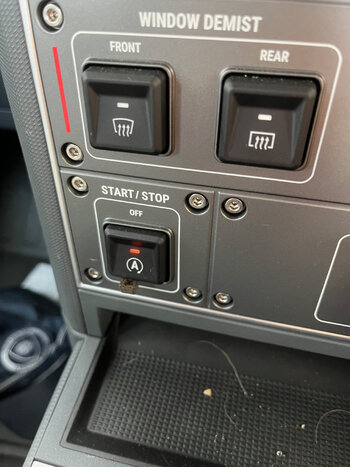
Just to keep this up and running: I used a small cable tie and snipped the tail off about 4mm. I shoved this tail portion into the switch that controls the start stop. Now stays on even after restarting.

It's the little things in life!
Cheers,
Ken
 

Attachments

  • IMG_0836.jpeg
    IMG_0836.jpeg
    2.8 MB · Views: 107

Mudnut

Quatermaster Owner
Local time
1:44 AM
Joined
Feb 22, 2024
Messages
93
Reaction score
165
Location
Clifton Beach QLD, Australia
Few more projects today. Figured out why my 50A anderson plug was getting no power. Was (my) dodgy connection to the ring terminal at the buss bar.
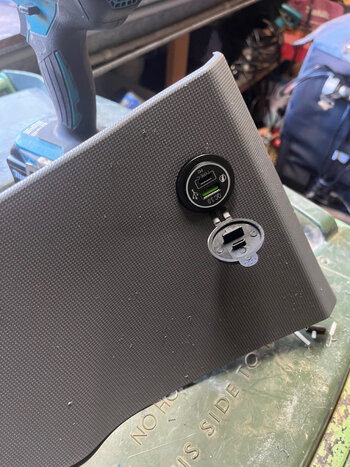
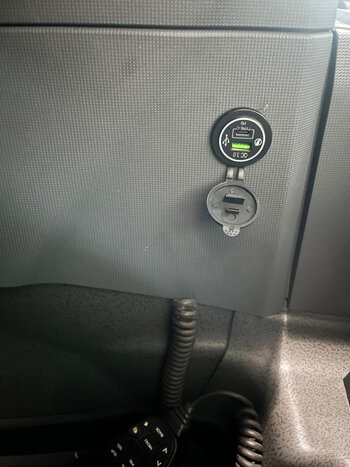
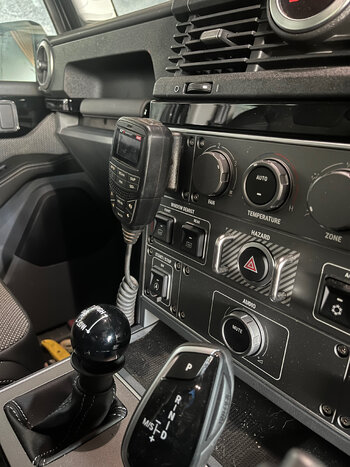
Installed my old GME UHF radio after repairing the antennae cable. Installed under the glove box, and connected to the INT 1 wiring. Also installed a USB and USBC plug off the same connection. Yes I know it is upside down. Wanted the cover to hang down, as there is a led light in the plug. Put this in the passenger footwell. Ran the UHF mike out under this panel, and up to a magnetic holder on the dash. Next up INT2 USB and USBC in drivers footwell.
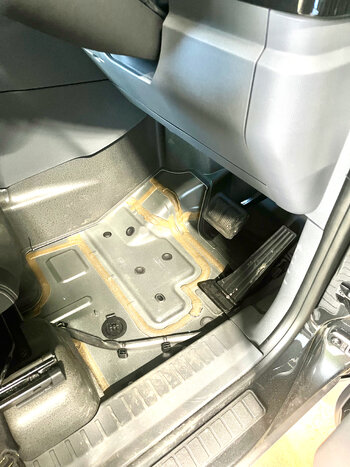
I am trialing driving without the big hump. Did not bother me before, but have recently re-injured my back, and the sciatic pain is increased with the current seating position. If no heat intrusion, might make adjustments to the insulation, and re fit modified panel.
 

Attachments

  • IMG_0852.jpeg
    IMG_0852.jpeg
    3.2 MB · Views: 83
  • IMG_0854.jpeg
    IMG_0854.jpeg
    2.7 MB · Views: 61
  • IMG_0855.jpeg
    IMG_0855.jpeg
    2.7 MB · Views: 76
  • IMG_0856.jpeg
    IMG_0856.jpeg
    2.7 MB · Views: 92
Last edited:

Mudnut

Quatermaster Owner
Local time
1:44 AM
Joined
Feb 22, 2024
Messages
93
Reaction score
165
Location
Clifton Beach QLD, Australia
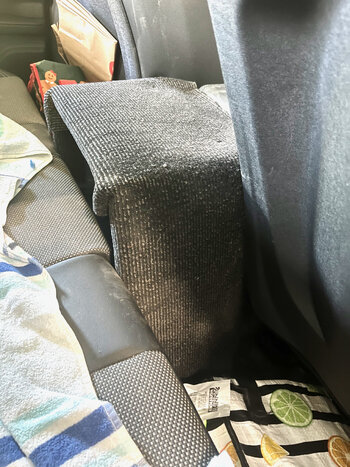
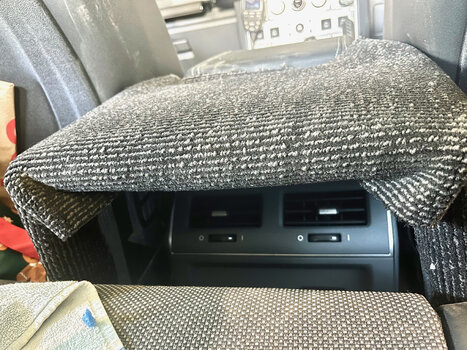
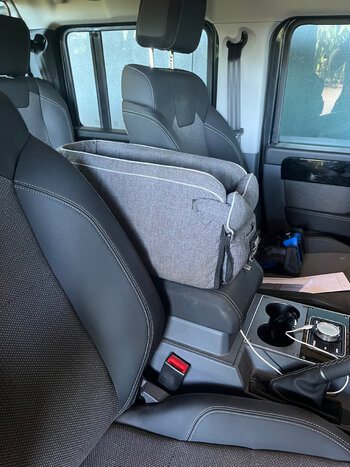
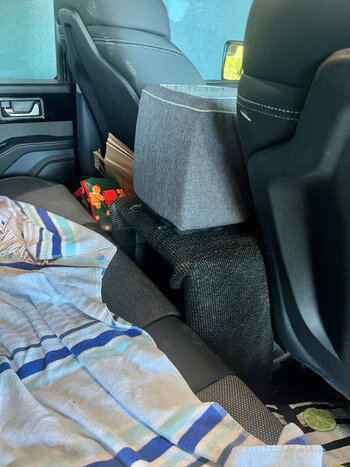
A few more projects done today. First up, going camping with the Mrs, and dogs. Cyndi the long haired chihuahua does not like spending time in the back seat with the very excitable English Staffy-Bobby, as he does not know how much he weighs, and where his feet are at any given time. She wants instead to sit in one of our laps whilst driving. Not ideal for all involved. So made a extension shelf for the centre console to accommodate her travel bed, which she can be clipped into, and allows her to see out the windows along with being between us. Carpet is temporarily attached, and if successful a more permanent attachment of the carpet to the frame will be undertaken. the timber frame is wrapped in either closed celled foam or carpet to prevent scratching of the seats or plastics.
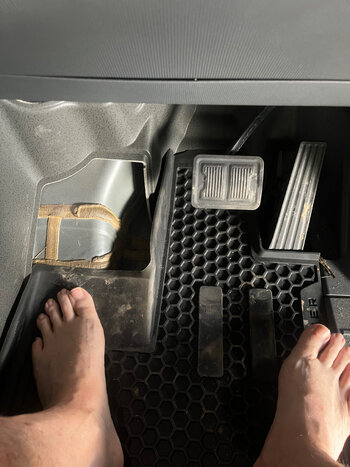
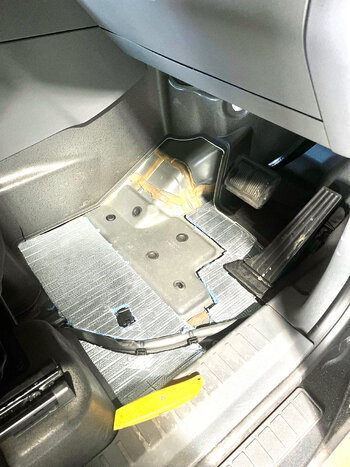
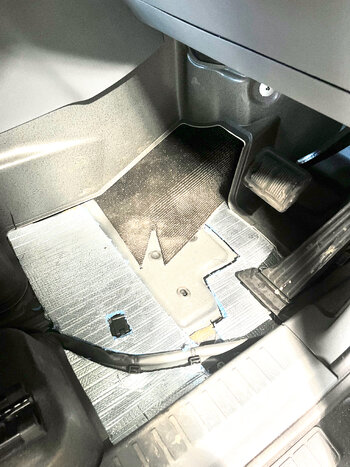
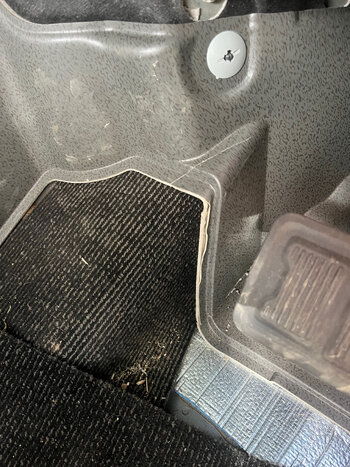
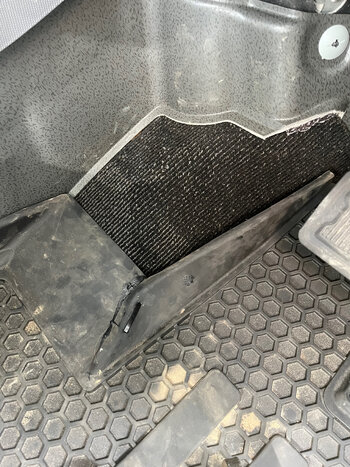
With my sciatic pain persisting, I have a temporary solution to the footrest intrusion in the RHD footwell. I earlier removed the floor covering, and attached foam backing. I then filled the low spots of the flooring with closed cell foam sheeting. It is just sitting in place, not glued yet. I then used an offcut of the carpet I purchased for the dog bed shelf, and placed it over the metal intrusion into the footwell. This is tucked under the plastic panels to hold it in place. The rubber floor mat is then placed on top of the area. I did cut the corner of the bit that originally moulded around the hump. I basically lays flat, and I can't feel it under foot whilst driving. Much more space for feet to move around. Feet and knees are level, and no extra heat that I can detect yet. I have been driving around without the plastic flooring for about a week so far. This just tidies up the space.
 

Attachments

  • IMG_0859.jpeg
    IMG_0859.jpeg
    3.5 MB · Views: 74
  • IMG_0861.jpeg
    IMG_0861.jpeg
    4.3 MB · Views: 70
  • IMG_0867.jpeg
    IMG_0867.jpeg
    3.7 MB · Views: 67
  • IMG_0868.jpeg
    IMG_0868.jpeg
    3.6 MB · Views: 73
  • IMG_0862.jpeg
    IMG_0862.jpeg
    3.8 MB · Views: 74
  • IMG_0863.jpeg
    IMG_0863.jpeg
    4.7 MB · Views: 75
  • IMG_0864.jpeg
    IMG_0864.jpeg
    4.7 MB · Views: 73
  • IMG_0865.jpeg
    IMG_0865.jpeg
    3.4 MB · Views: 80
Last edited:

Mudnut

Quatermaster Owner
Local time
1:44 AM
Joined
Feb 22, 2024
Messages
93
Reaction score
165
Location
Clifton Beach QLD, Australia
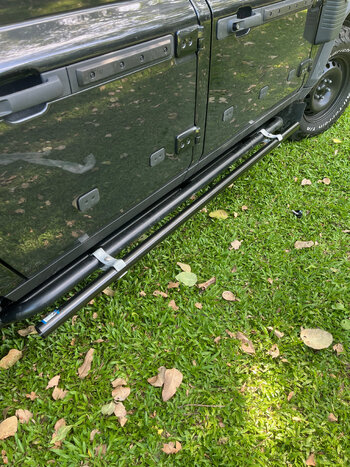
Next item on the list. Rock sliders installed. It took three tries to get them on the vehicle. Wrong ones ordered initially (wagon vs Quartermaster) which were too short. Dealer then ordered the Extended sliders for the Quartermaster. Instead of wasting an other day dropping it off for them to fit, I went in to pick them up. On the way home got a call - check the numbers. Might have ordered 2x Right side ones. Yup! Left one then ordered. Had the dealership drop it off at my home, and pick up the extra Right one, as I didn't want to travel into town again.
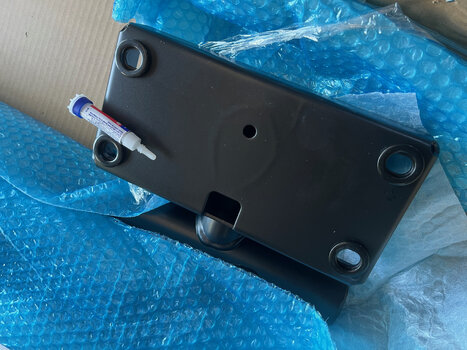
I have a car hoist, so was easy to suspend the slider on it and fit. Was a bit of a hasle getting the spacers to stay in place whilst fitting, but was manageable. For the other side, had a brain flash, and used super glue to hold the spacers in place whilst installing. Was simple as just line up the slider and screw in the bolts.
Next is the mock up of my step attachment. Not finished yet, but will try and get it sorted on the weekend.
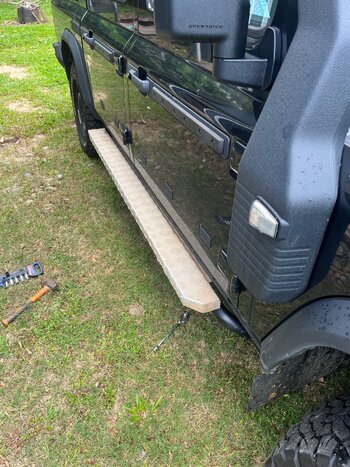
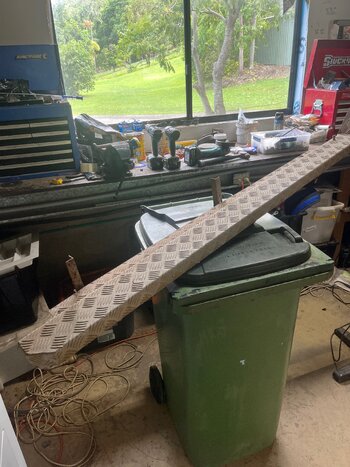
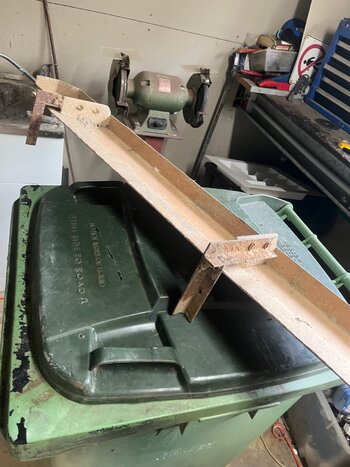
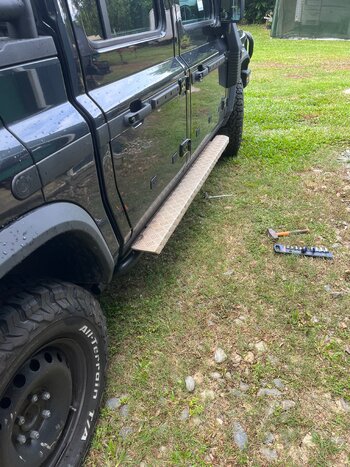
I have some alloy steps from an old Discovery 1. Cut the brackets off, and will attach them to the sliders. First photo, just temporarily clamped to the slider. Will stick out about 100mm, so perfect for a step, and some side protection. The step is just sitting on the bars for the photo. Will move inwards when attached. More on that once I finish that part.
 

Attachments

  • IMG_0906.jpeg
    IMG_0906.jpeg
    5.7 MB · Views: 44
  • IMG_0907.jpeg
    IMG_0907.jpeg
    5.4 MB · Views: 43
  • IMG_0915.jpeg
    IMG_0915.jpeg
    3.4 MB · Views: 50
  • Like
Reactions: PBD

Mudnut

Quatermaster Owner
Local time
1:44 AM
Joined
Feb 22, 2024
Messages
93
Reaction score
165
Location
Clifton Beach QLD, Australia
A few more projects done today. First up, going camping with the Mrs, and dogs. Cyndi the long haired chihuahua does not like spending time in the back seat with the very excitable English Staffy-Bobby, as he does not know how much he weighs, and where his feet are at any given time. She wants instead to sit in one of our laps whilst driving. Not ideal for all involved. So made a extension shelf for the centre console to accommodate her travel bed, which she can be clipped into, and allows her to see out the windows along with being between us. Carpet is temporarily attached, and if successful a more permanent attachment of the carpet to the frame will be undertaken. the timber frame is wrapped in either closed celled foam or carpet to prevent scratching of the seats or plastics.
With my sciatic pain persisting, I have a temporary solution to the footrest intrusion in the RHD footwell. I earlier removed the floor covering, and attached foam backing. I then filled the low spots of the flooring with closed cell foam sheeting. It is just sitting in place, not glued yet. I then used an offcut of the carpet I purchased for the dog bed shelf, and placed it over the metal intrusion into the footwell. This is tucked under the plastic panels to hold it in place. The rubber floor mat is then placed on top of the area. I did cut the corner of the bit that originally moulded around the hump. I basically lays flat, and I can't feel it under foot whilst driving. Much more space for feet to move around. Feet and knees are level, and no extra heat that I can detect yet. I have been driving around without the plastic flooring for about a week so far. This just tidies up the space.
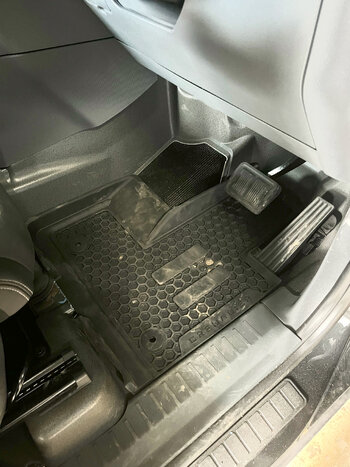
Just an update. Have travelled for another 500 km's and like not having the intrusion into the footwell. Decided to make my modification a bit more permanent. Cut out a bit of the forward cover where my boot was hitting, and installed the remainder of my 1 sq metre carpet purchased for A$ 27 from Bunnings that I used to cover the console extension. This carpet piece is placed on top of the closed cell foam that I installed earlier, and extends over the existing metal hump. This is tucked underneath the console, and front piece. The rubber mat is placed over the top to make an almost factory appearance. The rubber mat has been cut and SikaFlexed down, along with a cable tie to hold it flat. Forms nicely to the remainder of the hump and carpet.
 

Attachments

  • IMG_0919.jpeg
    IMG_0919.jpeg
    4.4 MB · Views: 31
  • IMG_0917.jpeg
    IMG_0917.jpeg
    3.5 MB · Views: 29

Mudnut

Quatermaster Owner
Local time
1:44 AM
Joined
Feb 22, 2024
Messages
93
Reaction score
165
Location
Clifton Beach QLD, Australia
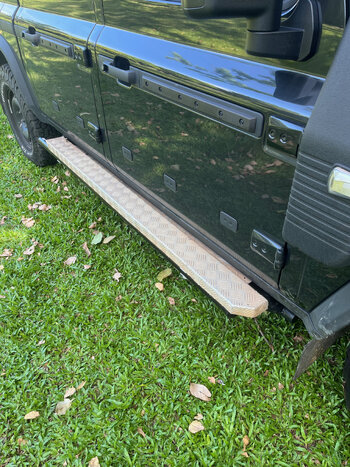
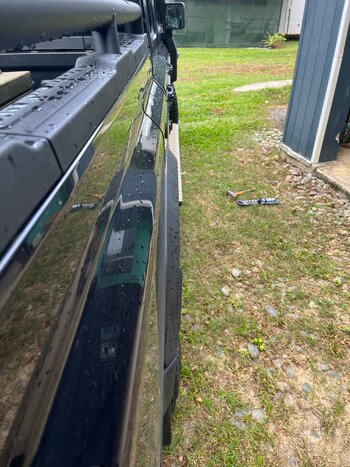
Finally was able to source more brackets in town. Fencing shop opened today from Christmas break. Purchased 4 clamps for each side to attach 40mm tube. The outer tube is elevated, and tucked under the old Disco step. This step is then tec screwed into the new pipe. Was able to jump up and down on the step with no movement. Should also protect the side of the car between the wheels from minor side scrapes. Not sure if I will raptor coat the steps or leave natural with Cape York dust hue.
 

Attachments

  • IMG_0926.jpeg
    IMG_0926.jpeg
    6.7 MB · Views: 19
  • IMG_0927.jpeg
    IMG_0927.jpeg
    7 MB · Views: 20
  • IMG_0925.jpeg
    IMG_0925.jpeg
    5.2 MB · Views: 24
  • IMG_0969.jpeg
    IMG_0969.jpeg
    5.2 MB · Views: 6
  • IMG_0970.jpeg
    IMG_0970.jpeg
    4.4 MB · Views: 9

Mudnut

Quatermaster Owner
Local time
1:44 AM
Joined
Feb 22, 2024
Messages
93
Reaction score
165
Location
Clifton Beach QLD, Australia
Just an update. Have travelled for another 500 km's and like not having the intrusion into the footwell. Decided to make my modification a bit more permanent. Cut out a bit of the forward cover where my boot was hitting, and installed the remainder of my 1 sq metre carpet purchased for A$ 27 from Bunnings that I used to cover the console extension. This carpet piece is placed on top of the closed cell foam that I installed earlier, and extends over the existing metal hump. This is tucked underneath the console, and front piece. The rubber mat is placed over the top to make an almost factory appearance. The rubber mat has been cut and SikaFlexed down, along with a cable tie to hold it flat. Forms nicely to the remainder of the hump and carpet.
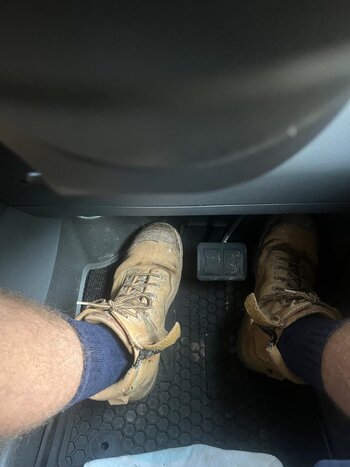
Just an update on how my boots fit in the space. Still not perfect, but much better than with the intrusion in place
 

Attachments

  • IMG_0965.jpeg
    IMG_0965.jpeg
    3.9 MB · Views: 10
Back
Top Bottom