The Grenadier Forum
Register Now for enhanced site access.
INEOS Agents, Dealers or Commercial vendors please contact admin@theineosforum.com for a commercial account.
gp_FACTOR_ logo_COLOR_VERTICAL.jpg


Hey Guys! AJ From GP Factor. Excited to be a part of this forum as a vendor and lifetime member!

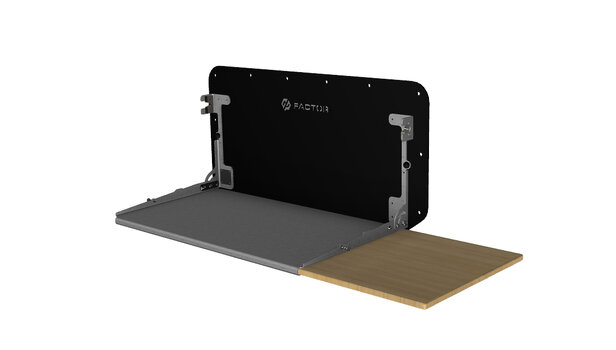
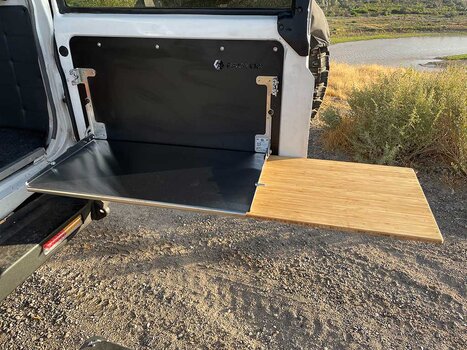
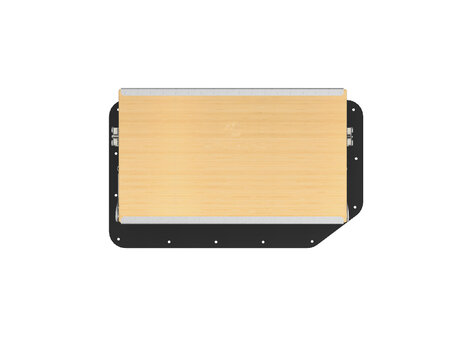
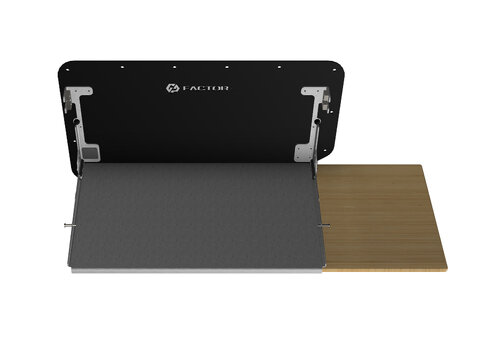
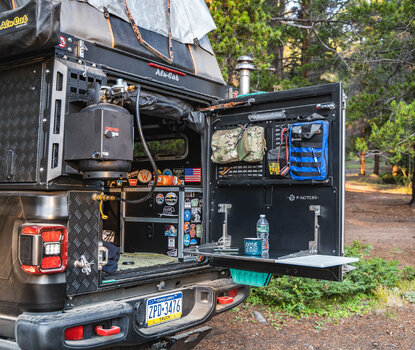
If you are unfamiliar with GP Factor, we produce high end vehicle parts and camping gear in the USA. We have prided ourselves on making parts that do not compromise on quality, and provide years of hard use. We had announced earlier this year that we will be making a full line of parts for the Ineos Grenadier. Currently, we produce one of the best folding tables on the market. We are excited to announced and give you all a sneak peek to the version we will be releasing for the Grenadier! This table is currently based on the same proven design we have made for years for Jeeps, Campers, Broncos, and Land Cruisers. It will be sized and specifically designed for the Grenadier. The specs of this table for your Grenadier as follows:

  • NO drilling or modification. This will use the existing factory bolt riv-nut locations so installation is super easy. You could even use your factory mounting hardware.
  • It will come with our patented cableless hinge design that is both durable and easy to use.
  • Table is made from food Grade 304 stainless
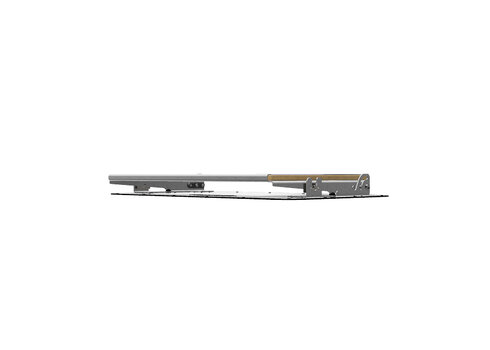
  • One handed dual latch design for easy closing and opening
  • All tables include a ½” bamboo cutting board that can be removed for cleaning or flipped over for dual sided use.
  • We will be releasing a second version of this table that will have a compartment built into the backer (like the factory plastic piece)
FULL LISTING FOR THIS TABLE CLICK HERE: GP GRENADIER FOLDING TABLE


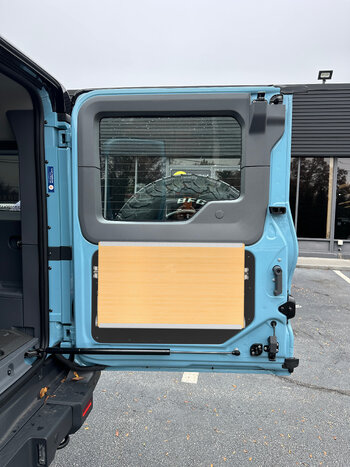
We will be opening up preorders for these in a few weeks and plan to ship the first batch in January/Early February 2024. I have also included in this post some pictures of our existing tables for reference.
You can also find a lot more pics, videos, and other media on our existing tables on our Instagram or website - @gp_factor

We will be releasing other products soon (maybe some stuff you all have been requesting…) for the Grenadier so keep an eye on our vendor area of the forum and also subscribe to our email list as well on our website – Gpfactor.com

Thanks and let me know if you have any questions! Cheers,
 

Attachments

  • Grenadier Assembly V1 ASSEMBLY - 1.jpg
    Grenadier Assembly V1 ASSEMBLY - 1.jpg
    99.3 KB · Views: 261
  • Grenadier Assembly V1 ASSEMBLY - 4.jpg
    Grenadier Assembly V1 ASSEMBLY - 4.jpg
    114.7 KB · Views: 231
  • Grenadier Assembly V1 Assembly Closed - 1.jpg
    Grenadier Assembly V1 Assembly Closed - 1.jpg
    104.1 KB · Views: 243
  • Grenadier Assembly V1 Assembly Closed - 3.jpg
    Grenadier Assembly V1 Assembly Closed - 3.jpg
    46.2 KB · Views: 273
  • IG-0001-1.jpg
    IG-0001-1.jpg
    4.7 MB · Views: 291
  • IG-0001-2.jpg
    IG-0001-2.jpg
    4.8 MB · Views: 293
  • IMG_6347.jpg
    IMG_6347.jpg
    170.2 KB · Views: 278
  • gp_FACTOR_ logo_COLOR_HORIZONTAL.jpg
    gp_FACTOR_ logo_COLOR_HORIZONTAL.jpg
    102.9 KB · Views: 325
  • CAL03940.jpg
    CAL03940.jpg
    2.4 MB · Views: 328
Last edited:

parb

Grenadier Owner
Lifetime Supporter
Local time
10:49 PM
Joined
Sep 10, 2023
Messages
945
Reaction score
1,377
Location
Silicon Valley, CA, USA
Thanks! A 71 GMC Jimmy, frame off restoration i finished in 2019. Its bone stock as it came from the factory except the seats. I opted for the tesla style leather over vinyl seats when i reupholstered them. And the center console was a total goner. I got an aftermarket one with cup holders, close to period correct but the cup holders aren't. Still ok with me.

And a 2000 Dodge Viper RT/10. I'm the first owner. Its been mildly performance enhanced.
 
Last edited:

parb

Grenadier Owner
Lifetime Supporter
Local time
10:49 PM
Joined
Sep 10, 2023
Messages
945
Reaction score
1,377
Location
Silicon Valley, CA, USA
I didn't finish the install today. Started at 9 am but needed to go for an event with family at 1.30p, have probably another 1.5 - 2hra until I'm done.

First things first. You need to trim the trim. There is a gotcha, the trim needs to be trimmed to the right of the bolt on the driver's side of the wires from the wiinch motor won't clear. The center section is for the winch itself.
a53a5208-e3f8-4e3b-b79b-e0d5c7c1a94f-1_all_22085.jpg


If you look at the trim in the top of the picture below you can see how I trimmed it on the right side of the screw. I'm about halfway done with cutting to the right of the screw in the pic below. I highly recommend getting a file so you can make the cut nice and straight. I lent my file out so I had to use a trim bit on my Dremel to try to make it look nice. Again, cut is halfway done in the pic.

a53a5208-e3f8-4e3b-b79b-e0d5c7c1a94f-1_all_22077.jpg


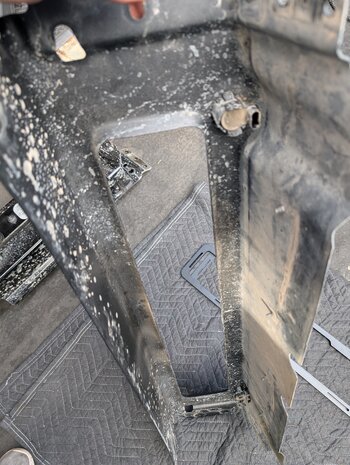
This is my inner bumper from factory. It has a tow hook bolt on it. But I don't think he kit was made for this configuration, the next picture shows the outer cover of the central bumper.
a53a5208-e3f8-4e3b-b79b-e0d5c7c1a94f-1_all_22088.jpg


Note in my bumper cover there is no way to attach the trim ring that comes with the kit. See pic below for my outer bumper. I've decided to skip that for now, but it looks a bit naked without the trim ring for the opening.

Btw I crossed a couple of streams, the mud is prevalent everywhere in the openings I can't get to with my power wash...
a53a5208-e3f8-4e3b-b79b-e0d5c7c1a94f-1_all_22087.jpg


Next I ran into a an issue. The lag bolts to attach the skid plate to the bumper are missing. Got to run to the hardware store and get them. I should have inventoried the kit before I jumped in.

Also I did not need to enlarge the hole for the positive wire, plenty of space in the factory hole. See below.

a53a5208-e3f8-4e3b-b79b-e0d5c7c1a94f-1_all_22086.jpg


Now some good news. the winch is functional. At least the wired controller is working after I hooked it up and turned on the 500A circuit.

Note to y'all... Corner bumpers are real work...
You have to be two people, its not easy to get the corner bumpers on without a bit of muscle to help you out. I found that running the bolt through the nut in the center bumper bracket prior to assembly, using the parts that came with the kit made things easier.

I Should button this up tomorrow night after work. You need to be two people for this, it's not possible to do by yourself IMHO. I used my harbor freight mechanics swiveling stool to hold the center bumper with the winch. More stable than a floor jack.
 

Attachments

  • a53a5208-e3f8-4e3b-b79b-e0d5c7c1a94f-1_all_22087.jpg
    a53a5208-e3f8-4e3b-b79b-e0d5c7c1a94f-1_all_22087.jpg
    3.7 MB · Views: 1
Last edited:
Back
Top Bottom