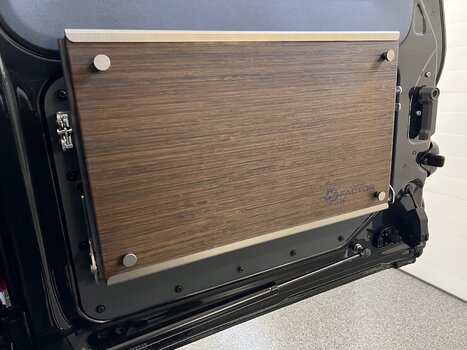
Just finished up an easy modification to my GP Factor table which is an amazing product and couldn’t be happier with it! That said, I’ve noticed the cutting board can move around in its mount slightly and on sharp bumps creates a bit of a knocking sound. The rest of the table is rock solid and doesn’t make any noise or rattles at all.
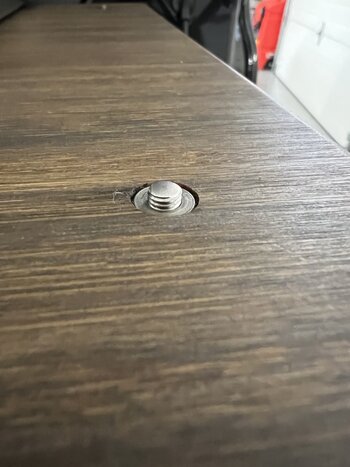
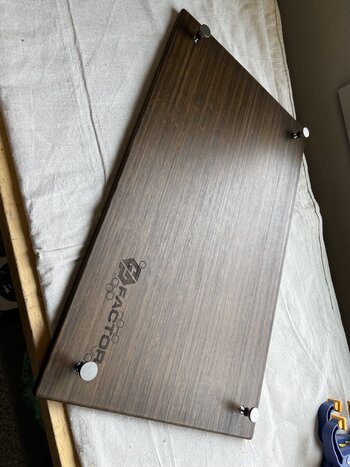
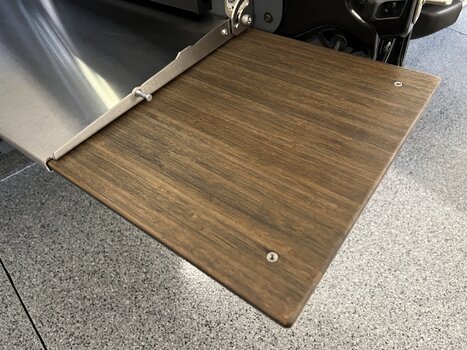
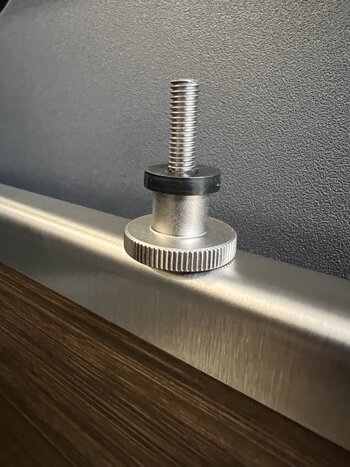
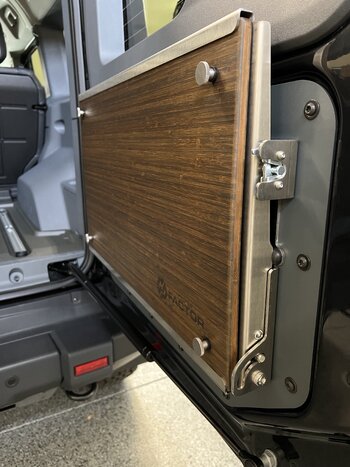
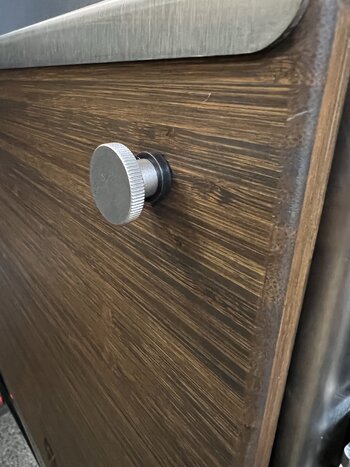
To fix the issue, I installed four stainless steel thumb screws which thread through the cutting board with stainless steel inserts designed for hardwood. The thumb screws, when snugged up, put light pressure on the underside of stainless table effectively cinching the cutting board in place. Needless to say, I was a bit reluctant to drill through the cutting board but it can easily be replaced and I certainly didn’t want to modify the solid metal parts of the table assembly or change its functionality in any way.
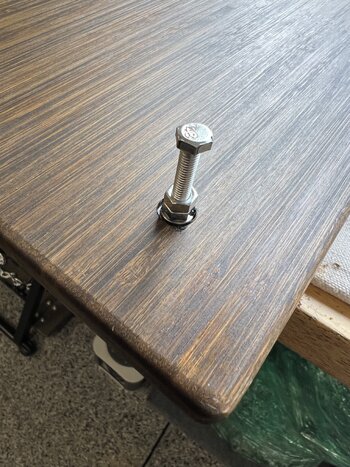
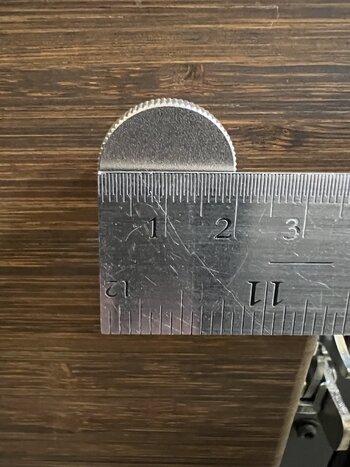
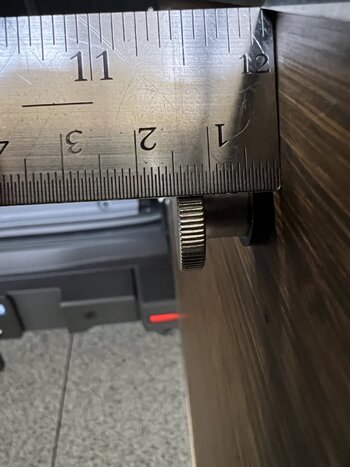
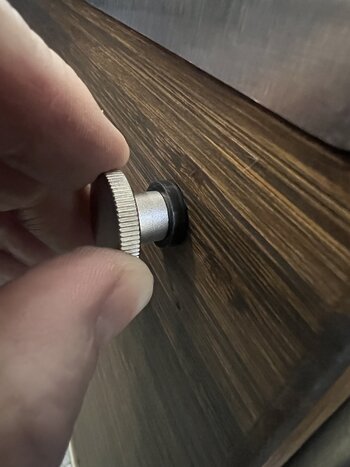
I think the modification turned out really well. The thumbscrews don’t have to be fully removed to slide the cutting board out you just loosen them slightly. They also serve as a couple of little handles and you can retighten the two inside thumbscrews to help stabilize the board while extended. The thumbscrews only protrude 15mm off the face of the cutting board when stowed but you can choose flusher faced ones if clearance is an issue for you.
Here are the part numbers I ordered from McMaster-Carr for this project if anyone is interested:
Stainless Steel Thumb Screws M5 x .08 20mm long (Part #: 92558A180 Qty: 4)
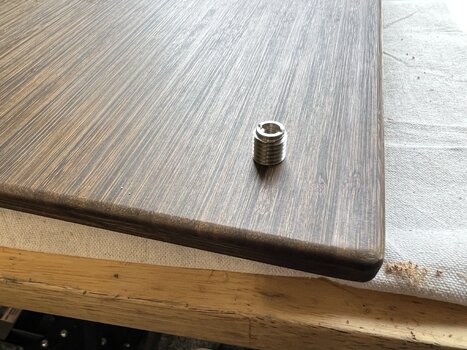
Stainless Threaded Insert M5 x 0.8 12.7mm long (Part #: 95807A510 Qty: 4)
I used small rubber washers to take up the tension on the thumbscrews and protect the cutting board. The rubber washers also helps keep the thumbscrews from loosening or backing off under vibration.
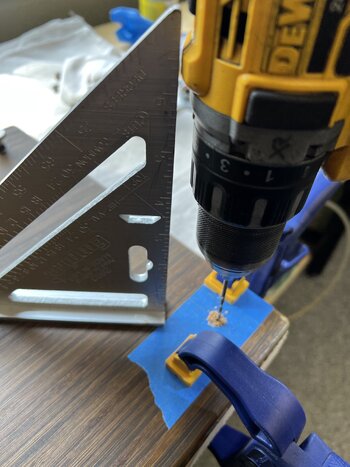
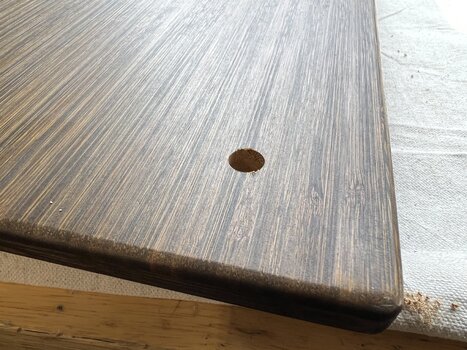
You’ll need a drill bit about 9.7mm in diameter to drill the hole for the inserts. I’d recommend using tape on both sides of the cutting board to prevent any splintering as you drill. Use a series of smaller drill bits to sneak up on the final diameter and place a solid block of wood underneath the cutting board as backing while drilling. To locate the position of the holes to drill I measured in 1.5” (38mm) from the top/bottom edge and each side to find my mark.
Be careful installing the inserts, if they feel tight enlarge the hole slightly so it threads in smoothly as you don’t want to split or crack the board. I found using an M5 bolt with a couple nuts jammed together and a 1/4 ratchet worked the best to install the inserts.
Here are some photos of the install for anyone interested in doing the same - if anyone has questions feel free to reach out.
Attachments
-
 IMG_4116.jpeg1.5 MB · Views: 105
 -
 IMG_4108.jpeg3 MB · Views: 102
 -
 IMG_4109.jpeg3.2 MB · Views: 101
 -
 IMG_4112.jpeg2.2 MB · Views: 98
 -
 IMG_4127.jpeg1.1 MB · Views: 100
 -
 IMG_4117.jpeg2.7 MB · Views: 103
 -
 IMG_4118.jpeg2.7 MB · Views: 102
 -
 IMG_4137.jpeg1.4 MB · Views: 74
 -
 IMG_4136.jpeg1.2 MB · Views: 73
 -
 IMG_4135.jpeg2.5 MB · Views: 73
 -
 IMG_4134.jpeg1.5 MB · Views: 73
 -
 IMG_4133.jpeg1.1 MB · Views: 76
 -
 IMG_4132.jpeg1.7 MB · Views: 76
 -
 IMG_4131.jpeg1.4 MB · Views: 80
Last edited:


