Added the Agile handle and a USB power jack behind it to INT2.
What do you plan on mounting? I’m looking at this as well for either a 12.9” iPad Pro or garmin tread overland xl…..
Register a free account today to become a member! Once signed in, you'll be able to contribute to the community by adding your own topics, posts, and connect with other members through your own private inbox! INEOS Agents, Dealers or Commercial vendors please contact admin@theineosforum.com for a commercial account.
Added the Agile handle and a USB power jack behind it to INT2.
Same…What do you plan on mounting? I’m looking at this as well for either a 12.9” iPad Pro or garmin tread overland xl…..
Yes please and thanks. I’m curious how the 12.9 will fit, and if it will intrude on the passenger… and if it can be oriented so the passenger can use itSame…
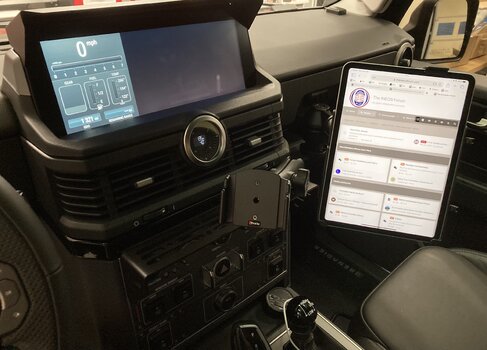
I also bought the arm from Agile and have an iPad Pro Ram mount.
I don’t have the the GPS yet, but will use the same arm.
The arm is positioned well to swing toward me or the passenger.
I’ll snap a picture once I mount the iPad.
")
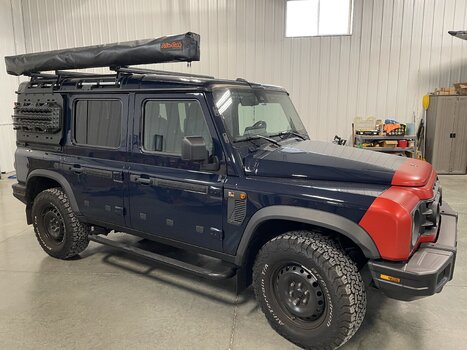
Palouse Falls?Grenadier took me here.
View attachment 7875308
Got round to installing my phone mount and charger today, alongside my UHF installation from earlier. My goal was to keep as much wiring as possible hidden, and have each piece of equipment in its own place (minimising the blocking of vents and buttons, dangling cords, etc).
This was my solution, installed so that everything is removable/movable so when I'm bored I can reconfigure it all again.
Phone charger
1. Deutsch plug fitted on the Int 2 wiring tails in the footwell so I can easily switch this out for different gadgets down the track
View attachment 7875326
2. USB C socket hidden behind dash panel as this cord will remain permanently connected and it is switched via the roof panel. Also this piece of trim is super easy to remove and refit if I do need to access the ports for any reason.
View attachment 7875327
3. Cable running inside the door seal to Lisen MagSafe charger fitted to Click-On mount on the A pillar
View attachment 7875328
UHF radio
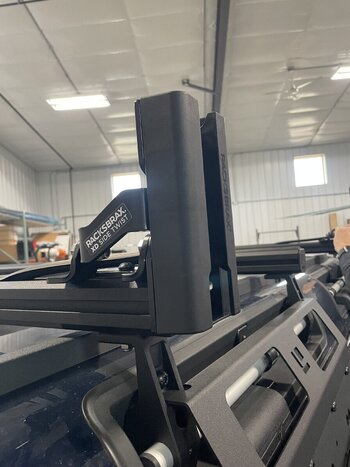
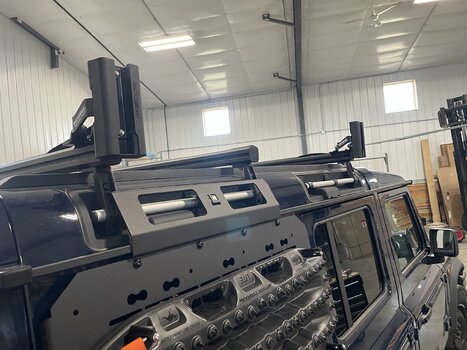
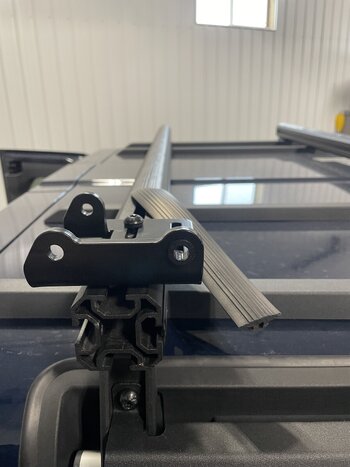
The UHF radio unit is mounted under the rear seat, and the antenna is mounted on the roof rack on a folding bracket.
View attachment 7875329View attachment 7875330
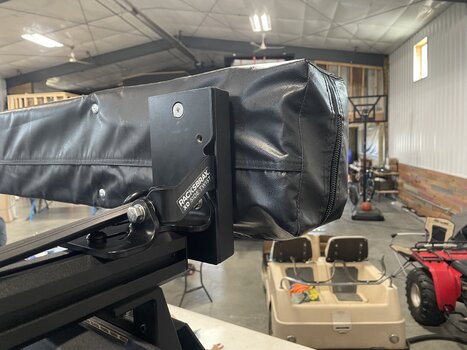
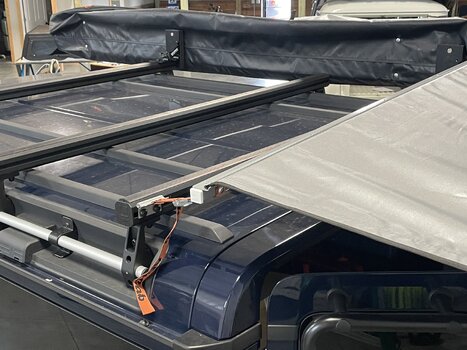
I always prefer to mount antennas on the roof for better reception, and I don't like looking at antenna's all the time. And I like to change the car configuration between urban and rural/remote travel. The antenna wiring feeds through the rear power socket on the roof, and external wiring is hidden by following the roof rack mounts and channels.
View attachment 7875331View attachment 7875332
The GME UHF has all the controls on the handset. I selected the handset location to avoid hanging cords, enable all passengers to access the radio (my kids like to use it when we travel in convoy), and keep the dash clear when it's removed for urban duties.
View attachment 7875333
Nope not for me, because I asked the auto sparky to do it. I needed a professional to do the brake controller and power to the rear for the trailer batteries etc (I don't trust myself doing electrical work). So given he was already taking it all apart I asked him to also run the wiring for the antenna and the solar panels. Glad I did because I didn't pay much more for the time, and it would've taken me a heap of time and effort to do it myself.Any issues running the cable through the roof socket? I assume you punched a hole through the gromet and ran the cable in from the outside and did you have to remove much internal trim to fish out the cable? I need to do the same to hard wire a solar panel soon and wondering how difficult it is going to be.
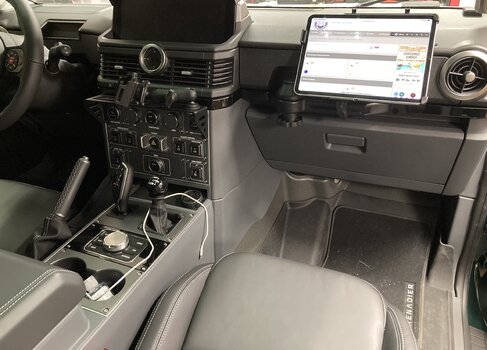
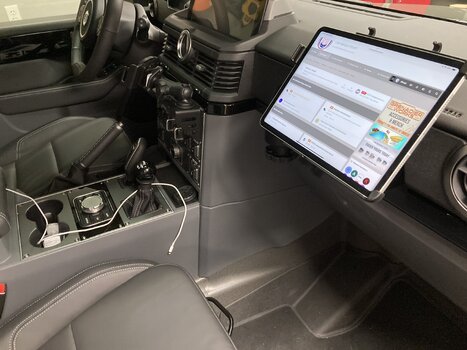
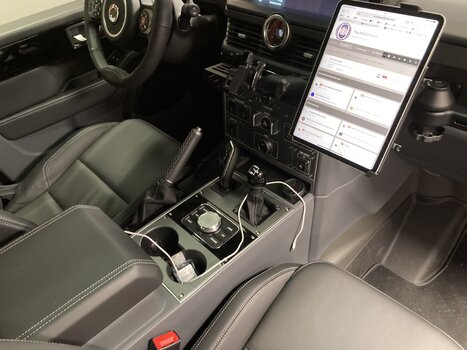
Here are a few quick pics to show the variations. With RAM, the possibilities are endless. The back of the iPad mount allows mounting the ball in a few different locations as well. It very easily allows swinging from driver to passenger.Yes please and thanks. I’m curious how the 12.9 will fit, and if it will intrude on the passenger… and if it can be oriented so the passenger can use it
Also - can you share a link to the usb outlet? R&D… rob and duplicate!

This looks good, thanks so much for sharing.Here are a few quick pics to show the variations. With RAM, the possibilities are endless. The back of the iPad mount allows mounting the ball in a few different locations as well. It very easily allows swinging from driver to passenger.
USB: Amazon USB
I didn’t use the screws, I bought some small hex head bolts and used them to mount. 18ga wire in a loom for protection, WAGO connectors for easy install and removal.
This looks good, thanks so much for sharing.
What generation iPad Pro 12.9 do you have? My understanding is that the cradle mount works with gen 3/4 but if you have a 5/6 gen it is thicker, and you need to modify the cradle a little with a Dremel
Got it thanks!I have an iPad Pro 11” third generation.
@minidok : a very wise observation and "diplomatic" warning!Nicely done - just do not forget the airbag impact on passenger

@minidok : a very wise observation and "diplomatic" warning!
@Phred : If the passenger airbag were to be activated, the top section of the dashboard opens up like a clam and the airbag's path is an explosive deployment emerging directly behind the pictured position of the iPad and propelling it directly at the passenger. Sorry! but it's quite dangerous to both the driver and the passenger to have the iPad mounted as shown. The illustrations are from the Ineos Body Builders guide in the Resources section of the forumView attachment 7875381
I’m trying to find documentation on running a wire through that grommet but can’t seem to find it using search. Any suggestion or links?Nope not for me, because I asked the auto sparky to do it. I needed a professional to do the brake controller and power to the rear for the trailer batteries etc (I don't trust myself doing electrical work). So given he was already taking it all apart I asked him to also run the wiring for the antenna and the solar panels. Glad I did because I didn't pay much more for the time, and it would've taken me a heap of time and effort to do it myself.
I didn't stay to look over his shoulder, but he said it took a bit of effort. Cable run through the grommet in the roof power outlet, roof lining down, all the trim off I believe. Others on the forum have done it and documented the process.
Can you tell me how you feed the wiring through the rear power socket I am looking to do something similar?Got round to installing my phone mount and charger today, alongside my UHF installation from earlier. My goal was to keep as much wiring as possible hidden, and have each piece of equipment in its own place (minimising the blocking of vents and buttons, dangling cords, etc).
This was my solution, installed so that everything is removable/movable so when I'm bored I can reconfigure it all again.
Phone charger
1. Deutsch plug fitted on the Int 2 wiring tails in the footwell so I can easily switch this out for different gadgets down the track
View attachment 7875326
2. USB C socket hidden behind dash panel as this cord will remain permanently connected and it is switched via the roof panel. Also this piece of trim is super easy to remove and refit if I do need to access the ports for any reason.
View attachment 7875327
3. Cable running inside the door seal to Lisen MagSafe charger fitted to Click-On mount on the A pillar
View attachment 7875328
UHF radio
The UHF radio unit is mounted under the rear seat, and the antenna is mounted on the roof rack on a folding bracket.
View attachment 7875329View attachment 7875330
I always prefer to mount antennas on the roof for better reception, and I don't like looking at antenna's all the time. And I like to change the car configuration between urban and rural/remote travel. The antenna wiring feeds through the rear power socket on the roof, and external wiring is hidden by following the roof rack mounts and channels.
View attachment 7875331View attachment 7875332
The GME UHF has all the controls on the handset. I selected the handset location to avoid hanging cords, enable all passengers to access the radio (my kids like to use it when we travel in convoy), and keep the dash clear when it's removed for urban duties.
View attachment 7875333
What happens when you use the other key? If it is unique to one key, at least you know it is that key that is offending problem.I've read about owners adding an illuminated ring to the ignition and then vehicle not starting. I do not have this but it makes me think i may have a problem with the immobiliser
I sometimes turn the key and lights come on, temporary lights go out and then instant start. Other times short pause, up to 5 seconds or so then start. Sometimes have to try again and instant start.
Today it wouldn't start after a number of tries, key out try again still nothing. Try again and starts. Not sure how many times. Later on, starts fine and then it wouldn't start, open door close, key out, in and so on. Took seatbelt off got out, opened rear door for something, back in again, starts instantly.
Any ideas? New key battery, does that affect the immobiliser?
This wad trying the 2nd key, other has done it occasionally too in the same for slow to start or try once again bit not having to try loads of times as today. Will try other key again tomorrowWhat happens when you use the other key? If it is unique to one key, at least you know it is that key that is offending problem.