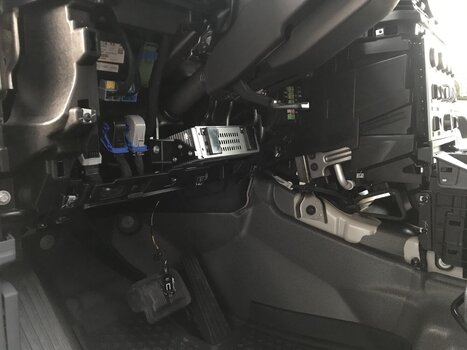
I have that exact trim remover in my Amazon supplied kit.Here another photo with tool. In the meantime, I have also dismantled the middle cover, as I want to demonstrate other covers.
")
Register a free account today to become a member! Once signed in, you'll be able to contribute to the community by adding your own topics, posts, and connect with other members through your own private inbox! INEOS Agents, Dealers or Commercial vendors please contact admin@theineosforum.com for a commercial account.
I have that exact trim remover in my Amazon supplied kit.Here another photo with tool. In the meantime, I have also dismantled the middle cover, as I want to demonstrate other covers.
This is what makes ownership of the Grenadier similar to that of the old Land Rover and other classic cars. We have a need to fix problems and improve things. Fortunately, the Grenadier should have less things to fix, but obviously, not completely.As reported earlier today, I went to my dealer. We looked to see where the water was coming from the centre console, but only suspected it was condensation.
However, I am now getting to the detail of it. I have dismantled some panels. But that is, as we say in Germany, a rat's tail. If you want to remove one fairing, you have to remove the next one first. But you can't remove it until you unscrew another one, and so on. The beginning has been made. Now I'll stop. That's enough for today.
I can't believe that noticeable moisture will be condensation. Unless you live in the tropics.As reported earlier today, I went to my dealer. We looked to see where the water was coming from the centre console, but only suspected it was condensation.
However, I am now getting to the detail of it. I have dismantled some panels. But that is, as we say in Germany, a rat's tail. If you want to remove one fairing, you have to remove the next one first. But you can't remove it until you unscrew another one, and so on. The beginning has been made. Now I'll stop. That's enough for today.
Yes, you're right. My opponent is the little time available to me and the other Land Rovers that I also have to take care of. They are suffering at the moment. Actually, I would like to do everything myself. Then I know it's really neat. But sometimes I have to accept that workshops take on work where I have to turn a blind eye to the result. I handed in my Range Rover exactly two years ago. It should be ready soon. Let's see.This is what makes ownership of the Grenadier similar to that of the old Land Rover and other classic cars. We have a need to fix problems and improve things. Fortunately, the Grenadier should have less things to fix, but obviously, not completely.
I remember handing in my Defender Td5 for some care and attention. They said it would be two weeks but had it for three months. It came back with 50% improvements and 50% worse! I now have a lot of details to address.Yes, you're right. My opponent is the little time available to me and the other Land Rovers that I also have to take care of. They are suffering at the moment. Actually, I would like to do everything myself. Then I know it's really neat. But sometimes I have to accept that workshops take on work where I have to turn a blind eye to the result. I handed in my Range Rover exactly two years ago. It should be ready soon. Let's see.
Great!I remember handing in my Defender Td5 for some care and attention. They said it would be two weeks but had it for three months. It came back with 50% improvements and 50% worse! I now have a lot of details to address.
 Then what comes out at 2 years?
  Well, I put him in the hands of the so-called experts.
")
It's not a complaint, but my experience is that there's far more to fix on the Grenadier than on my Defender.Fortunately, the Grenadier should have less things to fix, but obviously, not completely.
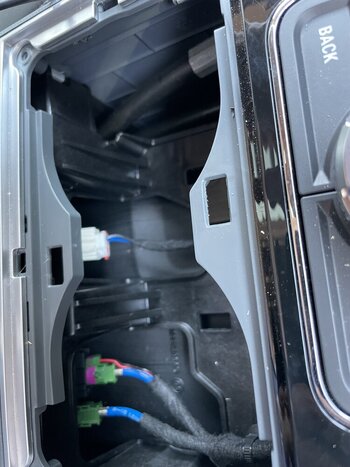
Personally, not had to ‘fix’ anything as yet. Some modifications to carry out though. Extra power outlets, line the rear compartment to disguise the cheap looking plastic etc.It's not a complaint, but my experience is that there's far more to fix on the Grenadier than on my Defender.
but they're all there waiting for youPersonally, not had to ‘fix’ anything as yet.

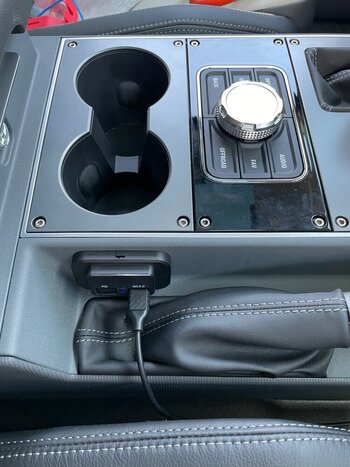
With Jeans guidance and pictures I am hoping to mount USB points as per my pic. Thinking I can PosiTap into USB wires.
When I removed screws from cup holder, it still felt very tight and didn’t want to move.
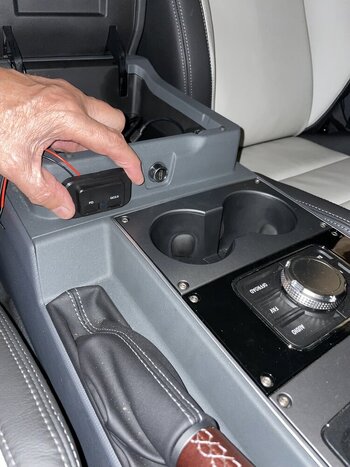
Looking at the wires that power the three power outlets within the arm rest. Any thoughts on which wire I should use to power my added USB? I wasn’t able to fit my USB on the front of the armrest as not able to thread any wire through.View attachment 7823974
Was thinking the same. The bottom fittings can take the data from inside the arm rest cubby to another location via the usb cable, perhaps where you have suggested just in front. The top usb outlet is just power like yours was considering in small shelf in front of the gear levers or visa verse.
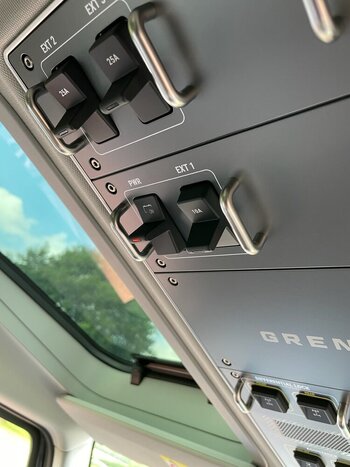
All done. Comes on with ignition or with PWR on roof panel. Wires not long enough to route in the way I would have preferred. Gynaecology skills very useful as a bit of a tight space to work in.Looking at the wires that power the three power outlets within the arm rest. Any thoughts on which wire I should use to power my added USB? I wasn’t able to fit my USB on the front of the armrest as not able to thread any wire through.
Gynaecology skills very useful as a bit of a tight space to work in.
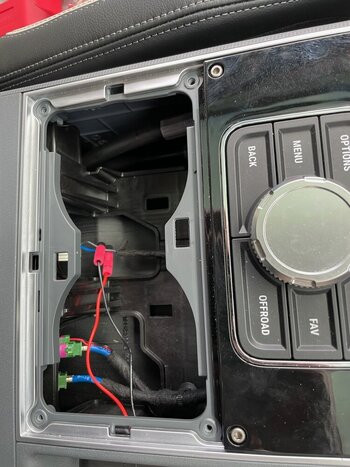
nice job. What are those connectors you spliced into the other wires with and a link to that usb socket please.All done. Comes on with ignition or with PWR on roof panel. Wires not long enough to route in the way I would have preferred. Gynaecology skills very useful as a bit of a tight space to work in.
PoziTap You can see them on YouTube. Really good experience with them so far. The pierce the wire with just a pin prick. If removed, the wire insulation tends to close in on itself again.nice job. What are those connectors you spliced into the other wires with and a link to that usb socket please.
Interesting, learning every day on this forumPoziTap You can see them on YouTube. Really good experience with them so far. The pierce the wire with just a pin prick. If removed, the wire insulation tends to close in on itself again.
")