The Grenadier Forum
Register Now for enhanced site access.
INEOS Agents, Dealers or Commercial vendors please contact admin@theineosforum.com for a commercial account.

Rear bumper removal

Zartoon

Grenadier Owner
Lifetime Supporter
Local time
11:06 PM
Joined
Sep 29, 2023
Messages
29
Reaction score
27
Location
Los Angeles, CA, USA
Greetings all

Has anyone taken off the rear bumper. Are there diagrams of what it all looks like and procedure to take off and install? Is it one piece or 3 piece?

Specifically, need to remote rear left side bumper. If there are pictures, can someone point me to it?

Thank you
 

Steveo

Global Grenadier #1009
Grenadier Owner
Lifetime Supporter
Local time
6:06 PM
Joined
Oct 13, 2022
Messages
260
Reaction score
564
Location
Dandenong Ranges, Victoria, Australia
Greetings all

Has anyone taken off the rear bumper. Are there diagrams of what it all looks like and procedure to take off and install? Is it one piece or 3 piece?

Specifically, need to remote rear left side bumper. If there are pictures, can someone point me to it?

Thank you
Hi @Zartoon did you get any answers to your post?

I want to remove the rear bumper so that I can fit the valves for some suspension airbags

Cheers,
Steve
 

andremacd

Grenadier Owner
Lifetime Supporter
Local time
9:06 AM
Joined
Jun 26, 2024
Messages
8
Reaction score
17
Location
South Africa
Hello gents

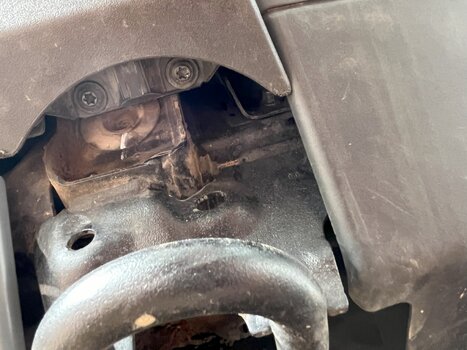
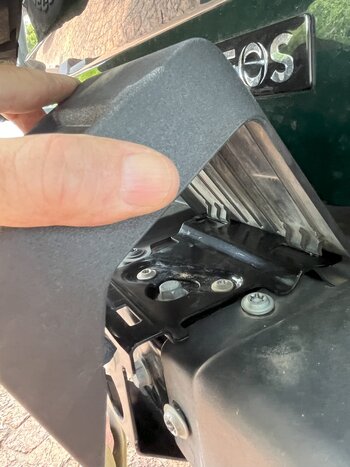
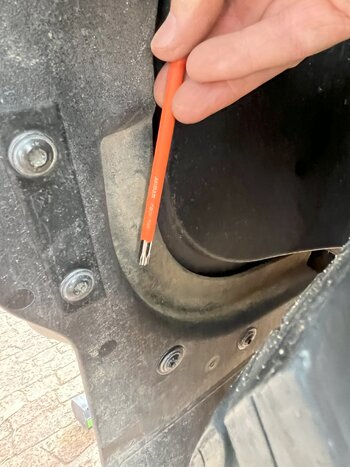
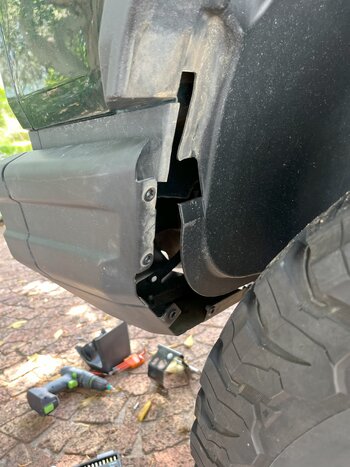
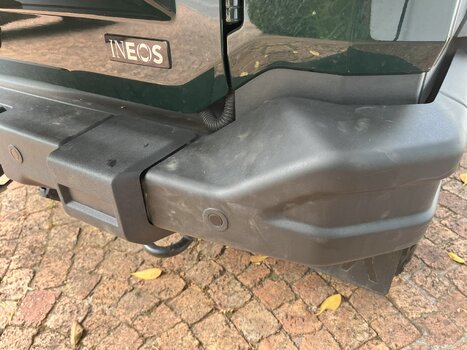
I have also been wanting to take a closer look at the rear bumper so decided to remove the plastic covers from the right rear side. Quite straightforward, but as with most things Ineos, you will need a wide range of torx wrenches..
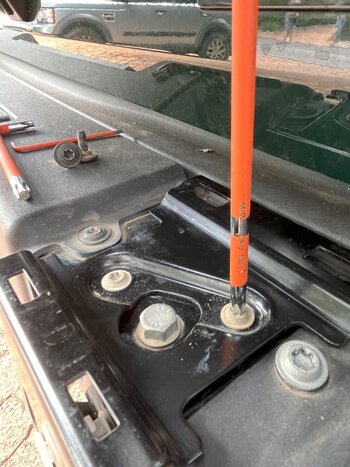
Start by removing the cap piece (below the Ineos sign) - 2 (T40 iirc) bolts from below. Now the plastic cap comes off by tilting upwards.
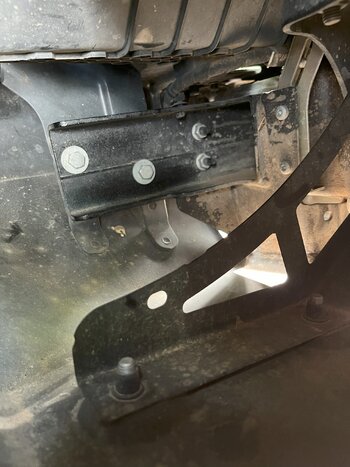
Underneath is a thin metal bracket - remove the 2 T30 screws from above. The base of this piece is also held in place by the T40 screws that you have already removed above. Metal bracket comes off.

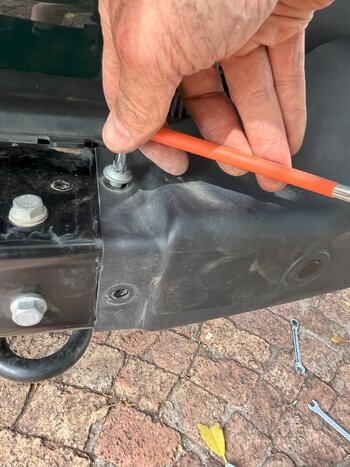
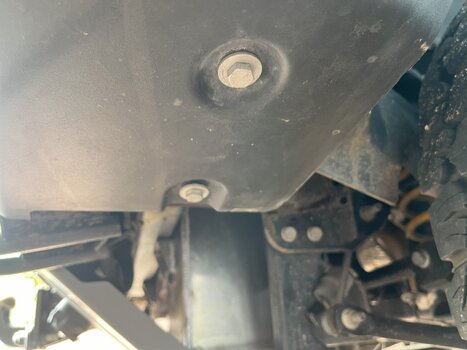
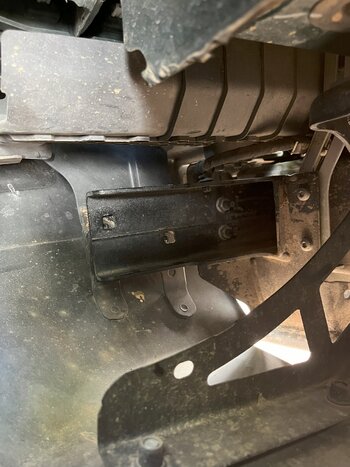
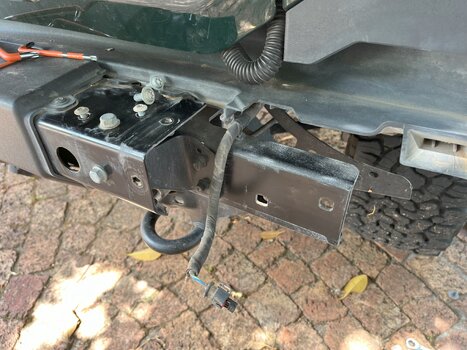
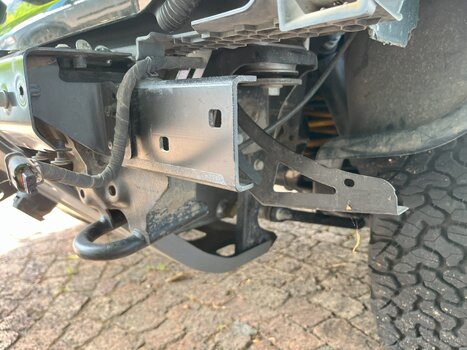
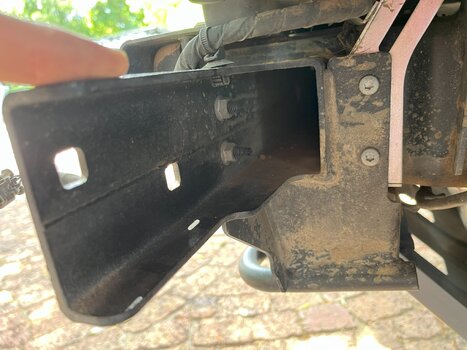
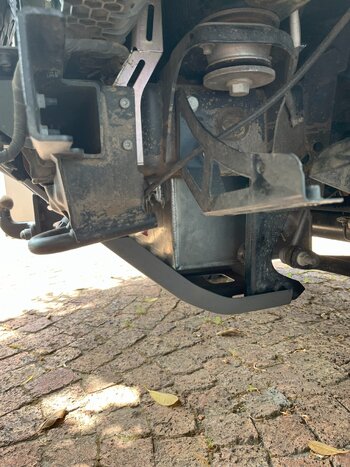
The corner bumper is now removed: Two T45 screws adjacent to the pieces already removed. Five T40 screws to remove the mudflap. Two 13mm bolts from the undersurface. Now the fun part - two more 13mm bolts located inside the corner piece that can only be accessed by wedging your arm in from the wheel well. Disconnect the PDC and the piece is off.
Hope this helps.
Cheers
Andre
 

Attachments

  • IMG_9540.jpeg
    IMG_9540.jpeg
    2.6 MB · Views: 87
  • IMG_9539.jpeg
    IMG_9539.jpeg
    1.7 MB · Views: 80
  • IMG_9537.jpeg
    IMG_9537.jpeg
    1.6 MB · Views: 76
  • IMG_9536.jpeg
    IMG_9536.jpeg
    1.7 MB · Views: 79
  • IMG_9534.jpeg
    IMG_9534.jpeg
    2.1 MB · Views: 77
  • IMG_9533.jpeg
    IMG_9533.jpeg
    1.5 MB · Views: 77
  • IMG_9532.jpeg
    IMG_9532.jpeg
    2.3 MB · Views: 74
  • IMG_9529.jpeg
    IMG_9529.jpeg
    2.3 MB · Views: 76
  • IMG_9531.jpeg
    IMG_9531.jpeg
    2.3 MB · Views: 79
  • IMG_9530.jpeg
    IMG_9530.jpeg
    2.4 MB · Views: 83
  • IMG_9523.jpeg
    IMG_9523.jpeg
    2.5 MB · Views: 83
  • IMG_9524.jpeg
    IMG_9524.jpeg
    2.3 MB · Views: 83
  • IMG_9526.jpeg
    IMG_9526.jpeg
    2.1 MB · Views: 81
  • IMG_9527.jpeg
    IMG_9527.jpeg
    3.1 MB · Views: 94

Logsplitter

Photo Contest Winner
Grenadier Owner
Lifetime Supporter
Local time
7:06 AM
Joined
Oct 31, 2022
Messages
2,869
Reaction score
10,177
Location
🇬🇧
Hello gents

I have also been wanting to take a closer look at the rear bumper so decided to remove the plastic covers from the right rear side. Quite straightforward, but as with most things Ineos, you will need a wide range of torx wrenches..
Start by removing the cap piece (below the Ineos sign) - 2 (T40 iirc) bolts from below. Now the plastic cap comes off by tilting upwards.
Underneath is a thin metal bracket - remove the 2 T30 screws from above. The base of this piece is also held in place by the T40 screws that you have already removed above. Metal bracket comes off.

The corner bumper is now removed: Two T45 screws adjacent to the pieces already removed. Five T40 screws to remove the mudflap. Two 13mm bolts from the undersurface. Now the fun part - two more 13mm bolts located inside the corner piece that can only be accessed by wedging your arm in from the wheel well. Disconnect the PDC and the piece is off.
Hope this helps.
Cheers
Andre
Where did you get the auxiliary fuel tank made ? And is your Grenadier petrol or diesel.
Thanks
 

andremacd

Grenadier Owner
Lifetime Supporter
Local time
9:06 AM
Joined
Jun 26, 2024
Messages
8
Reaction score
17
Location
South Africa
Where did you get the auxiliary fuel tank made ? And is your Grenadier petrol or diesel.
Thanks
Hi Logsplitter…sharp eye!

Diesel.
Aux tank is made by highlander offroad, an under the radar top-notch engineer/apple farmer in Elgin, South Africa. 77 litre. Over engineered and built. Perfect for the grenadier.

 
Last edited:

Logsplitter

Photo Contest Winner
Grenadier Owner
Lifetime Supporter
Local time
7:06 AM
Joined
Oct 31, 2022
Messages
2,869
Reaction score
10,177
Location
🇬🇧
Hi Logsplitter…sharp eye!

Diesel.
Aux tank is made by highlander offroad, an under the radar top-notch engineer/apple farmer in Elgin, South Africa. 77 litre. Over engineered and built. Perfect for the grenadier.

When removing the rear silencer did you just straight pipe it or put a small silencer in the system.
 
  • Like
Reactions: PBD

hoohoohama

Grenadier Owner
Lifetime Supporter
Local time
2:06 AM
Joined
Mar 26, 2023
Messages
116
Reaction score
82
Location
New York
Has anyone ordered parts (for example, a rear corner bumper) from Ineos dealership? wondering how long the process takes these days.
 
  • Like
Reactions: PBD

hoohoohama

Grenadier Owner
Lifetime Supporter
Local time
2:06 AM
Joined
Mar 26, 2023
Messages
116
Reaction score
82
Location
New York
Has anyone ordered parts (for example, a rear corner bumper) from Ineos dealership? wondering how long the process takes these days.
I recently ordered a rear corner bumper from the nearest dealer, surprisingly it only took about one week (shipping from Belgium) and cost $534
 

hoohoohama

Grenadier Owner
Lifetime Supporter
Local time
2:06 AM
Joined
Mar 26, 2023
Messages
116
Reaction score
82
Location
New York
Hello gents

I have also been wanting to take a closer look at the rear bumper so decided to remove the plastic covers from the right rear side. Quite straightforward, but as with most things Ineos, you will need a wide range of torx wrenches..
Start by removing the cap piece (below the Ineos sign) - 2 (T40 iirc) bolts from below. Now the plastic cap comes off by tilting upwards.
Underneath is a thin metal bracket - remove the 2 T30 screws from above. The base of this piece is also held in place by the T40 screws that you have already removed above. Metal bracket comes off.

The corner bumper is now removed: Two T45 screws adjacent to the pieces already removed. Five T40 screws to remove the mudflap. Two 13mm bolts from the undersurface. Now the fun part - two more 13mm bolts located inside the corner piece that can only be accessed by wedging your arm in from the wheel well. Disconnect the PDC and the piece is off.
Hope this helps.
Cheers
Andre
How did you disconnect the parking sensor? Do you need to pop it out first?
 
Back
Top Bottom