The Grenadier Forum
Register Now for enhanced site access.
INEOS Agents, Dealers or Commercial vendors please contact admin@theineosforum.com for a commercial account.

Build Thread My Grenadier Trialmaster Utility Build

Znarfgh

Grenadier Owner
Local time
7:51 PM
Joined
Sep 11, 2022
Messages
251
Reaction score
473
Location
Melbourne
Build01.jpg


Some preliminary ideas for my build:

* Light Bar on rack
* Brake controller
* Power for van
* Side steps/rock sliders
* Rok lights for roof rack
* UHF & CelFi fold down Aerial mounts on roof rack (or on bull bar which is not a high priority at this point)

Roll on Saturday so I can get my hands on the vehicle.
 

DenisM

Grenadier Owner
Lifetime Supporter
Local time
6:51 PM
Joined
Jan 26, 2022
Messages
2,208
Reaction score
4,406
Location
Brisbane, Queensland Australia
View attachment 7827849

Some preliminary ideas for my build:

* Light Bar on rack
* Brake controller
* Power for van
* Side steps/rock sliders
* Rok lights for roof rack
* UHF & CelFi fold down Aerial mounts on roof rack (or on bull bar which is not a high priority at this point)

Roll on Saturday so I can get my hands on the vehicle.
Certainly hope you get your vehicle on Saturday and that it completely fills your hopes and expectations!:D
Might I humbly suggest that if you are not considering taking the Grenadier into extreme situations, then the side runners are far preferable to rock sliders in term of their everyday utility. Most reports on this forum and elsewhere seem to confirm that the positioning of the rock sliders so close to the door sill makes them impractical to use as a safe means of entry/exit.
I have the side runners on my Trialmaster and they are, in my view, a "must". I sometimes wonder why they weren't a standard inclusion on all models...
 
Last edited:

Znarfgh

Grenadier Owner
Local time
7:51 PM
Joined
Sep 11, 2022
Messages
251
Reaction score
473
Location
Melbourne
DenisM,

Thanks, I also hope it completely fills my hopes and expectations but I know that it won't. As long as it's reliable and capable that's what matters. I love my Grand Cherokee but hate its reliability which is atrocious.

My Grenadier will be mostly used as a daily commute and outback tourer but should I feel the need to tackle the rougher stuff I want to be able to do so. The steps I envision will not necessarily double as a rock slider as I don't want the additional weight. Here's what I have on my Disco 2 and will serve as inspiration for the Grenadier.


20221215_165520.jpg
 

DenisM

Grenadier Owner
Lifetime Supporter
Local time
6:51 PM
Joined
Jan 26, 2022
Messages
2,208
Reaction score
4,406
Location
Brisbane, Queensland Australia
@Znarfgh FWIW: The side runners on the Grenadier (12.5kg each/300kg load, 113 mm sill clearance ) are half the weight of the optional rock sliders (25 kg each/2000kg load, 40mm sill clearance)
 

Znarfgh

Grenadier Owner
Local time
7:51 PM
Joined
Sep 11, 2022
Messages
251
Reaction score
473
Location
Melbourne
@Znarfgh FWIW: The side runners on the Grenadier (12.5kg each/300kg load, 113 mm sill clearance ) are half the weight of the optional rock sliders (25 kg each/2000kg load, 40mm sill clearance)
I know but I don't like them and think they will sustain damage fairly easily. It would have been easier to order the factory steps and bull bar but neither meet my requirements so will wait till something comes from the aftermarket. If the aftermarket does not produce anything I will build my own side steps and can always revert to the IG bull bar. Theu might even upgrade the bull bar with aerial mounts and then I'll buy one.
 

Ovrland Bill

Grenadier Owner
Lifetime Supporter
Founding Guard
Local time
12:51 AM
Joined
Sep 25, 2021
Messages
321
Reaction score
345
Finally in its home base but before the work begins it needs to go over the weighbridge so that I have a starting point for the weight reduction process - a diet is definitely on the agenda.
View attachment 7828488
“Adding lightness” is a nice change!
 

grenadierboy

Grenadier Owner
Lifetime Supporter
Local time
7:51 PM
Joined
Apr 6, 2022
Messages
1,812
Reaction score
3,306
Location
Armadale Australia
View attachment 7827849

Some preliminary ideas for my build:

* Light Bar on rack
* Brake controller
* Power for van
* Side steps/rock sliders
* Rok lights for roof rack
* UHF & CelFi fold down Aerial mounts on roof rack (or on bull bar which is not a high priority at this point)

Roll on Saturday so I can get my hands on the vehicle.


Considering some Stedi MICRO V2 13.9 INCH 24 LED FLOOD LIGHTS (https://www.stedi.com.au/micro-v2-13-9-inch-24-led-flood-light-amber.html), attaching to the underside of the exterior rails on a Front Runner slimline rack (see photo) & plug into roof outlets.

Maybe 1 each side and 1 at the rear
front runner with stedi lights.png
front runner.png
 
Last edited:

Znarfgh

Grenadier Owner
Local time
7:51 PM
Joined
Sep 11, 2022
Messages
251
Reaction score
473
Location
Melbourne
Considering some Sted iMICRO V2 13.9 INCH 24 LED FLOOD LIGHTS (https://www.stedi.com.au/micro-v2-13-9-inch-24-led-flood-light-amber.html), attaching to the underside of the exterior rails on a Front Runner slimline rack (see photo) & plug into roof outlets.

Maybe 1 each side and 1 at the rearView attachment 7828568View attachment 7828569
They look good but at 2600lm, pretty bright. I've got these in a kit form and will mount one amber and one white on each side. Have not quite worked out the rear yet. The ROK lights are 813lm and bright enough for my needs. https://www.perceptionlighting.com.au/3-surface-mount-rock-light-500k-rok3
 

Znarfgh

Grenadier Owner
Local time
7:51 PM
Joined
Sep 11, 2022
Messages
251
Reaction score
473
Location
Melbourne
20231003_150723c.jpg

A quick test fit for a unit I had built for my Disco 2. Fits well and the L Track will provide tie down points for it.
20231003_150752c.jpg

Left hand side houses a 40 litre Engel on a slide and the RHS has a custom storage box. The lid becomes a work platform for food prep etc. The top has a platform for storage boxes which can be lashed down on tie rails to the side of the unit.

With a bit of refurbishment it will come up like new. Relatively light weight but I'll investigate a rebuild in aluminium once all the other tasks are ticked off the list. Just waiting for my L track fittings to arrive.

81axJek57wL._AC_SX522_.jpg
 

grenadierboy

Grenadier Owner
Lifetime Supporter
Local time
7:51 PM
Joined
Apr 6, 2022
Messages
1,812
Reaction score
3,306
Location
Armadale Australia

Znarfgh

Grenadier Owner
Local time
7:51 PM
Joined
Sep 11, 2022
Messages
251
Reaction score
473
Location
Melbourne
I have read a few things about battery voltage on the Grenadier and decided to keep an eye on both my batteries with a cheap battery monitor until I have more time to work on a more comprehensive solution. For that reason I'm not mounting it but leaving it in one of the cup holders. I may yet install it in the blank where the seat heater switch would be but will wait before breaking out the step drill.👀

20231004_142711c.jpg
 

Znarfgh

Grenadier Owner
Local time
7:51 PM
Joined
Sep 11, 2022
Messages
251
Reaction score
473
Location
Melbourne
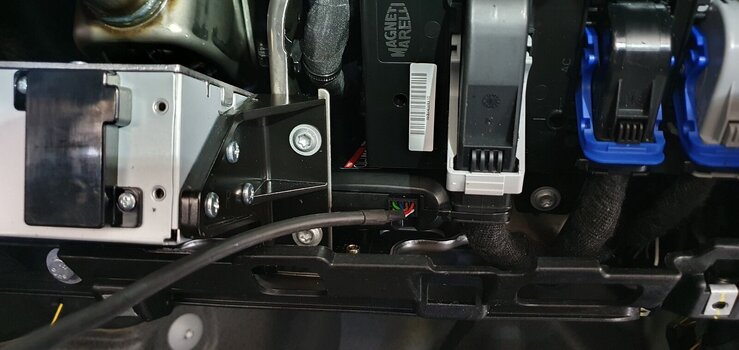
My trailer wiring has been a little slow due to specialised tool and fittings requirements. I have managed to install the Redarc brake controller unit and the Anderson plug wiring to power the caravan. I used an existing point in the Littlefuse box which is permanently live.

The brake controller is located under the dash next to the ICE unit and the rotary dial to the right of the steering column.
Clipboard01.jpg

I had to fabricate two small brackets and some Nutserts but no holes were drilled in the Grenadier.

20231029_125745.jpg
 

Attachments

  • 20231029_123349.jpg
    20231029_123349.jpg
    175.1 KB · Views: 51

Znarfgh

Grenadier Owner
Local time
7:51 PM
Joined
Sep 11, 2022
Messages
251
Reaction score
473
Location
Melbourne
Something that has annoyed me from day 1 is the lid stay in the commercial 2 seater. The metal rod is too short, fiddly to locate and does not hold the lid open far enough to give clear access to the battery compartment.

A 330mm gas strut has solved that problem. Access is easier, the lid opens to 70 degrees which gives unimpeded access to the battery compartment.

20231106_135337.jpg


The one I used was at 90N which is just barely enough to hold the lid up so I think I will uprate it slightly = maybe 100N or 110N.

The strut is very close to the positive battery terminal which now has heat shrink around it and will also get a rubber boot in the near future. I checked that there was no contact using a mini camera and all is good.

20231106_11_12_33.png
 

Znarfgh

Grenadier Owner
Local time
7:51 PM
Joined
Sep 11, 2022
Messages
251
Reaction score
473
Location
Melbourne
Installing the brake controller did my head in. Working out the pin locations when using a 13 - 7pin converter was a nightmare. The Ineos EBDK-030 instructions also appear to have a couple of flaws in it - namely pin 12 for the blue wire did not work and I swopped it to pin 5 and this worked. Also, pin 2 and 8 need to be swopped as well as reverse lights on the van would only work when the fog lights were switched on. All these changes are made at the 13 pin socket.

20231108_160952c.jpg


Anyway, all is good now and the Anderson plug at the rear is also installed. Hooked direct to the starter battery and a nearby earth. This is a temporary solution as I intend to remove the NATO connector and replace it with a flush mount Trailervision Anderson plug cover.

20231108_161106c.jpg
 

Znarfgh

Grenadier Owner
Local time
7:51 PM
Joined
Sep 11, 2022
Messages
251
Reaction score
473
Location
Melbourne
An eagerly awaited arrival today.

20231126_135509.jpg

Now for the mounting and connection but this may take a while as I need to get a Deutsch plug crimping tool.
 

Znarfgh

Grenadier Owner
Local time
7:51 PM
Joined
Sep 11, 2022
Messages
251
Reaction score
473
Location
Melbourne
And fitted but not yet wired up.
20231126_162541.jpg

Awaiting some Deutsch DTP pins and need to source a crimper.
 

Znarfgh

Grenadier Owner
Local time
7:51 PM
Joined
Sep 11, 2022
Messages
251
Reaction score
473
Location
Melbourne
A few smaller jobs completed.

Fire extinguisher - quick access was the criteria for location - jump out grab the extinguisher and deploy.
20231129_184142.jpg

Phone Mount - I don't get a clear view of the screen but that's OK as Android Auto does the job just fine. Main reason is to be able to wirelessly charge the phone when in the car. I also wanted to get the phone away from the top of the dash as it tends to overheat in that location.
20231201_093450.jpg

UHF microphone - magnetic mount and for the time being mounted with double sided tape to test the location. Once confirmed, holes will be drilled and screws used.
20231201_093529.jpg

Caravan TPMS (just an old TPMS car unit that I now use on the van with only two sensors running)
20231201_093502.jpg
 
Back
Top Bottom