Register a free account today to become a member! Once signed in, you'll be able to contribute to the community by adding your own topics, posts, and connect with other members through your own private inbox! INEOS Agents, Dealers or Commercial vendors please contact admin@theineosforum.com for a commercial account.
It all sounds like its the way to go but I might see if I can fit the 4 brackets thats in the kit just for extra support . Thats saved me a lot of trial and error because I only have 100mm above the roofline so it fits in the garage.Did a 5 hr each way road trip late January, also went mountain bike riding via appprox 5 kms each way of dirt roads etc etc over creeks and ruts and corrugations at speed, It has been nothing but rock solid.
Cool bike rack. Love the design!Did a 5 hr each way road trip late January, also went mountain bike riding via appprox 5 kms each way of dirt roads etc etc over creeks and ruts and corrugations at speed, It has been nothing but rock solid.
Its possible for sure, buy the 4 pack of base stow it brackets and then 2x packs of the awning brackets.It all sounds like its the way to go but I might see if I can fit the 4 brackets thats in the kit just for extra support . Thats saved me a lot of trial and error because I only have 100mm above the roofline so it fits in the garage.
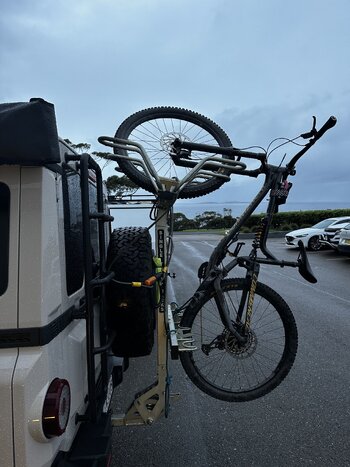
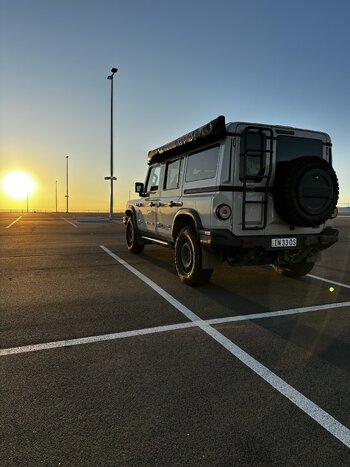
Yeah the spare tire means these kind of racks probably make the most sense, especially for long trips. Short in town trips they can be a pain however…. But then again depending on how many bikes you have and the cost i will trade convenience for overbuilt stability and piece of mind. Here is a side on shot, its possible to adjust it and lower it all the way down with the bikes off to still fully access the boot.Cool bike rack. Love the design!
If the Pirate Camp Co brackets do not work, KAON has a similar bracket that might.I'm pretty sure I can't attach mine to the rails. I just picked up a bargain from Expedition SLRV on the Gold Coast. Only problem it weighs 40kg. The brackets are for a platform rack, I have the three cross bars. The brackets that came with it weigh over 10kg, they are 6mm stainless plate, folded and welded. I though about modifying them, but I think I will buy these HD brackets from Pirate Camp Co. instead instead. As long as they fit, waiting on dimensions. A lot less work.
Anyone interested in very heavy stainless brackets? View attachment 7855543View attachment 7855544View attachment 7855541
1. Yes it rotates by design, I actually find it handy. I can tilt the awing up slightly if needed to clean the rain gutter area.I was looking at doing something similar, and wanted to keep the profile as low as possible with an awning being attached, i am think normal 2.5x2.5m awning at this point.
A few questions:
i think due to holes in bracket i will flip it so its the other way
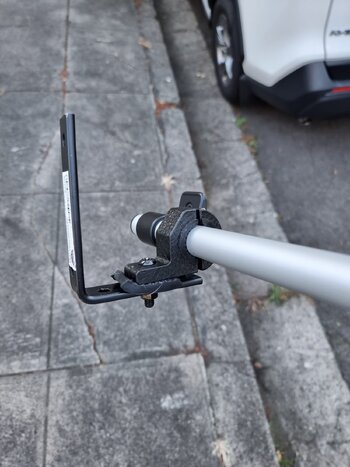
- should the silver metal bar rotate? Only the side which i removed to put bracket on rotates easily (by hand) Should i be doing something up tighter? Need to add some rubber?
- Did your bracket rest on the gutter rail?
Alan,Here is my first go at a build post, feel free to read and follow my process, or just skip ahead to the pictures
Since seeing the original designs I was very interested in the addition of the side tie down rails on the roof of the grenadier. This with the ability for the roof to take some load was a big factor back when I decided to put my deposit down as this to me would cover 90% of my needs should I be able to find a way to mount my foxwing without a roofrack in place.
Initially I found some brackets that looked plausible from and American supplier who made similar for fj cruiser style roof racks, these were around $200 plus shipping.
I also looked to black sheep as they had proven the side roof rails to indeed be load rated / capable. The high lift jack mounts they have looked perfect to be fair, however the $500 plus shipping to land them in Sydney Australia was a bit too much for me to risk it should it not work as needed.
Then a few weeks ago the soultion came to me in the from of Rhino Rack themselves.
They offer a new modular system called “Stow It”
It starts as a base pack of 4 legs with additional pieces to then be purchase as needed.
I went to a local bcf where the staff were most kind in allowing me to check if my theory would worth with one of the stow it brackets out in the car park.
I almost couldn’t believe it but it seemed to my eye to no only fit and not foul or rub on anything but to actually fit being supported on the side of the roof gutter and remain level!!!
Happy enough I took the plunge and purchased the base kit “SSIT” and the additional awning adapter 2 pack “BSIT”
Next stop was to Bunnings to find a suitable ubolt.
The tie down rail is 25mm in diameter but after a quick test fit in store the 26 and even 28mm u bolts didn’t quite fit into the stow it bracket. I then found the solution in the form of Taskmaster 51 x 28.4mm 316 Stainless Steel U Bolt. Yes the 0.4mm extra made all the difference. They are not an easy bolt to find in stock and I had to go to 3 stores to finally get 4 of them. Note: only needed 2 for the awning side and used the other 2 to mount up another rhino rack item from my past vehicle.
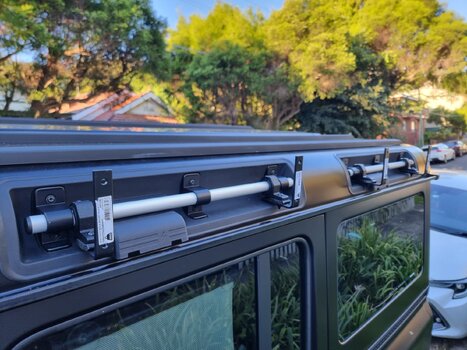
Getting home I got straight into it and decided on the mounting points for each bracket. The gap between was approx 910-915mm which spread the load evenly enough and didn’t cover or restrict access to the roof power points.
When mounting the brackets to the car I also purchased some spring washers to help raise up the nuts enough to allow space to tighten them, I setted with 1 washer closest to the roof and 3 closet to the awning. The actual job was a very easy and fast one with the help of an 11mm spanner and Something to
Stand on helps.
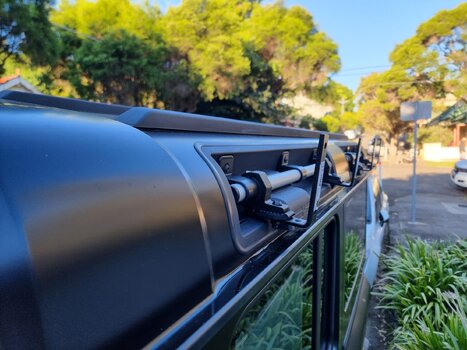
Taking the new BSIT brackets I mounted them to the foxwing and with some quick measurements I decided I wanted the rear of the awning to be a few cm past the back of the car, the idea being it would allow the awning to open in full and not snag the rear doors but still be close enough to ideally provide a near 100% waterproof cover above the rear when setup.
Once the brackets locations were trippled measured checked and tightened I lifted the foxwing up to see it it would fit. All looked good so I added the top bolt onto each mount to secure the foxwing and set it up.
The foxwing setup as easily as usual and once the supporting poles were added the rear doors could be opened and apart from a bit of the foxwing fabric nothing hit or got in the way.
For less than $250 I have a better than I could have imagined outcome that if / as needed I can add and remove the awning. Even when mounted the tie down points are easily accessible behind to still tie down a swag and so on.
I tried to take as many pictures along the way and when all was proven and done, I couldn’t help but just stand and admire the results.
The foxwing fits like factory with no clearance issues with the biggest bonus of all being that it added zero additional height to the vehicle.
Hopefully the above process makes sense and the pics can tell the rest of the story. Comments and questions welcomed.
Cheers
Alan
Yep always the gamble when you bolt a sail to a 4x4Alan,
Have you ever experienced a very strong front coming through (sand storm) in the desert before rains or on a beach with no where to hide? We had a mate with an Oztent well staked to the ground and his 4x4 ripped to shreds in the desert before the rains come. He had a hard trip.
At a minimum, use 4x brackets (not 2). Plus large screw in ground peg bolts to secure tent poles supporting the 270 awning, do not assume the weather mate.
Plus when I replaced the roof aluminium tubes with steel, I noted the very small bolts used to fix to roof. It won't carry a big load, especially in a big wind.
Hope it helps.
 .
.I would suggest same size but stronger material if thats a concern… i can say that the setup i have more than easily holds my long camping shovel. But i agree i would not be keen to mount a high lift jack in the same methodOzyGrenie - did you think those smaller screws securing the aluminum tubes could be upsized? I ask because I’ve been contemplating using them to mount a shovel and axe.
I see that Black Sheep Innovations used them for a Hi-Lift mount, but their mount aopears to rest on the rain gutter, so the tube’s aren’t taking the full weight.