The Grenadier Forum
Register Now for enhanced site access.
INEOS Agents, Dealers or Commercial vendors please contact admin@theineosforum.com for a commercial account.

How to install the wolfbox mirror

Jörk

Grenadier Owner
Local time
2:35 AM
Joined
Sep 7, 2023
Messages
84
Reaction score
85
Location
Schwäbisch Gmünd, Deutschland
Hello
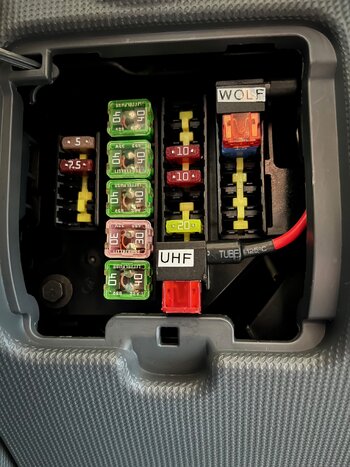
I like to install the wolfbox mirror and need some help.
Does someone knows about the free FC‘s from cockpit electrical center witch free one is permanent + and witch free one is ignition switched on +?
 

Attachments

  • IMG_2495.jpeg
    IMG_2495.jpeg
    1.6 MB · Views: 23
  • IMG_2495.jpeg
    IMG_2495.jpeg
    1.6 MB · Views: 23

Jean Mercier

GG#920
Grenadier Owner
Lifetime Supporter
Local time
2:35 AM
Joined
Sep 10, 2022
Messages
2,633
Reaction score
9,406
Location
Sint-Martens-Latem, Belgium
I think you will find quite some information in this thread:

And if you want to know how I installed my "not-Wolfbox" mirror, here some explanation:
 
Vote:
Upvote 0

landmannnn

Grenadier Owner
Local time
1:35 AM
Joined
Apr 9, 2024
Messages
583
Reaction score
894
Location
UK
Hello
I like to install the wolfbox mirror and need some help.
Does someone knows about the free FC‘s from cockpit electrical center witch free one is permanent + and witch free one is ignition switched on +?
The clock is the only permanent, suggest the 12v socket for switched.
 
Vote:
Upvote 1

MattG

GG #2987
Grenadier Owner
Lifetime Supporter
Local time
12:05 PM
Joined
Jun 7, 2023
Messages
104
Reaction score
215
Location
Adelaide, South Australia
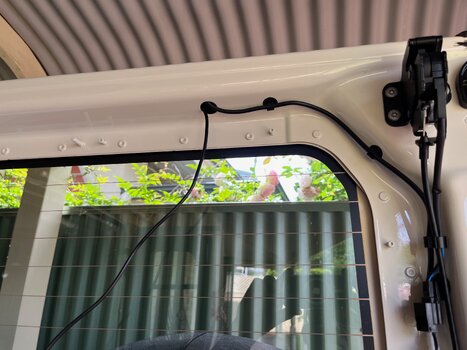
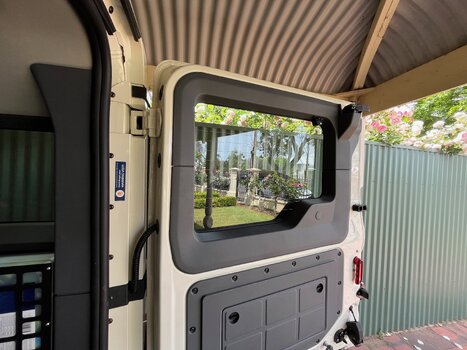
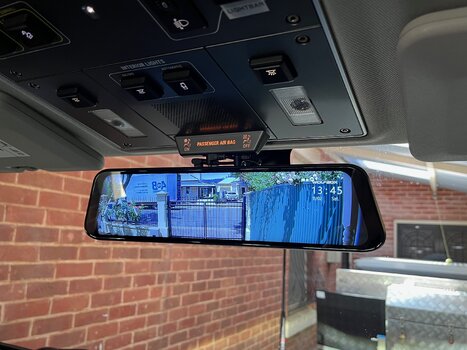
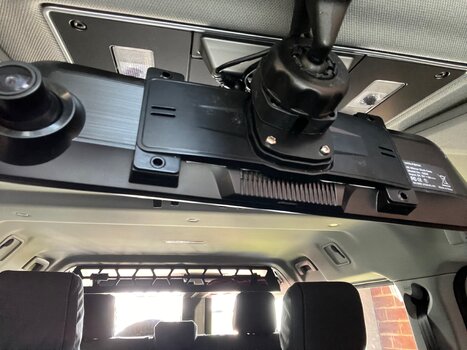
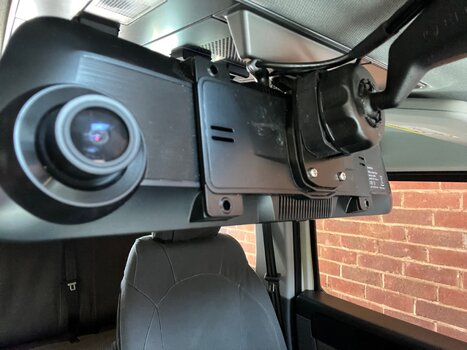
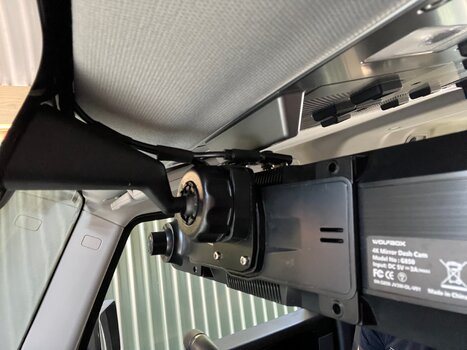
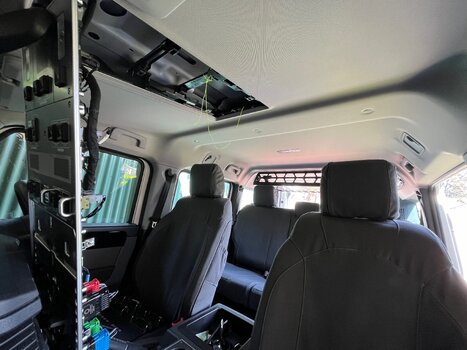
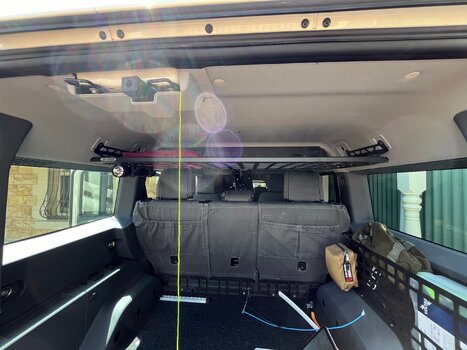
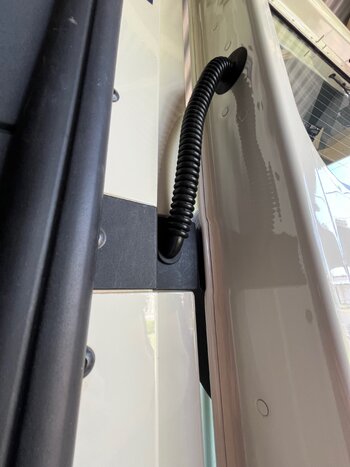
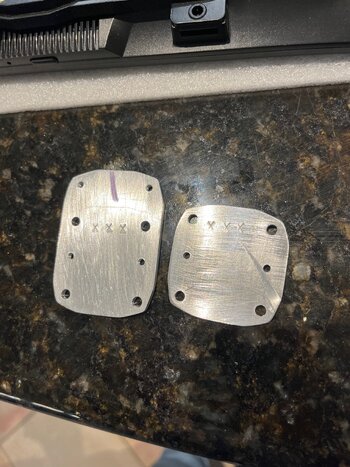
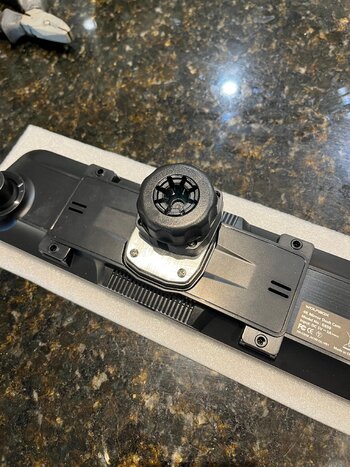
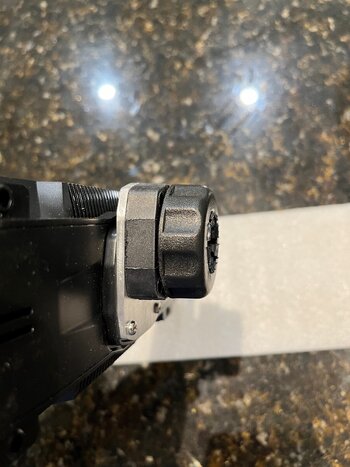
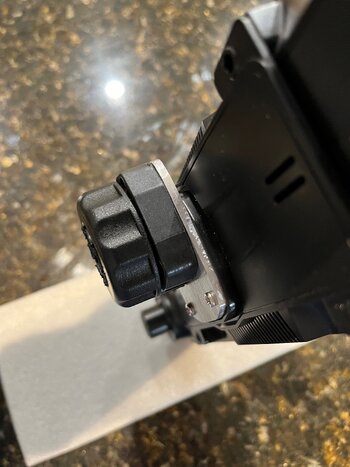
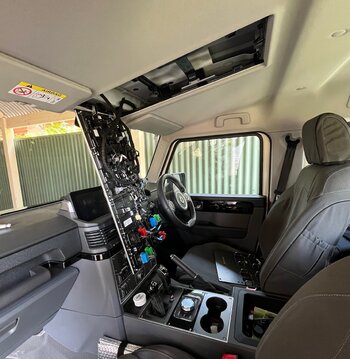
Finally finished installing my Wolfbox G850 today. Quite a bit of work involved. I managed to feed the video cable directly to the rear door from the overhead switch panel via the roof space and then out to the rear door via a piece of corrugated rubber tubing. I used one of the pre-existing rubber grommets in the barn door to feed the cable up and out to the camera all within the door frame itself. Luckily there is a hole within the upper part of the door frame right where the camera is mounted. I made a two part aluminium mounting plate for the mirror so I could mount it using the existing ball mount and one of the Amazon mounts. My mounting bracket drops the mirror down by about 15mm allowing enough clearance for the power, video and GPS cables. For power, I tapped into the driver’s side dashboard fuse box and routed the cable under the dash, up the A Pillar and across to the overhead switch panel within the roof space. I mounted the GPS Antenna within the roof space just to the side of the overhead switch panel. It’s about as factory as I could make it. Having seen a few other installs, I thought I’d put mine up as an alternative.
 

Attachments

  • 4959.jpeg
    4959.jpeg
    1.8 MB · Views: 79
  • 4981.jpeg
    4981.jpeg
    2 MB · Views: 76
  • 4999.jpeg
    4999.jpeg
    1.8 MB · Views: 76
  • 5003.jpeg
    5003.jpeg
    2.5 MB · Views: 73
  • 5017.jpeg
    5017.jpeg
    2.2 MB · Views: 78
  • 5013.jpeg
    5013.jpeg
    2.6 MB · Views: 80
  • 5014.jpeg
    5014.jpeg
    2.4 MB · Views: 78
  • 5015.jpeg
    5015.jpeg
    2.2 MB · Views: 77
  • IMG_4961.jpeg
    IMG_4961.jpeg
    2.8 MB · Views: 76
  • IMG_4963.jpeg
    IMG_4963.jpeg
    2.5 MB · Views: 74
  • IMG_5002.jpeg
    IMG_5002.jpeg
    2.1 MB · Views: 73
  • IMG_4108.jpeg
    IMG_4108.jpeg
    4.2 MB · Views: 68
  • IMG_4103.jpeg
    IMG_4103.jpeg
    4.1 MB · Views: 65
  • IMG_4104.jpeg
    IMG_4104.jpeg
    3.2 MB · Views: 63
  • IMG_4107.jpeg
    IMG_4107.jpeg
    2.5 MB · Views: 74
Last edited:
Vote:
Upvote 0
Local time
1:35 AM
Joined
Feb 22, 2024
Messages
54
Reaction score
97
Location
Clifton Beach QLD, Australia
Finally finished installing my Wolfbox G850 today. Quite a bit of work involved. I managed to feed the video cable directly to the rear door from the overhead switch panel via the roof space and then out to the rear door via a piece of corrugated rubber tubing. I used one of the pre-existing rubber grommets in the barn door to feed the cable up and out to the camera all within the door frame itself. Luckily there is a hole within the upper part of the door frame right where the camera is mounted. I made a two part aluminium mounting plate for the mirror so I could mount it using the existing ball mount and one of the Amazon mounts. My mounting bracket drops the mirror down by about 15mm allowing enough clearance for the power, video and GPS cables. For power, I tapped into the driver’s side dashboard fuse box and routed the cable under the dash, up the A Pillar and across to the overhead switch panel within the roof space. I mounted the GPS Antenna within the roof space just to the side of the overhead switch panel. It’s about as factory as I could make it. Having seen a few other installs, I thought I’d put mine up as an alternative.
Looks real nice! Any link available for the Amazon mount you refer to? Still waiting on my Quartermaster to see if I need this mirror.
 
Vote:
Upvote 0

MattG

GG #2987
Grenadier Owner
Lifetime Supporter
Local time
12:05 PM
Joined
Jun 7, 2023
Messages
104
Reaction score
215
Location
Adelaide, South Australia
Vote:
Upvote 0

landmannnn

Grenadier Owner
Local time
1:35 AM
Joined
Apr 9, 2024
Messages
583
Reaction score
894
Location
UK
Vote:
Upvote 0
Back
Top Bottom