The Grenadier Forum
Register Now for enhanced site access.
INEOS Agents, Dealers or Commercial vendors please contact admin@theineosforum.com for a commercial account.

Roof wiring for Baja s2

Overland Hunter

Grenadier Owner
Local time
7:40 AM
Joined
Feb 14, 2024
Messages
7
Reaction score
1
Location
Little Rock, AR, USA
Looking for some help regarding installing roof lights. I've purchased a pair of Baja s2 to mount. I've attempted to install them today but struggled with the connection being a little loose. I think the connections on my rig are slightly bigger (barrel for wire) than the one I have with my deutch connection kit I got online? Also using
supplied opposite end doesn't seem to lock the wires in as well as the kit I've used in the past for interior connections in the footwell. Fairly new to all this. Am I wrong in thinking there are different size barrels ? If so does anyone know the size Ineos uses. Hopefully this made sense
Thanks in advance
 

TheDocAUS

Grenadier Owner
Lifetime Supporter
Local time
12:40 AM
Joined
Mar 8, 2023
Messages
2,425
Reaction score
4,257
Location
Eromanga
Looking for some help regarding installing roof lights. I've purchased a pair of Baja s2 to mount. I've attempted to install them today but struggled with the connection being a little loose. I think the connections on my rig are slightly bigger (barrel for wire) than the one I have with my deutch connection kit I got online? Also using
supplied opposite end doesn't seem to lock the wires in as well as the kit I've used in the past for interior connections in the footwell. Fairly new to all this. Am I wrong in thinking there are different size barrels ? If so does anyone know the size Ineos uses. Hopefully this made sense
Thanks in advance
You need to post more information, as I am not sure I follow. Maybe post some pictures.

However, if you are trying to connect to the INEOS rooftop power outlets, they use Deutsch DTP plugs, so you must wire DTP plugs to the Baja light end. If you have Deutsch DT plugs they will not work.

Yes DTP verse DT plug, but they are different plugs. Rooftop power outlet circuits are rated at 25 amps and you should use DTP plugs, as DT plugs are only rated to 13 amps.

deuplugs-jpg.7808047
 
Last edited:
Vote:
Upvote 1

TheDocAUS

Grenadier Owner
Lifetime Supporter
Local time
12:40 AM
Joined
Mar 8, 2023
Messages
2,425
Reaction score
4,257
Location
Eromanga
PLUG COMPATIBILITY
That would mean a genuine Deutsch DTP plug (INEOS side) and a third party brand plug on the other, which can explain why they are a bit loose. I have seen this with genuine Anderson plugs verse third party brands.

That style of crimper normally works well.

You could change the rooftop plug to your third party brand and see if that fixes the problem.

LOCK IN PINS/SOCKETS
The other cause maybe the pins and sockets are not locked correctly in the plugs. The Wurth video, below, talks about locking the pins/sockets into place. Here is a cross section of the DT style plug showing what is going on (image shows a crimped open style socket). If the pins/sockets are not locked in, the plugs do not work properly.
screenshot-2023-04-17-17-43-40-png.7808698


View: https://youtu.be/GQs7EPzDOak

MORE INFORMATION:
This thread here has lots of information on Deutsch plugs, including the different types, the various accessories for the plugs, crimping tools, videos, pictures, pin/socket removal from the Deutsch plug and links to suppliers in various countries. A summary is in the first post on the thread. Plus there are other useful posts in the thread, for example:
20230303-open-cap-deutsch-connectorlabel-jpg.7814124
 
Last edited:
Vote:
Upvote 0

Overland Hunter

Grenadier Owner
Local time
7:40 AM
Joined
Feb 14, 2024
Messages
7
Reaction score
1
Location
Little Rock, AR, USA
PLUG COMPATIBILITY
That would mean a genuine Deutsch DTP plug (INEOS side) and a third party brand plug on the other, which can explain why they are a bit loose. I have seen this with genuine Anderson plugs verse third party brands.

That style of crimper normally works well.

You could change the rooftop plug to your third party brand and see if that fixes the problem.

LOCK IN PINS/SOCKETS
The other cause maybe the pins and sockets are not locked correctly in the plugs. The Wurth video, below, talks about locking the pins/sockets into place. Here is a cross section of the DT style plug showing what is going on (image shows a crimped open style socket). If the pins/sockets are not locked in, the plugs do not work properly.
screenshot-2023-04-17-17-43-40-png.7808698


View: https://youtu.be/GQs7EPzDOak
Thanks, really appreciate it! I'm a visual person and this helped
 
Vote:
Upvote 0

Overland Hunter

Grenadier Owner
Local time
7:40 AM
Joined
Feb 14, 2024
Messages
7
Reaction score
1
Location
Little Rock, AR, USA
Vote:
Upvote 0

Austin-TX-Grenadier

Grenadier Owner
Local time
7:40 AM
Joined
Jul 21, 2024
Messages
12
Reaction score
1
Location
Cedar Park, TX, USA
Vote:
Upvote 0

Disco Dave

Grenadier Owner
Local time
11:40 PM
Joined
Feb 22, 2022
Messages
266
Reaction score
513
Location
Cairns, Australia
PLUG COMPATIBILITY
That would mean a genuine Deutsch DTP plug (INEOS side) and a third party brand plug on the other, which can explain why they are a bit loose. I have seen this with genuine Anderson plugs verse third party brands.

That style of crimper normally works well.

You could change the rooftop plug to your third party brand and see if that fixes the problem.

LOCK IN PINS/SOCKETS
The other cause maybe the pins and sockets are not locked correctly in the plugs. The Wurth video, below, talks about locking the pins/sockets into place. Here is a cross section of the DT style plug showing what is going on (image shows a crimped open style socket). If the pins/sockets are not locked in, the plugs do not work properly.
screenshot-2023-04-17-17-43-40-png.7808698


View: https://youtu.be/GQs7EPzDOak

MORE INFORMATION:
This thread here has lots of information on Deutsch plugs, including the different types, the various accessories for the plugs, crimping tools, videos, pictures, pin/socket removal from the Deutsch plug and links to suppliers in various countries. A summary is in the first post on the thread. Plus there are other useful posts in the thread, for example:
20230303-open-cap-deutsch-connectorlabel-jpg.7814124
Am I missing something? Isn’t the red positive, or did I wire mine up back to front?
 
Vote:
Upvote 0

QRgren

Grenadier Owner
Lifetime Supporter
Local time
8:40 AM
Joined
Jul 3, 2023
Messages
46
Reaction score
60
Location
Northeast
QRgren, I just ordered these as well for my 4 bd S2Pros. Can you recommend a good video that shows the overall process of converting the S2's plugs to DTP? Just wondering if I need to cut any wires on the S2.
I did not cut the wires on the S2. I carefully disassembled the DT connector and was left with exposed wire to use for the DTP plug.
 
Vote:
Upvote 0

grnamin

Grenadier Owner
Lifetime Supporter
Local time
7:40 AM
Joined
Oct 16, 2023
Messages
845
Reaction score
1,261
Location
Texas, USA
I've been using these:


Vote:
Upvote 0

Austin-TX-Grenadier

Grenadier Owner
Local time
7:40 AM
Joined
Jul 21, 2024
Messages
12
Reaction score
1
Location
Cedar Park, TX, USA
I did not cut the wires on the S2. I carefully disassembled the DT connector and was left with exposed wire to use for the DTP plug.
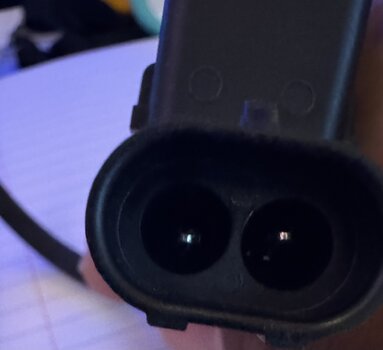
QRgren: I want to make sure I don’t mess up these S2’s. Did you pull from the back to disassemble or somehow cut the plastic all together around the wires?
 

Attachments

  • IMG_2733.jpeg
    IMG_2733.jpeg
    434.7 KB · Views: 9
  • IMG_2732.jpeg
    IMG_2732.jpeg
    552.5 KB · Views: 10
Vote:
Upvote 0

QRgren

Grenadier Owner
Lifetime Supporter
Local time
8:40 AM
Joined
Jul 3, 2023
Messages
46
Reaction score
60
Location
Northeast
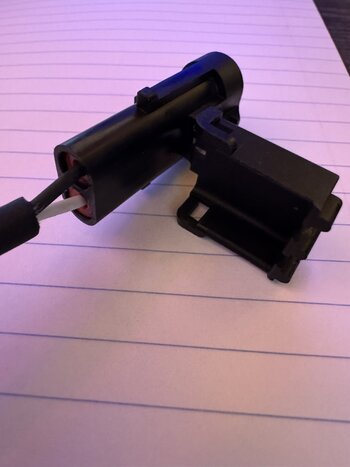
I did not cut any plastic. Pic shows the parts you are dealing with. I used a small pry tool to work out the orange pieces.

Edit: push from the inside where you see the prongs - small flat head
Edit 2: you may also need to depress the wings on the metal connectors with needle nose pliers and then push
IMG_2069.jpeg
 
Last edited:
Vote:
Upvote 0

Austin-TX-Grenadier

Grenadier Owner
Local time
7:40 AM
Joined
Jul 21, 2024
Messages
12
Reaction score
1
Location
Cedar Park, TX, USA
I did not cut any plastic. Pic shows the parts you are dealing with. I used a small pry tool to work out the orange pieces.

Edit: push from the inside where you see the prongs - small flat head
Edit 2: you may also need to depress the wings on the metal connectors with needle nose pliers and then push
View attachment 7871533
Thanks. I’ll try that.
 
Vote:
Upvote 0

Austin-TX-Grenadier

Grenadier Owner
Local time
7:40 AM
Joined
Jul 21, 2024
Messages
12
Reaction score
1
Location
Cedar Park, TX, USA
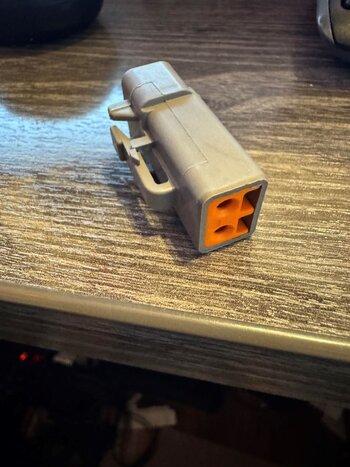
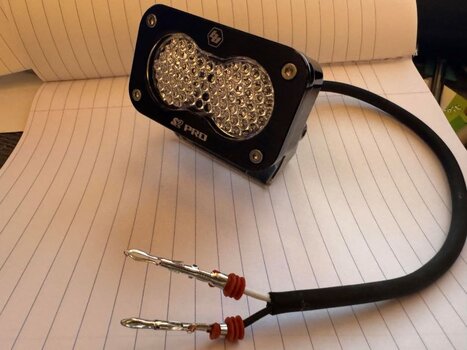
I took apart the S2's and just waiting on the DTP Connector Kit from Amazon. Thinking I need to ensure the existing metal pins are the correct size for the DTP "Male" that will ultimately go into the roof outlet. When you took apart your S2's did you get rid of the existing metal pins?
 

Attachments

  • Dummy DTP.jpg
    Dummy DTP.jpg
    210.6 KB · Views: 10
  • BD-S2s.jpg
    BD-S2s.jpg
    66.2 KB · Views: 10
Vote:
Upvote 0

grnamin

Grenadier Owner
Lifetime Supporter
Local time
7:40 AM
Joined
Oct 16, 2023
Messages
845
Reaction score
1,261
Location
Texas, USA
I took apart the S2's and just waiting on the DTP Connector Kit from Amazon. Thinking I need to ensure the existing metal pins are the correct size for the DTP "Male" that will ultimately go into the roof outlet. When you took apart your S2's did you get rid of the existing metal pins?
The ones from Agile are the right size.
 
Vote:
Upvote 0

QRgren

Grenadier Owner
Lifetime Supporter
Local time
8:40 AM
Joined
Jul 3, 2023
Messages
46
Reaction score
60
Location
Northeast
I took apart the S2's and just waiting on the DTP Connector Kit from Amazon. Thinking I need to ensure the existing metal pins are the correct size for the DTP "Male" that will ultimately go into the roof outlet. When you took apart your S2's did you get rid of the existing metal pins?
You need to remove those connectors as they will not work. I used needle nose pliers and pulled them off. See my pic above where the individual components were removed.
 
Vote:
Upvote 0
Back
Top Bottom