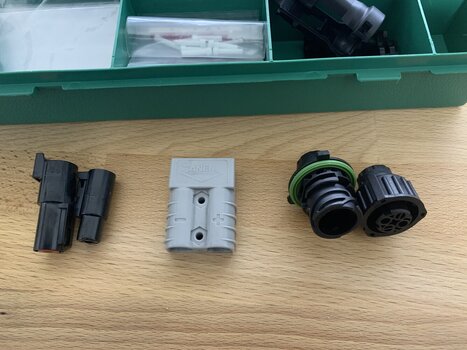
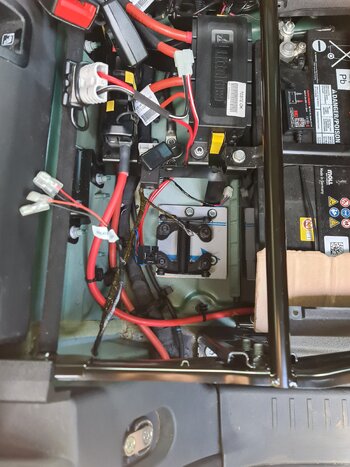
Yesterday I finally finished my CKMA12 ARB compressor install I got my inspiration mainly from:
@Barney
https://www.theineosforum.com/threa...nadier-today.12411127/page-77#post-1333217887
and
@Highwayman
https://www.theineosforum.com/threa...nadier-today.12411127/page-40#post-1333192813
and
@Tinki
https://www.theineosforum.com/threads/arb-single-compressor-install-the-painful-way.12413024
and some others.
Took me some time to mount it, because I wanted to do it as decently as possible (I am an amateur), my car hasn’t a shed, is sleeping outside, and the Belgian weather is horrible, therefore I had to wait for dry days.
I still have to check if there are no small air leaks, but I could inflate my spare tire from 2.5 bar to 3.0 bar.
But … the first moment I checked the compressor I had a huge leak on the connector: First reaction was “shit”, until I I saw that I could dismount it with my hand, no tools …I forgot I only did mount it temporarily without putting any Teflon tape!


I will not go into all the details of my compressor mounting, see the posts above, and in the meantime some more, but I am happy to share some pictures and some tips.
For the electrical part I used – as did
@Highwayman – the Ineos provided wires.
In the next picture you can see the (my) wiring:
View attachment 7834460
Some comments on this wiring diagram:
Instead of disconnecting my battery to avoid short circuits, I removed the 40A FI13 fuse, not easy by the way, because stuck between other fuses, I lost the cover while dismounting, probably somewhere in my car, but I had spare fuses. See picture below:
View attachment 7834462
Before showing some other pictures:
- I didn’t drill holes in the Grenadier, I used the available studs like the other posters above did.
- I used a stainless steel plate of 2mm, and learned that you need real decent cobalt drill bits to make holes in it!

- I did cut the trim patiently with a hobby cutter in the back of the trim, for the hole for inserting the switch.
- I used Teflon tape for fitting the air connections (pressure switch and air connection). I also got the teflon tape from my father (he died in 2008!). I hate to throw things away – I am an amateur

- The space in the Grenadier is quite tight, therefore I dismounted the compressor from the provided ARB support, and mounted that support first (got that idea from one of the posters above).
- To mount it back, untighten and don’t tighten the two black screws of the blue housing so that you can rotate and slide the compressor to a suitable position, as well to replace the four supporting screws as to choose your most suitable position fort he inflation nipple. Only tighten them once you are satisfied with the positioning.
Here the pictures, but please read the other posters contributions before asking me questions:
View attachment 7834463
View attachment 7834464
View attachment 7834465
View attachment 7834467
View attachment 7834468
I bought the compressor together with the inflator from a Belgian company, but I didn’t notice that the coupling was USA standard. Therefore, I replaced it with a European standard (and Teflon tape from my father

).
View attachment 7834469
I would like to thank everybody who had a discussion on suitable compressors and compressor mounting, not only the three I mentioned in the beginning of this post. My experience was “zero”, and I learned a lot by reading all these posts and mounting it myself.


