Black Sheep Innovations Rear Skid Plate:
I couldn't find any instructions to install the skid plate, but it was mostly intuitive. The only thing that threw me through a loop was the inclusion of two small washers, implying a difference in two of the bolt locations. I couldn't find any advantage in smaller washers on any two of the fasteners over others, so I put the smaller washers in an arbitrary location where I wouldn't have to look at them. The hardware included was all high-grade stainless, very nice to see. As ever, every thing under the vehicle that isn't Loctite'd, like suspension components, gets anti-seize applied. The Black Sheep skid pate was much thicker and had much more engineering effort behind it than the OEM. Because it's aluminum, it's not much heavier at 15 vs 16.5 lbs (6.8 vs 7.5 kg), but it feels much more substantial. As advertised, the Black Sheep skid plate is 4mm generally, but has many reinforcements doubling it to 8mm, but I even found a couple spots that were 10mm. The mounting brackets are also quite nice and appear to be stainless steel. These guys are not playing around.
View attachment 7893497
View attachment 7893498
View attachment 7893499
View attachment 7893507
View attachment 7893508
View attachment 7893500
View attachment 7893501
View attachment 7893502
View attachment 7893523
View attachment 7893503
View attachment 7893504
View attachment 7893505
View attachment 7893506
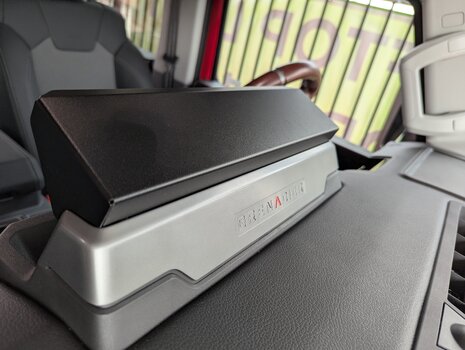
Black Sheep Innovations Anti-Glare Cover:
Not sure how I feel about this one, I think time will tell. It's very nicely cut and formed, no complaints with the quality. It's also easy to mount. I'll have to see how effective and necessary it is, but it does detract a bit from the minimal intrusion into one's sight-line. To mount, just clean the back of the screen cowling with some alcohol, peel, and stick.
View attachment 7893509
View attachment 7893510
View attachment 7893511
View attachment 7893512
View attachment 7893514
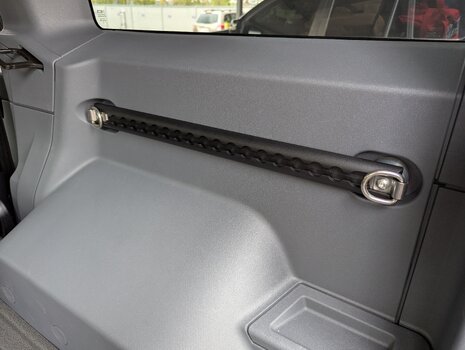
Grenadier USA Cargo Wall Track:
Super easy install and a nice piece. It took me maybe 2 minutes to install. Good stuff.
View attachment 7893515
View attachment 7893516
View attachment 7893519
View attachment 7893517
Bison Gear Rear Cargo Basket, Left:
I had to modify the basket to fit the different shape of the left cargo area trim panel with the inverter option. Thanks to
@NOLA Grenadier for the demo on that. Unlike his, my proved to be pretty inadequate, so I only took a picture of the final product loaded with some gear to hide my eternal shame. I initially tried a cutoff wheel, but my weak-ass electric tool proved inadequate. I then used the jig saw but did a pretty terrible job measuring the dimensions of the necessary cut out. I clearly don't have the patience for fabrication. I drilled out two rivets as evidenced by the silver rings on the face. In any case, this thing is really useful to have back there and was really nicely built before I mangled it.
View attachment 7893520
View attachment 7893521
View attachment 7893522