
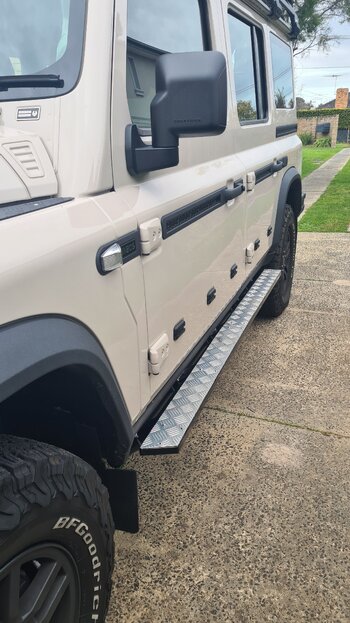
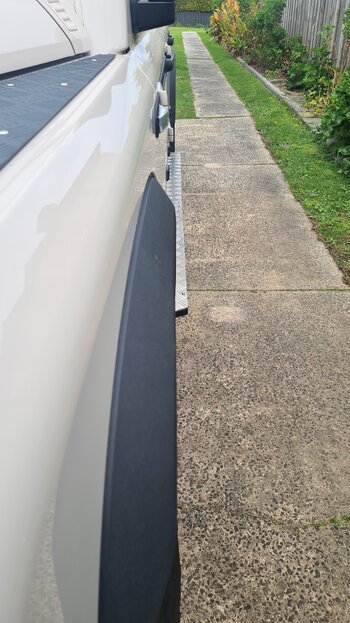
G’day, having enjoyed side steps on my 4WD vehicles over many decades it was incumbent on me to provide them on my new Grennie. Besides obvious ease of entry to the cabin, front and rear side steps play a role in erecting the roof top tent and providing access to equipment stored on the roof. They also offer some further vehicle protection. My design criteria includes: able to carry 100 kg, fend off low scrub and not protrude more than about 25 mm, have minimal impact on the performance of the sliders, and, not have sharp edges to protect pedestrians and vehicle users. Additionally, able to be removed in the field in the event of damage.
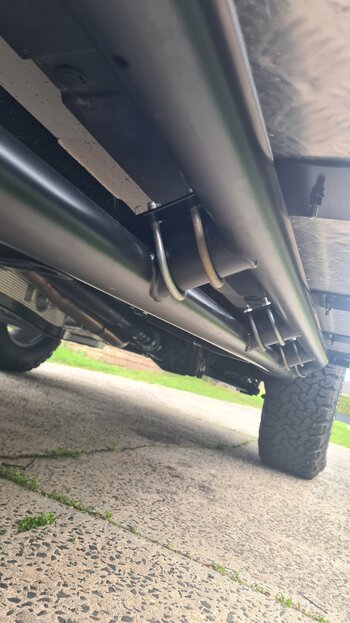
I do not know of any readily available side steps so . . . my side steps were ‘home made’ with not much more than an angle grinder/cutter, an arc welder and some basic fabrication tools. Recycled materials were used other than the square hollow tube (25 mm rhs). Mounting is 50 mm ‘U’ bolts running parallel to the chassis to slide over rocks, tree trunks, etc. Overall length is 1730 mm and width of 100 mm. (More detailed info for those that want it.)
I do not know of any readily available side steps so . . . my side steps were ‘home made’ with not much more than an angle grinder/cutter, an arc welder and some basic fabrication tools. Recycled materials were used other than the square hollow tube (25 mm rhs). Mounting is 50 mm ‘U’ bolts running parallel to the chassis to slide over rocks, tree trunks, etc. Overall length is 1730 mm and width of 100 mm. (More detailed info for those that want it.)
Attachments
Last edited:


