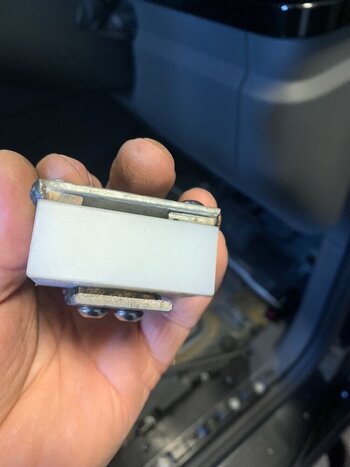
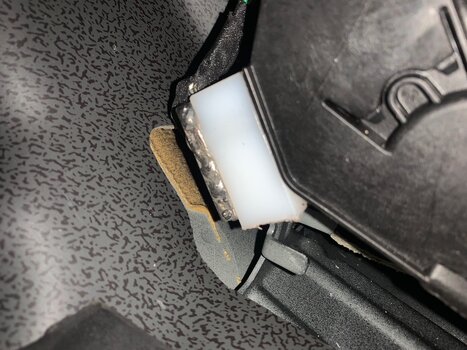
This is the reason why I run a 100amp lithium auxiliary battery, -60amp charger 250amp battery output through a 3500w inverter so I'm never without power, well, for the last 4 years anyway. Would never consider doing this any other way IMOI must say I'm not a fan of running inverters in vehicles as they consume a lot of power when run off the battery.
So, my motto is if I can't power it from the battery, it stays at home. I recently purchased a USB C charger for cordless batteries which works really well. I use it to charge batteries for the cordless drill, blower and eventually, a small chainsaw.
There are options out there that don't require AC power. (now to work put how I'm going to power that coffee machine)
The Grenadier Forum
Register a free account today to become a member! Once signed in, you'll be able to contribute to the community by adding your own topics, posts, and connect with other members through your own private inbox! INEOS Agents, Dealers or Commercial vendors please contact admin@theineosforum.com for a commercial account.
You are using an out of date browser. It may not display this or other websites correctly.
You should upgrade or use an alternative browser.
You should upgrade or use an alternative browser.
Show us your mods.
- Thread starter Tom D
- Start date
-
- Tags
- mods power inverter
Not really mods ... just what I did,with my Grenadier ...
- First, an alarm system was installed (Pandory Elite V2).
- Then underbody protection and cavity sealing (FluidFilm)
- I covered the airline rails with a rubber profile (www.STOCKundSTEIN.de)
- Then a non-slip mat and a TPE rubber mat
- For android car wireless I use AAwireless (https://www.aawireless.io/)
- Walser tool bag
- Spare-wheel cover
- some stickers
Attachments
-
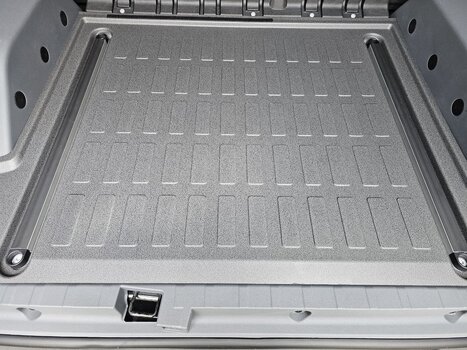 photo_2_2023-09-22_11-20-17.jpg408 KB · Views: 543
 -
 photo_3_2023-09-22_11-36-33.jpg291.2 KB · Views: 392
 -
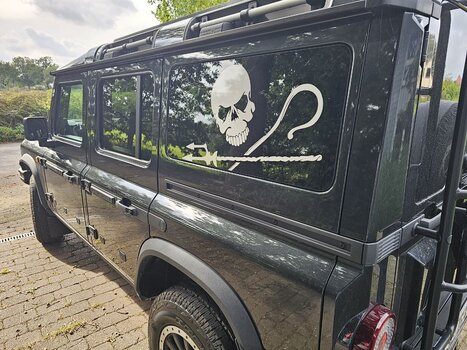 photo_1_2023-09-22_11-36-33.jpg341.4 KB · Views: 346
 -
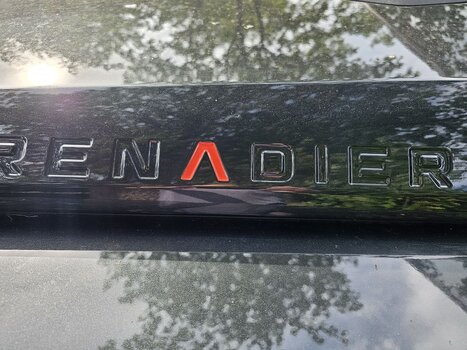 photo_7_2023-09-22_11-20-17.jpg310.7 KB · Views: 328
 -
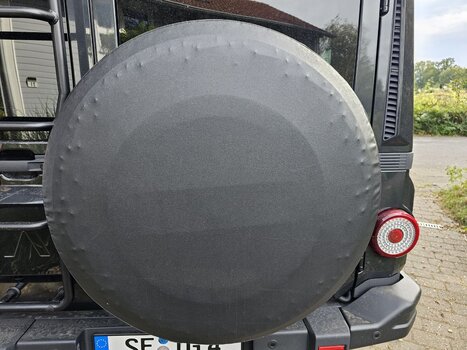 photo_5_2023-09-22_11-20-17.jpg328.1 KB · Views: 337
 -
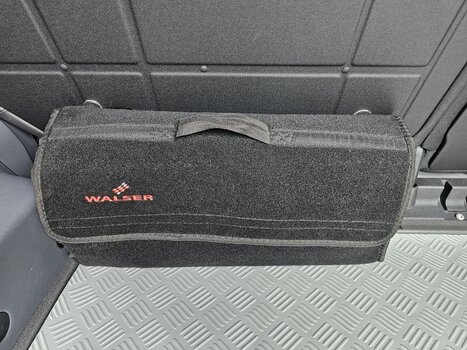 photo_1_2023-09-22_11-20-17.jpg448.1 KB · Views: 335
 -
 photo_6_2023-09-22_11-20-17.jpg292.2 KB · Views: 348
 -
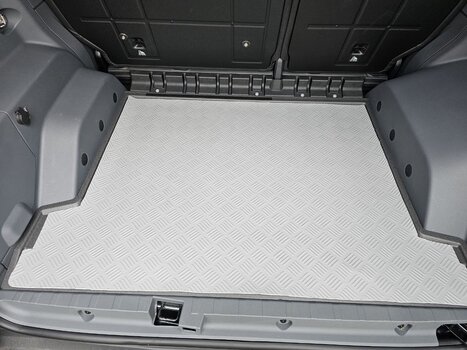 photo_3_2023-09-22_11-20-17.jpg225.5 KB · Views: 342
 -
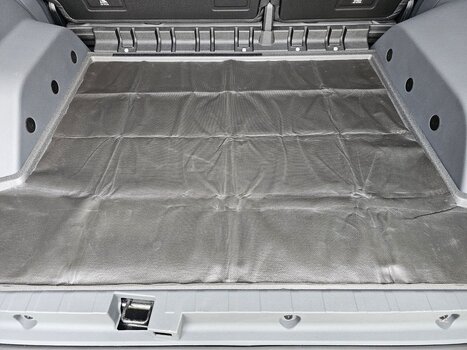 photo_4_2023-09-22_11-20-17.jpg336.1 KB · Views: 355
Picked up Liberty the Grenadier and went straight to Gobi X /R&D off-road outside Cape Town to get my ostrich wing awning fitted. Back next week to get Victron smart charger fitted and 16A connection socket for when in campsites also to pick up Jerry can holders for roof rack.


Looking good!
A more modest mod for me today… fitting an inflatable lumbar roll to the drivers seat.
Removing the seat back was tricky, not knowing how its put together. To save you all the bother (and two broken clips) here’s how to do it…
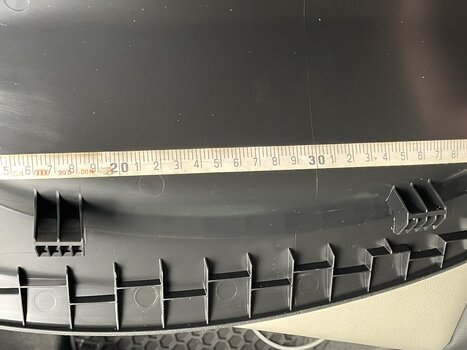
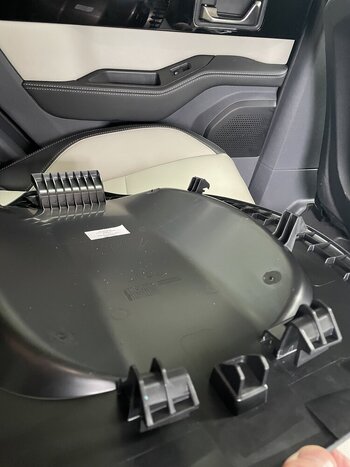
The black plastic cover is attached by large clips that hook on to the metal parts of the seat, there are a further two replaceable clips at the bottom. (White) these were not salvageable but could be replaced. Although to be honest it doesn't seem to need them.
To get it off without breaking anything you‘ll need to insert a flat tool at the base and release the two central clips, you do this by pushing upwards, then release two of the side clips, by pushing in from the side with the flat tool. I have shown the locations of these measured from the bottom, as you will be doing all of this blind. The hooks at the other side will come out by moving teh whole thing towards the side you have already removed. The top hook is large and can only be removed by pulling the whole thing downwards once all the other clips have been removed.
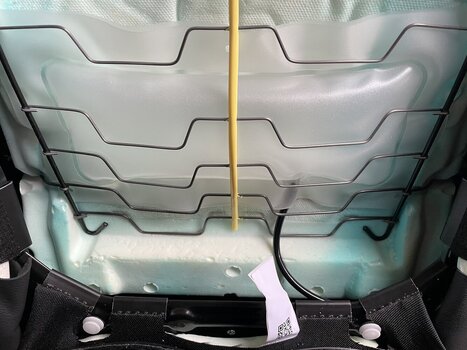
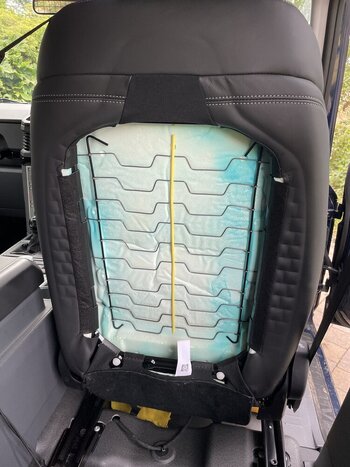
Fitting the air bag was easy and it works very well inserted between the sprung wires and the foam seat back. I secured it with a couple of cable ties… Job done!
Attachments
Great write up mate.Looking good!
A more modest mod for me today… fitting an inflatable lumbar roll to the drivers seat.
Removing the seat back was tricky, not knowing how its put together. To save you all the bother (and two broken clips) here’s how to do it…
The black plastic cover is attached by large clips that hook on to the metal parts of the seat, there are a further two replaceable clips at the bottom. (White) these were not salvageable but could be replaced. Although to be honest it doesn't seem to need them.
To get it off without breaking anything you‘ll need to insert a flat tool at the base and release the two central clips, you do this by pushing upwards, then release two of the side clips, by pushing in from the side with the flat tool. I have shown the locations of these measured from the bottom, as you will be doing all of this blind. The hooks at the other side will come out by moving teh whole thing towards the side you have already removed. The top hook is large and can only be removed by pulling the whole thing downwards once all the other clips have been removed.
Fitting the air bag was easy and it works very well inserted between the sprung wires and the foam seat back. I secured it with a couple of cable ties… Job done!
This is something id be keen on, as although i really like the gren seats, they do lack lumbar support
Looks great mate!Picked up Liberty the Grenadier and went straight to Gobi X /R&D off-road outside Cape Town to get my ostrich wing awning fitted. Back next week to get Victron smart charger fitted and 16A connection socket for when in campsites also to pick up Jerry can holders for roof rack. View attachment 7827580View attachment 7827581View attachment 7827582View attachment 7827583
let us know how you get on with the Ostrich wing... I'm juggling what awning to get...
Will definatly be doing this! Link that what you purchased?Looking good!
A more modest mod for me today… fitting an inflatable lumbar roll to the drivers seat.
Removing the seat back was tricky, not knowing how its put together. To save you all the bother (and two broken clips) here’s how to do it…
The black plastic cover is attached by large clips that hook on to the metal parts of the seat, there are a further two replaceable clips at the bottom. (White) these were not salvageable but could be replaced. Although to be honest it doesn't seem to need them.
To get it off without breaking anything you‘ll need to insert a flat tool at the base and release the two central clips, you do this by pushing upwards, then release two of the side clips, by pushing in from the side with the flat tool. I have shown the locations of these measured from the bottom, as you will be doing all of this blind. The hooks at the other side will come out by moving teh whole thing towards the side you have already removed. The top hook is large and can only be removed by pulling the whole thing downwards once all the other clips have been removed.
Fitting the air bag was easy and it works very well inserted between the sprung wires and the foam seat back. I secured it with a couple of cable ties… Job done!
Hi Tom, How is the inflatable lumbar powered. Does it have an electric air pump that is battery operated or hard wired?Looking good!
A more modest mod for me today… fitting an inflatable lumbar roll to the drivers seat.
Removing the seat back was tricky, not knowing how its put together. To save you all the bother (and two broken clips) here’s how to do it…
The black plastic cover is attached by large clips that hook on to the metal parts of the seat, there are a further two replaceable clips at the bottom. (White) these were not salvageable but could be replaced. Although to be honest it doesn't seem to need them.
To get it off without breaking anything you‘ll need to insert a flat tool at the base and release the two central clips, you do this by pushing upwards, then release two of the side clips, by pushing in from the side with the flat tool. I have shown the locations of these measured from the bottom, as you will be doing all of this blind. The hooks at the other side will come out by moving teh whole thing towards the side you have already removed. The top hook is large and can only be removed by pulling the whole thing downwards once all the other clips have been removed.
Fitting the air bag was easy and it works very well inserted between the sprung wires and the foam seat back. I secured it with a couple of cable ties… Job done!
DaBull
I used the one from John Craddock. I had one in my defender and it lasted 150,000 miles no problem. Its a simple manual bulb inflator. The bladder feels reasonably robust, just be careful not to snag it on the springs when inserting it.
 www.johncraddockltd.co.uk
EXT010-1 - Pneumatic Lumbar Support for 1 Seat
EXT010-1, pneumatic lumbar support for 1 seat Land Rover Parts and Range Rover Parts
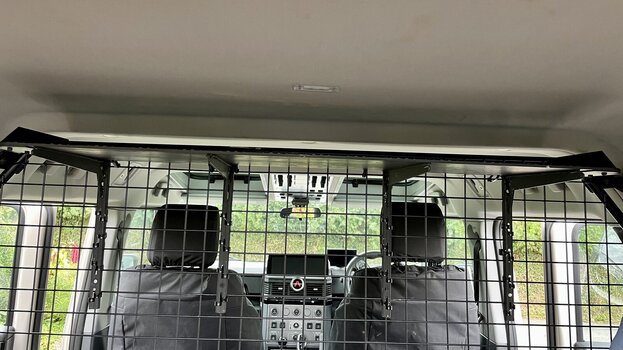
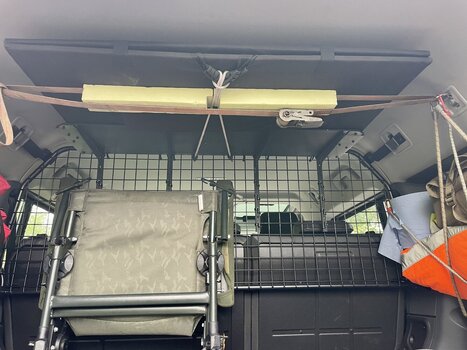
I’ve temporarily fitted four shelf brackets and a shelf on to the cargo barrier behind the rear seats of my 5 seater commercial.
The shelf is at the highest point, leaving a 2 inch gap between the shelf and ceiling.
Then I’ve strung a small ratchet strap across the top rear cargo rings, along with the ratchet.
I can now sit my Bluetti 350 solar panel (folded) up in the ceiling of the cargo bay with a short bungee cord keeping it from creeping out.
It’s out of sight in the rear view mirror too, as well as hidden from prying eyes.
When my panel is in place it does block the rear ceiling light, but I already have a rechargeable magnetic light on the rear side window panel.
I prefer to keep my AC kit separate from the vehicle’s DC source, so I carry a Bluetti power station when mains power is needed.
I’m hoping to engage the services of a fabricator to make an aluminium “slot in” shelf to replace my functional but ugly set up. It does work very well though.
Patent not applied for.
Also sea shepherd fan?Not really mods ... just what I did,with my Grenadier ...
- First, an alarm system was installed (Pandory Elite V2).
- Then underbody protection and cavity sealing (FluidFilm)
- I covered the airline rails with a rubber profile (www.STOCKundSTEIN.de)
- Then a non-slip mat and a TPE rubber mat
- For android car wireless I use AAwireless (https://www.aawireless.io/)
- Walser tool bag
- Spare-wheel cover
- some stickers
Last edited:
Already a fan from long ago. Also have their logo's on my defender. So try to support them by buying some gear, and explain people what they exactly are doing for the oceans. (Not only attacking Japanese wale ships as there most spectacular act)
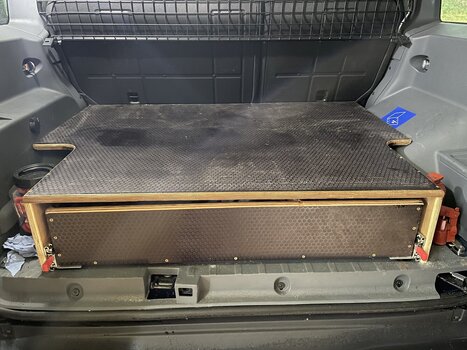
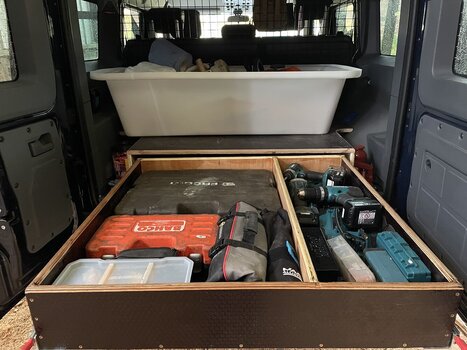
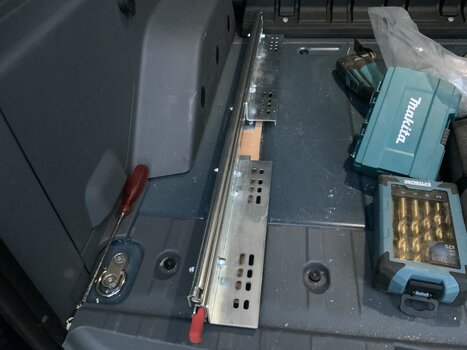
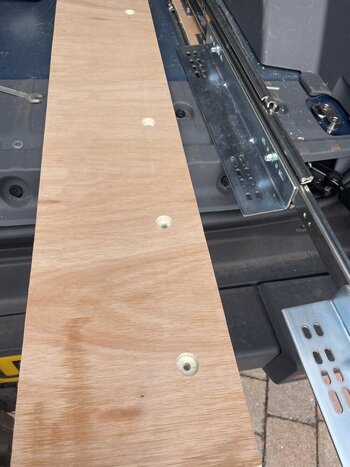
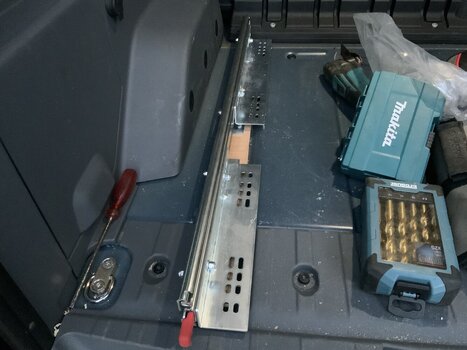
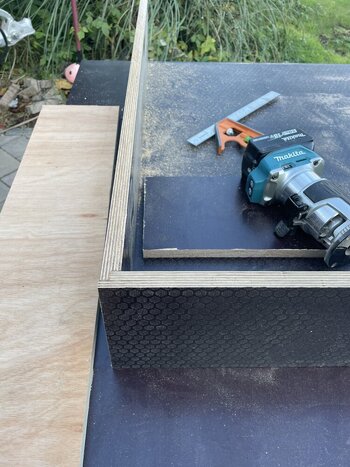
Just about finished the drawer. Need another coat of oil on the bare wood but otherwise it’s done.
The plasterers bath is great for chainsaws and other dirty / oily stuff.
Also great for carcasses if you’ve a hunter.


The plasterers bath is great for chainsaws and other dirty / oily stuff.
Also great for carcasses if you’ve a hunter.
Attachments
Experimenting with cockpit setup before drilling any holes… pleased with the UHF install so far, still trying to find a satisfactory home for the backup handheld/cradle.

- Local time
- 1:19 AM
- Joined
- May 19, 2022
- Messages
- 2,223
This makes the whole pedal steeper?Accelerator peddle height adjustment. Made up a spacer that inserts at the top of the peddle base plate. Much more comfortable to drive.
View attachment 7829040
Correct, I found that I am still able to press the top of the peddle and still have clearance at the bottom of the peddle. Plus now I don't need to lift my foot up 25mm to use the brake anymore. I can keep my heel in one spot on the mat and access the brake and accelerator peddle quiet comfortable now.This makes the whole pedal steeper?
- Local time
- 1:19 AM
- Joined
- May 19, 2022
- Messages
- 2,223
OK. Thanks for the feedback. That sounds good. I'll have to keep an eye on that.Correct, I found that I am still able to press the top of the peddle and still have clearance at the bottom of the peddle. Plus now I don't need to lift my foot up 25mm to use the brake anymore. I can keep my heel in one spot on the mat and access the brake and accelerator peddle quiet comfortable now.
Similar threads
- Replies
- 36
- Views
- 2K
- Replies
- 1
- Views
- 534
- Replies
- 12
- Views
- 907
- Replies
- 31
- Views
- 2K

