- Local time
- 10:05 PM
- Joined
- Sep 4, 2022
- Messages
- 73
Has anybody found aux outlets in footwells,under bonnet and fusebox.Had a quick look but cant see anything obvious.Do you have to remove covers.Quick start guide very vague not a good picture.
Register a free account today to become a member! Once signed in, you'll be able to contribute to the community by adding your own topics, posts, and connect with other members through your own private inbox! INEOS Agents, Dealers or Commercial vendors please contact admin@theineosforum.com for a commercial account.
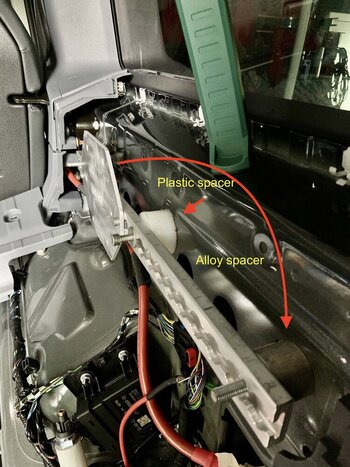
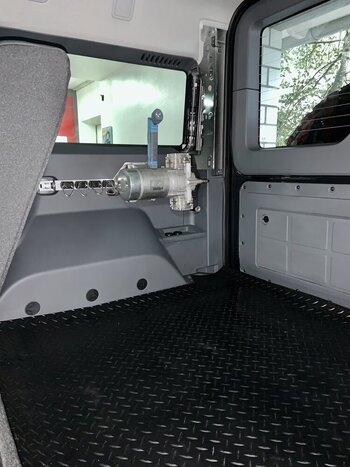
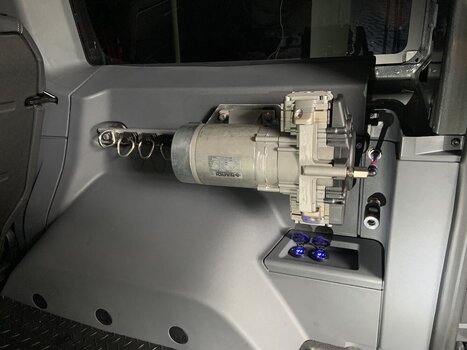
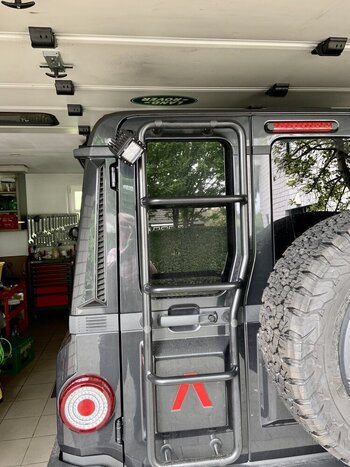
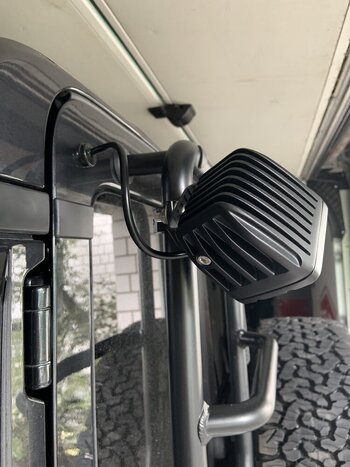
That compressor mounting is genius. Does the panel still fit over it?Yesterday I also fitted the two outlets under the hood with Deutsch plugs. Both outlets are live. I use the 25 A outlet for a work light on the rear ladder. The 10A outlet is used for an extra relay that supplies power to a compressor in the back right of the cargo area. I also connected a small work light to each of the two front roof connections, which shine to the side. I switch these worklights with the switches EXT 3 and EXT 2
Thanks, I saw that post of you, but didn't "analyze it" yet. "mea culpa", laziness
")

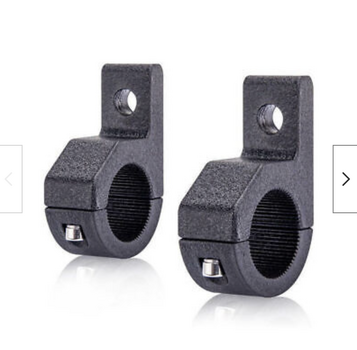
Yes and the clamps/mounts you used, exactly what I want.The roof side work lights look great.
Could you please tell me the make and model?
These are cheap no name 48W worklights. You can buy them anywhere on the internet. I think they cost a little under 40 Euros together. I use 2 of these lamps with 18 W on my tractor, which together cost only 9 Euros!!!The roof side work lights look great.
Could you please tell me the make and model?
That compressor mounting is genius. Does the panel still fit over it?
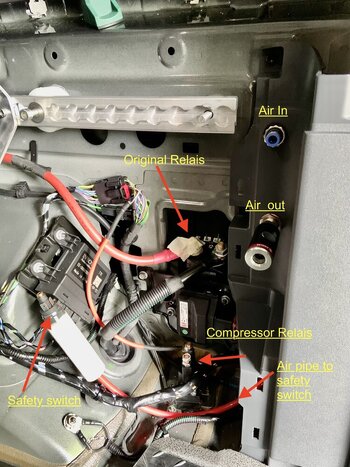
Lights are neat, can you tell me please the cable run/switch for the ladder light thanks, perhaps an image of inside the door and switch would be great.The compressor installation is now complete.
I also attached a work light to the rear ladder. I can switch all the lamps and the compressor separately.
EXT 2 : work light on the right
EXT 3: work light on the left
EXT 5: rear work lights
EXT 1: compressor
Next job will be installing a mirror dash cam with another camera on the back door.
Thanks to Highwayman, DCPU and Bakepl for your help. This is what is so good about these forums.Sorry if I wasn’t clear enough
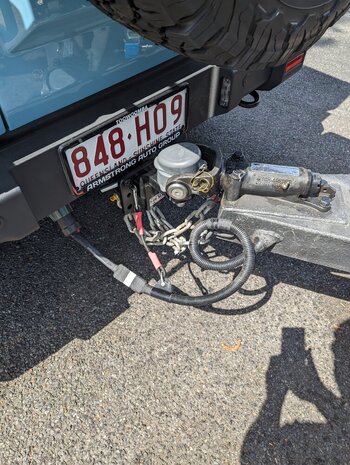
There are three wires (cables or leads if you prefer)
The brown wire is heavy duty and is permanently live. It is on fuse F113 (40amp).
The black wire is the associated earth (or ground if you prefer)
The yellow wire is live with the ignition.
I connected my compressor up to these three wires earlier today.
Hope that clarifies a bit for you
And thanks to DocAUS tooThanks to Highwayman, DCPU and Bakepl for your help. This is what is so good about these forums.
")
The wiring goes in for the winch, no factory winch means no 500amp wiring.Hi guys, have any of you who don't have a front winch seen where the cable ends of EXT4 500A are located in the engine compartment. These are the last ones I have not found yet. A photo would be great. Thanks.
But we still get the 500 amp switch overhead?The wiring goes in for the winch, no factory winch means no 500amp wiring.
Makes sense, just making sure I understood the set up.Wiring for a 500amp circuit should be easy to find. Why would they install all that expensive copper wire for someone that did not order the winch? A switch just ensures the panel looks good.
Don't forget the power to the NATO socket at the rearWiring for a 500amp circuit should be easy to find. Why would they install all that expensive copper wire for someone that did not order the winch? A switch just ensures the panel looks good.

I thought the front winch and rear NATO were part of the same wiring package. So you either have them or you don't, depending on whether you selected the factory Red Winch.Don't forget the power to the NATO socket at the rear
No, the vehicle has a pre-equipment. A winch can be retrofitted. The cable must be blind somewhere.The wiring goes in for the winch, no factory winch means no 500amp wiring.
Yeah, sure. And the corresponding cables are also connected to the switch.But we still get the 500 amp switch overhead?