The Grenadier Forum
Register Now for enhanced site access.
INEOS Agents, Dealers or Commercial vendors please contact admin@theineosforum.com for a commercial account.

Subwoofer adding guideline (not official)

Desertfox

Grenadier Owner
Forum Donor
Local time
9:09 PM
Joined
Nov 8, 2023
Messages
32
Reaction score
53
Location
Dubai - United Arab Emirates
I just added the JBL speakers front and rear, a bit of Dynamat on the inner skin of the doors 4 x 18 inch pieces (difficult to open the inner plastic skin). The Bass is quiet good from the 6 inch front speakers, after configuring the setting son the factory equalizer. Did buy the Pioneer subwoofer and it fits well under the front seats, however the jury is out whether it is required or not!
 

RyanT

Supporting Vendor
Local time
9:09 PM
Joined
Apr 1, 2023
Messages
100
Reaction score
440
Location
United Kingdom
Here's another take on adding a sub, and upgrading the sound system (and throwing a boatload of cash at a Grenadier to see what sticks):
We were lucky enough to do quite a bit of work on this Grenadier and also got to see the finished product after the audio installation. It was really Impressive but have to admit when the customer told us they were installing a sub on our cargo rack I was a bit worried about it reverberating. Glad to say no rattling or reverberation at all and we had that thing cranked up pretty loud.
 

DenisM

Grenadier Owner
Lifetime Supporter
Local time
7:09 AM
Joined
Jan 26, 2022
Messages
2,190
Reaction score
4,371
Location
Brisbane, Queensland Australia
I just added the JBL speakers front and rear, a bit of Dynamat on the inner skin of the doors 4 x 18 inch pieces (difficult to open the inner plastic skin). The Bass is quiet good from the 6 inch front speakers, after configuring the setting son the factory equalizer. Did buy the Pioneer subwoofer and it fits well under the front seats, however the jury is out whether it is required or not!
when you added the jbl speakers, I am wondering how you matched the impedance with what was already installed..?
 

dannypalm

Grenadier Owner
Local time
11:09 PM
Joined
Nov 5, 2023
Messages
6
Reaction score
18
Location
Cape Town, South Africa
For those in Cape Town, South Africa I can highly recommend the Sounds Dynamic team down in Ottery (https://www.facebook.com/soundsdynamic/)

Last week I had the following installed in my new Fieldmaster:

Rockford 10" shallow woofer
Rockford R300.4 amp
Rockford 6.75 2 way spk
Rockford 4" 2way spk
4 guage cable kit
Partial sound deadening in the front doors.
Custom fibre glass box covered in grey vinyl to Match interior

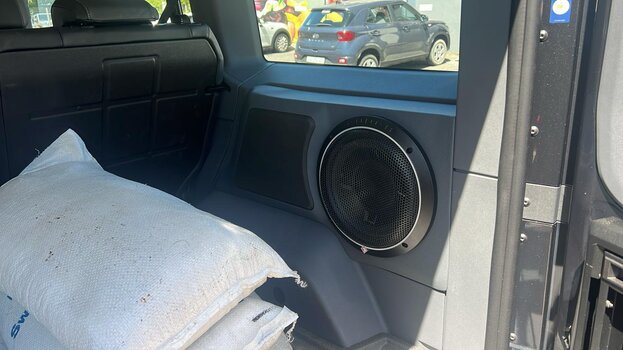
Essentially I replaced the current Hertz speakers and added a subwoofer and amp in the back. The Amp is installed under the back seat very neatly and the subwoofer is enclosed in a custom fibre glass box attached to the back right side of the Grenadier. It was done so well that it looks like part of the Grenadier. The result is fantastic and incomparable to the factory-fitted speakers. Also it takes so little space in the back - I highly recommend this for anyone looking to boost their listening experience.
 

Attachments

  • PHOTO-2024-01-20-10-42-34.jpg
    PHOTO-2024-01-20-10-42-34.jpg
    109 KB · Views: 119

Krabby

Global Grenadier 76
Forum Moderator
Grenadier Owner
Lifetime Supporter
Local time
4:09 PM
Joined
Nov 5, 2022
Messages
5,054
Reaction score
9,700
Location
New Jersey, USA
For those in Cape Town, South Africa I can highly recommend the Sounds Dynamic team down in Ottery (https://www.facebook.com/soundsdynamic/)

Last week I had the following installed in my new Fieldmaster:

Rockford 10" shallow woofer
Rockford R300.4 amp
Rockford 6.75 2 way spk
Rockford 4" 2way spk
4 guage cable kit
Partial sound deadening in the front doors.
Custom fibre glass box covered in grey vinyl to Match interior

Essentially I replaced the current Hertz speakers and added a subwoofer and amp in the back. The Amp is installed under the back seat very neatly and the subwoofer is enclosed in a custom fibre glass box attached to the back right side of the Grenadier. It was done so well that it looks like part of the Grenadier. The result is fantastic and incomparable to the factory-fitted speakers. Also it takes so little space in the back - I highly recommend this for anyone looking to boost their listening experience.
LOVE THE SUBWOOFER SETUP. That’s exactly what IA should have done.
 

TNT647

Grenadier Owner
Lifetime Supporter
Local time
4:09 PM
Joined
Jan 7, 2024
Messages
71
Reaction score
66
Location
Pittsburgh, PA, USA
For those in Cape Town, South Africa I can highly recommend the Sounds Dynamic team down in Ottery (https://www.facebook.com/soundsdynamic/)

Last week I had the following installed in my new Fieldmaster:

Rockford 10" shallow woofer
Rockford R300.4 amp
Rockford 6.75 2 way spk
Rockford 4" 2way spk
4 guage cable kit
Partial sound deadening in the front doors.
Custom fibre glass box covered in grey vinyl to Match interior

Essentially I replaced the current Hertz speakers and added a subwoofer and amp in the back. The Amp is installed under the back seat very neatly and the subwoofer is enclosed in a custom fibre glass box attached to the back right side of the Grenadier. It was done so well that it looks like part of the Grenadier. The result is fantastic and incomparable to the factory-fitted speakers. Also it takes so little space in the back - I highly recommend this for anyone looking to boost their listening experience.
Wow Danny, more pictures please. I would love to see where they glued the sound deadening patches on the door and if they preserved the plastic vinyl moisture barrier between the door paneling.
 

Shenal

Grenadier Owner
Local time
1:09 PM
Joined
Feb 15, 2024
Messages
2
Reaction score
0
Location
California, USA
Hello, since I wanted to install a subwoofer because the sound was not good for me, I made a small tutorial here. The whole thing was installed by me with the best of my knowledge and conscience, but this does not mean that it was carried out perfectly and error-free! Everyone acts as he wants;) Since my English is not so error-free, I was supported by a program, so whoever finds errors can keep them😅So and off we go🥳 The whole thing was realised with a Pioneer TS-WX130DA. This is not too expensive and fits perfectly under the front seat. I will build another bracket so that the tool still fits under the seat.View attachment 7818403
The first step is to remove the centre cover on the B column. This one is only clipped but still doesn't just go down. Have a few spare clips ready, as they like to break.
View attachment 7818404
View attachment 7818405
After that, the tread mouldings front and rear must be removed. This step is the easiest;)

If the treads are down, the lower cover of the B column must be down. This has 4 screws: 2 top Torx 30 and 2 bottom 10mm

View attachment 7818406View attachment 7818407View attachment 7818408

That's what the whole thing looks like. The cables for the speakers are twisted and have a black mark. I did not cut these extra, but only removed the insulation with the cutter. The whole thing can be done as minimalistically as possible because the subwoofer only needs an input signal and no power is required from the cables. A cinch extension is absolutely sufficient. This is briefly soldered and cleanly insulated again. You can also solder on the plug, but this could not be easily separated with me and also have no matching grimp connecters....
View attachment 7818420

We continue on a new page because I don't know how many photos the post can handle😂
 

GN4HIR

Forum Donor
Local time
3:09 PM
Joined
May 5, 2024
Messages
131
Reaction score
197
Location
Houston, TX, USA
For the JBL sub, here is what is working for me:

Gain set at about 1/3,
Bass Boost set at 0,
Low Pass Filter about 1/4 (somewhere around 70hz); and
Phase 0 (button out).

1716013946915.jpg


1716011576859.jpg


Next, go in to Acoustic Settings and select Fader/Balance and move the fader toward the front as shown. This is key as 1. the sub gets its speaker level input off the rear speaker so in effect you are turning down the gain on the sub but 2. it also moves the perceived soundstage forward with the rear speakers just acting as fill.

1716014122166.jpg


I'm not a sound engineer and this may not suit you or your style of music. For me it got rid of the boomy sound and blends well the stock speakers. I listen to a lot of Jazz that is bass heavy (Marcus Miller, Brian Bromberg) and the sound is pretty good.

Good Luck.
 

DaBull

Grenadier Owner
Lifetime Supporter
Local time
1:09 PM
Joined
Dec 28, 2022
Messages
1,410
Reaction score
2,693
Location
California
For the JBL sub, here is what is working for me:

Gain set at about 1/3,
Bass Boost set at 0,
Low Pass Filter about 1/4 (somewhere around 70hz); and
Phase 0 (button out).

View attachment 7857247


View attachment 7857246

Next, go in to Acoustic Settings and select Fader/Balance and move the fader toward the front as shown. This is key as 1. the sub gets its speaker level input off the rear speaker so in effect you are turning down the gain on the sub but 2. it also moves the perceived soundstage forward with the rear speakers just acting as fill.

View attachment 7857248

I'm not a sound engineer and this may not suit you or your style of music. For me it got rid of the boomy sound and blends well the stock speakers. I listen to a lot of Jazz that is bass heavy (Marcus Miller, Brian Bromberg) and the sound is pretty good.

Good Luck.
Hi GN4HIR, Thanks for posting info on settings for the Sub-wolfer and soundstage tuning.
I listen to a lot of Jazz too.
In case you did not see this, here's a post I made about setting up your own custom preset setting on the Grenadier Equalizer. DaBull
Sound System Equalizer Tuning for the Grenadier
 

landmannnn

Grenadier Owner
Local time
9:09 PM
Joined
Apr 9, 2024
Messages
541
Reaction score
853
Location
UK
Just something to add to @Eric.S. original post regarding connection to the speaker wires when you have not got the molex socket under the back seats - 2023 models I read.

I went down the route of picking up the + and - for the rear speakers at the head unit. No cutting or stripping of any IG wiring. It took a while, some highlights....


Below the steering wheel is the head unit, 3 panels need removing to get to it.

On the back of the head you will find the standard 8 pin ISO plugs (one brown, one black). We are interested in the brown one as it has the plus and minus for each of 4 speakers.

Screenshot_20241006-175016.png

In the above you can see the

head unit. I have unbolted it and pulled it forwards.
I have also unplugged the brown plug which was hard to get to as it is on rear left with almost no spare cable.

Next step, I bought a short iso audio extension

PXL_20241006_100358918.jpg


You can't see it on the photo, but the wires are labelled with what they do which was handy.

Next stage was to modify the extension. The black plug and wiring was removed, then I spliced the 4 speaker wires and added a plug to connect the speaker wires. Wrapped in cloth tape to make it close to factory
PXL_20241006_141615548.jpg

I then added a matching socket on the speaker wires that came with the sub. More cloth tape.
PXL_20241006_144005134.jpg

Then the brown plug on the extension goes into the head unit, with the original brown plug going onto the other end of the extension.
Then the speaker wires can be routed to the sub under the floor covering.

By the way, for those who would add a 4 channel amp to give more power to the speakers, a similar method could be used.
 
Back
Top Bottom